Table of Contents >> Show >> Hide
- What a Rain Barrel Can (and Can’t) Do
- Before You Start: The 60-Second Safety & Common-Sense Checklist
- Tools & Materials
- The “5 Easy Steps” Build
- Quick Math: How Much Water Can You Actually Collect?
- Using Rain Barrel Water the Smart Way
- Maintenance: Keep It Clean, Functional, and Not Gross
- Troubleshooting (Because Rain Barrels Have Opinions)
- Optional Upgrades (If You Catch the Rain-Barrel Bug)
- Conclusion: Your Roof Is Basically a Water SourceUse It
- Real-World DIY Experiences & Lessons Learned (500+ Words)
If your water bill has ever made you whisper, “I should start charging my plants rent,” a rain barrel is your new best friend.
A basic DIY rain barrel captures runoff from your roof and stores it for later, so you can water ornamental beds, rinse muddy tools,
or keep container plants happy without turning on the hose every single time.
The best part: building one is a weekend-level project (the “weekend” where you still have time to snack and brag about being handy).
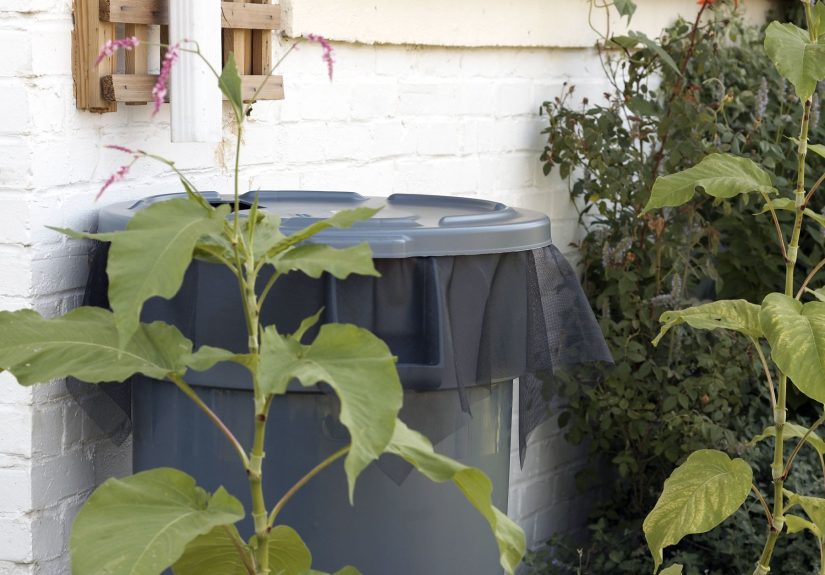
Below is a simple, reliable, and mosquito-smart setup you can build with common parts from a hardware store.
What a Rain Barrel Can (and Can’t) Do
A rain barrel helps you:
- Save tap water for outdoor chores (especially in dry spells).
- Reduce runoff that can pool around your yard or rush into storm drains.
- Water more intentionally because stored rainwater feels “limited,” like a good dessert.
What it can’t do: magically sterilize roof runoff. Rain barrel water is typically considered non-potable.
Keep it out of your kitchen, out of your mouth, and out of any plumbing connection to your home’s drinking-water system.
(Your immune system didn’t sign up for that.)
Before You Start: The 60-Second Safety & Common-Sense Checklist
- Use it for non-potable purposes (think: ornamentals, lawns, cleaning, not drinking).
-
Control mosquitoes with tight lids and fine mesh screening on every opening.
Standing water is basically a nightclub for mosquito larvae if you leave it uncovered. -
Plan overflow so extra water flows away from your foundation.
A barrel fills fast in a decent stormoverflow is not optional; it’s essential. - Stability matters: a full barrel is heavy. Build a level base that won’t wobble, sink, or tip.
-
Check local rules: most places allow rain barrels, but some communities have specific requirements
(screens, diverters, placement, or overflow direction).
Tools & Materials
Rain Barrel Shopping List
- One 50–55 gallon plastic barrel (preferably food-grade or previously used for non-toxic contents)
- Spigot kit or hose bib + bulkhead fitting (the leak-proof “sandwich” that passes through the barrel wall)
- Overflow fitting (bulkhead or threaded adapter) + hose (or PVC) to direct overflow
- Fine mesh screen (mosquito screen) for the top opening / inlet
- Downspout diverter kit (optional but very helpful), or a simple downspout elbow arrangement
- Silicone sealant (outdoor/waterproof)
- PTFE thread tape (“Teflon tape”) for threaded connections
- Bricks/pavers/gravel (for a stable base) or a sturdy stand/platform rated for heavy loads
Tools
- Drill + hole saw bits sized for your spigot and overflow fittings
- Measuring tape + marker
- Utility knife or jigsaw (if you’re cutting a larger top opening)
- Adjustable wrench
- Sandpaper or deburring tool (optional, but makes cleaner holes and better seals)
- Safety glasses + gloves
The “5 Easy Steps” Build
Step 1: Choose the Spot and Build a Stable Base
Pick a downspout that’s convenient to a garden bed or a place you’ll actually use the water.
(If the barrel is hidden behind a jungle of recycling bins, you will forget it exists until it overflows like a tiny rooftop waterfall.)
Base rules:
- Level: no rocking, no leaning, no “it’ll settle.”
- Strong: a 55-gallon barrel can weigh hundreds of pounds when full.
- Elevated (optional but useful): raising it makes it easier to fill a watering can and improves flow from the spigot.
A simple base can be a flat patio stone or pavers over compacted gravel. If you build a stand,
treat it like furniture for a very heavy, very wet roommate.
Step 2: Prep and Clean the Barrel (Then Mark Your Holes)
If your barrel is new: rinse it. If it’s used: rinse it thoroughly and confirm what it previously held.
Your goal is “safe enough for outdoor irrigation,” not “mysterious chemical soup.”
Mark these locations:
-
Spigot hole: typically 2–3 inches up from the bottom so you can drain most of the water,
while leaving room for the fitting and reducing sediment clogging. - Overflow hole: near the topleave a little margin from the rim so the plastic stays strong.
-
Inlet opening: depends on your setup. Some barrels use the existing bung hole (small opening),
others cut a larger opening and cover it with screen.
Pro tip: once you drill, you’re committed. Measure twice, drill once, and avoid the classic DIY tragedy:
the spigot installed at a height that makes the last 10 gallons permanently unreachable.
Step 3: Install the Spigot (No Leaks Allowed)
Drill the spigot hole with the correct size hole saw for your bulkhead fitting. Clean up the edges.
Insert the bulkhead fitting, follow the manufacturer’s washer orientation, and tighten firmlysnug, not “crack the barrel” tight.
Seal like you mean it:
- Use the provided gasket/washer correctly (most leaks are “washer placement” issues).
- Add a thin bead of silicone if your kit recommends it (or if your barrel wall is slightly curved or uneven).
- Wrap threaded connections with PTFE tape to reduce drips.
Attach your spigot/hose bib. Keep the spigot handle accessiblefuture-you will thank present-you.
Step 4: Add Overflow + Mosquito-Proof the Openings
Overflow is the difference between “smart water saver” and “why is my basement damp?”
Your barrel will fill quickly during a solid rain, so the overflow must send extra water somewhere safe.
Overflow setup:
- Drill the overflow hole near the top.
- Install the overflow fitting (bulkhead/adapter) with gasket(s) and sealant as needed.
-
Attach a hose or pipe and direct it away from the houseaim for a rain garden, lawn area,
or back toward the original downspout path.
Mosquito-proofing (non-negotiable):
- Cover any inlet opening with fine mesh screen and secure it tightly.
- Use a lid that fits well. If your barrel has a removable lid, keep it closed.
- Screen the overflow opening if your design allows, or ensure the system stays sealed.
If you live in a mosquito-heavy area, being diligent here matters.
A rain barrel should help your yardnot turn it into the unofficial mosquito maternity ward.
Step 5: Connect to the Downspout and Test the System
You’ve got two common connection styles:
Option A: Downspout Diverter (Cleaner + More Reliable)
A diverter is installed in the downspout and sends water into the barrel until it’s full,
then routes water back down the downspout. This reduces overflow chaos and makes the setup look intentional.
Option B: Simple Downspout Cut + Elbow
Cut the downspout above the barrel and add an elbow that drops water into the screened inlet.
This method is straightforward, but you must manage overflow carefully.
Testing checklist:
- Run a garden hose into the inlet to simulate rainfall.
- Check spigot and overflow fittings for leaks.
- Confirm overflow flows where you planned (and not back toward the foundation).
- Make sure the barrel stays stable as it fillsno shifting, no tilting.
Quick Math: How Much Water Can You Actually Collect?
Here’s the handy rule of thumb: 1 inch of rain on a 1,000 sq ft roof can yield about 623 gallons.
A single 55-gallon rain barrel is basically a “small snack” compared to what your roof can generate in a storm.
That’s not bad newsit’s a planning superpower. It means:
- Your barrel may fill quickly (hello, overflow plan).
- Using the water regularly creates space for the next rain (use it or lose it).
- If you want more capacity, you can expand by linking barrels or upgrading to a larger system.
Using Rain Barrel Water the Smart Way
- Best uses: ornamentals, shrubs, lawns, rinsing tools, washing outdoor furniture.
- Be cautious with edibles: if you use it on vegetables, target the soil, not the edible portion, and wash produce well.
- Do not drink it or use it for cooking.
Maintenance: Keep It Clean, Functional, and Not Gross
Monthly (or after big storms)
- Clear leaves and roof grit from the screen.
- Inspect overflow hose placement.
- Check fittings for slow drips (a tiny drip becomes a swampy surprise).
Seasonally
- Control algae by keeping the barrel opaque or shaded. Sunlight + water = green science experiment.
- Flush sediment by draining the barrel and rinsing the bottom if it starts clogging your spigot.
-
Winterize in freezing climates: drain completely, disconnect hoses/diverter as needed,
and store or protect components so ice expansion doesn’t crack fittings.
Troubleshooting (Because Rain Barrels Have Opinions)
“My spigot leaks.”
- Check gasket orientation and tightness.
- Add PTFE tape to threaded connections.
- Use a small amount of silicone where recommended.
“My barrel overflows in every storm.”
- Confirm the overflow opening isn’t clogged by debris or screen material.
- Use a diverter that returns flow to the downspout when full.
- Consider adding a second barrel in series for more capacity.
“The water smells weird.”
- Use the water more frequently (stagnant water gets funky).
- Clean the barrel and screen.
- Reduce organic debris entering the system (better screening, cleaner gutters).
Optional Upgrades (If You Catch the Rain-Barrel Bug)
Link Two Barrels
Add a linking kit near the bottom or mid-height so the barrels fill together. This boosts storage without changing the downspout setup.
Add a “First-Flush” Approach
Many DIYers try to keep roof grit out by discarding the first bit of runoff from a storm (when dust, pollen, and roof debris wash off).
You can do this with diverters or add-on components, but even a good screen and clean gutters make a big difference.
Improve Water Delivery
A rain barrel is gravity-fed. If you want stronger flow, raise the barrel (safely) or use a small pump designed for rain barrels.
Conclusion: Your Roof Is Basically a Water SourceUse It
Building a DIY rain barrel isn’t just a fun weekend projectit’s a practical way to stretch outdoor water use and reduce runoff.
Keep it simple: a solid base, a leak-free spigot, a real overflow plan, and tight mosquito screening.
Then use the water often, maintain the system seasonally, and enjoy the tiny thrill of watering your flowers with yesterday’s rain.
Real-World DIY Experiences & Lessons Learned (500+ Words)
Most people start a DIY rain barrel project thinking the “hard part” is drilling holes in plastic.
In reality, the biggest learning curve is everything that happens after the barrel is installedwhen weather,
yard layout, and daily habits show you what works and what needs adjusting.
One common experience: the first big rain is both satisfying and slightly alarming. DIYers often report a moment of pride
(“Look at it filling!”) followed by an urgent discovery (“It’s filling REALLY fast!”). That’s when overflow planning becomes
very real. If the overflow hose isn’t secured, it can shift during heavy flow and dump water where you don’t want itlike near
the foundation, under a deck, or into a flower bed that suddenly becomes a pond. A simple fix many homeowners adopt is staking
the overflow hose in place or routing it to a stable splash area (gravel, lawn, or a small rain garden).
Another classic lesson is that screening is not a one-time task. Screens are excellent at stopping leaves and
mosquitoes, but they also collect debris. DIYers often notice the barrel fills more slowly later in the season. The culprit is
usually a clogged screen or gutters full of roof grit. Once people build “screen check” into their routineespecially after storms
the system suddenly behaves again. It’s like owning a pet: low-maintenance, but not “no-maintenance.”
Flow expectations can also surprise first-timers. Rain barrels are gravity-fed, so water pressure is modest. Many DIYers expect a
strong hose stream and instead get a gentle flow. The usual workaround is simple and effective: elevate the barrel so you can fill
watering cans easily, then carry water where it needs to go. People who want a hose-ready experience often upgrade later with a
small pump made for barrels. The key “experience lesson” here is not to overspend at the beginningbuild the basic system, see how
you naturally use it, and upgrade only if your habits demand it.
Water use habits tend to change, too. A funny but real pattern: once the barrel is installed, people become more intentional about
watering. They’ll top off pots early in the morning, soak ornamentals at the base instead of misting leaves, and time watering to
reduce evaporation. Many DIYers also realize rain barrel water is best used quickly rather than stored for long periods. Using it
regularly keeps it fresher, frees up space for the next rain, and reduces the chance of odors or algae issues.
Finally, winter (in colder areas) teaches respect. DIYers who skip draining sometimes learn the hard way that frozen water expands,
and fittings don’t appreciate being stress-tested by ice. The people who have the smoothest year-to-year experience make winterizing
a seasonal ritual: drain, disconnect, and store hoses or accessories so spring startup is easy and leak-free. The good news is that
after one full cycle of seasons, most homeowners say their rain barrel becomes one of those “set it and forget it” helpersjust with
occasional screen checks and a little seasonal care.