Table of Contents >> Show >> Hide
- What You’ll Need (Your “No Surprises” Checklist)
- Step 1: Install the New Drive (Hardware Part)
- Step 2: Create a Windows 10 Installation USB
- Step 3: Boot the PC from the USB Installer
- Step 4: Run Windows Setup (The Actual Installation)
- Step 5: Complete First-Time Setup (OOBE)
- Step 6: Activate Windows 10 (Without Losing Your Mind)
- Step 7: Install Drivers and Run Updates
- Step 8: Restore Your Stuff (The “Make It Feel Like Home” Stage)
- Troubleshooting: The Problems Everyone Eventually Meets
- Pro Tips (Small Moves, Big Stress Reduction)
- Real-World Install Experiences & Lessons Learned (500+ Words)
- Experience #1: “Why is Windows trying to install on Disk 0… which is not my new drive?”
- Experience #2: “The installer can’t see my NVMe drive at all.”
- Experience #3: “I installed Windows, but it keeps booting back into the USB installer.”
- Experience #4: “Activation used to be automatic, now it’s mad at me.”
- Experience #5: “Fresh install complete… and I have no Wi-Fi.”
- Conclusion
Installing Windows 10 on a brand-new hard drive is basically a three-act play: (1) put the drive in, (2) create a bootable installer, (3) run Windows Setup and let it do its thing. The only “plot twists” usually come from BIOS/UEFI settings, missing storage drivers, or accidentally installing Windows onto the wrong drive (the classic).
Before we dive in, one reality check: Windows 10 support ended on October 14, 2025. Your PC can still run Windows 10, but it won’t receive regular security updates unless you’re on an extended update program. If your hardware supports Windows 11, it’s worth considering. If you’re set on Windows 10 (compatibility, legacy software, or you just like the vibe), this guide will get you installed cleanly and correctly.
What You’ll Need (Your “No Surprises” Checklist)
- A new hard drive or SSD (2.5″ SATA, 3.5″ SATA, or M.2 NVMe depending on your PC)
- An 8GB+ USB flash drive (bigger is fine; everything on it will be erased)
- A working PC with internet (to create the Windows 10 installer USB)
- Windows 10 license (product key or digital license already tied to your PC)
- Optional but smart: another USB for drivers, especially Wi-Fi/LAN and storage controller drivers
- Time + patience (and maybe a snack, because progress bars feed on optimism)
Step 1: Install the New Drive (Hardware Part)
Desktop (SATA 2.5"/3.5" HDD/SSD)
- Shut down the PC completely and unplug it.
- Open the case and mount the drive in a bay or bracket.
- Connect SATA data from the drive to the motherboard and SATA power from the PSU to the drive.
- If you’re worried about installing Windows to the wrong drive, temporarily unplug other storage drives.
Laptop (2.5" SATA or M.2)
- Power off, unplug, and follow your laptop’s service guide to access the drive bay.
- Swap the drive carefully. For M.2, insert at an angle and secure the screw.
- Reassemble the laptop.
Tip: If you’re upgrading to an SSD, you’ll feel the difference immediately. Boot times go from “make coffee” to “blink and miss it.”
Step 2: Create a Windows 10 Installation USB
Microsoft’s Media Creation Tool is the simplest method on a Windows PC. It downloads Windows 10 and builds a bootable USB automatically.
Option A: Use the Media Creation Tool (Recommended)
- On a working PC, download Windows 10 installation media from Microsoft’s official software download page.
- Run the tool as administrator.
- Select Create installation media (USB flash drive, DVD, or ISO file).
- Choose language/edition/architecture (most modern PCs = 64-bit).
- Select USB flash drive and pick your USB device.
- Let it finish. Safely eject the USB.
Option B: Download the ISO (If You Need It)
If you must create media another way (for example, using a different tool or OS), you can download the Windows 10 ISO from Microsoft and write it to a USB properly. Just don’t “copy the ISO file” onto a USB and expect magic. The USB must be made bootable with the right structure.
Step 3: Boot the PC from the USB Installer
This step is where people panic because the computer “ignores the USB.” Don’t worryyour PC is just being dramatic.
Use the One-Time Boot Menu (Easiest)
- Insert the USB installer.
- Power on and immediately tap the boot menu key repeatedly:
- Dell: F12
- HP: Esc or F9
- Lenovo: F12 (or a small “Novo” button on some models)
- ASUS/Acer/MSI (varies): often F12 or Esc
- Select the USB option that says UEFI (if shown).
Or Change Boot Order in BIOS/UEFI
- Enter BIOS/UEFI setup (often F2, Del, or Esc at startup).
- Ensure the new drive is detected.
- Set the USB drive as first boot device (temporarily).
- Save and exit.
UEFI vs Legacy: On most modern systems, install Windows in UEFI mode using a GPT disk. Legacy mode typically uses MBR. UEFI + GPT is the modern, cleaner option unless you’re working with very old hardware.
Step 4: Run Windows Setup (The Actual Installation)
1) Start the Installer
- Pick language/time/keyboard.
- Click Install now.
- If asked for a product key:
- Enter it if you have it, or
- Select I don’t have a product key if you’re reinstalling on the same PC with a digital license.
- Select the correct edition (Home vs Pro must match your license).
- Accept the license terms.
2) Choose “Custom: Install Windows only (advanced)”
This is the clean-install path. It’s the one you want for a new drive.
3) Select the New Drive
You’ll see a list of drives/partitions. Here’s how to avoid the classic mistake:
- If you disconnected other drives earlier, life is easy: select the only internal drive.
- If you didn’t, identify the new drive by its size (for example, 1TB vs 256GB).
4) Create/Let Windows Create Partitions
- If the drive shows as Unallocated Space, select it and click Next. Windows will create the required partitions automatically.
- If the drive has old partitions (maybe it’s not truly “new”), you can delete partitions until it becomes Unallocated Space, then install.
If you’re doing UEFI + GPT (recommended): Windows Setup will usually handle it automatically when booted in UEFI mode. If you need to force a wipe/convert (advanced), Windows Setup supports using DiskPart to clean the drive and convert partition styleuseful when a disk is stuck in the wrong format.
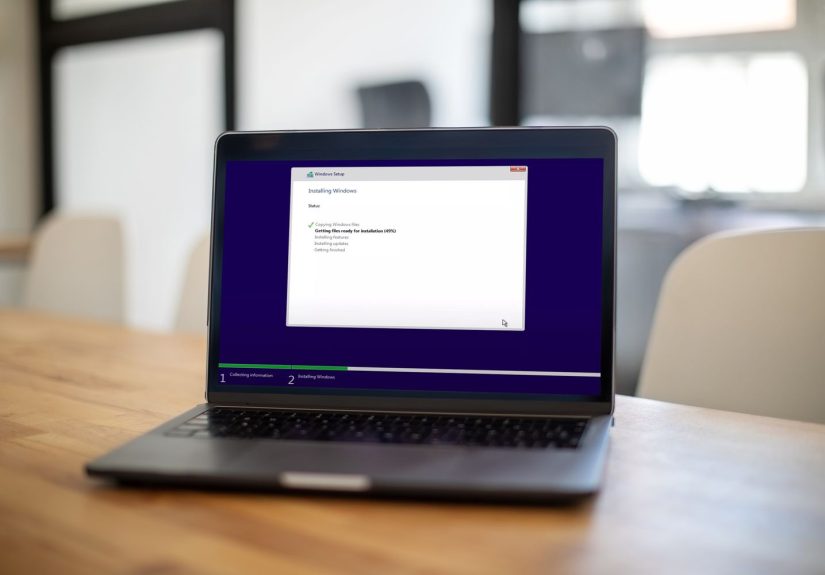
5) Let the Install Finish
The PC will copy files, install features, and reboot several times. When it restarts, don’t mash keys and boot from the USB again. If it keeps returning to the installer, remove the USB after the first reboot (or fix boot order).
Step 5: Complete First-Time Setup (OOBE)
After installation, Windows will walk you through region, keyboard, network, and account setup.
- Connect to the internet if you can. It helps with activation and drivers.
- Create/sign in to an account (local or Microsoft account depending on edition/setup options).
- Choose privacy settings.
Step 6: Activate Windows 10 (Without Losing Your Mind)
Activation usually happens automatically once you’re online, especially if:
- This PC previously had Windows 10 activated, and
- You installed the same edition (Home vs Pro), and
- The motherboard is the same (Windows licenses often “stick” to that hardware).
Check Activation Status
Go to Settings > Update & Security > Activation.
If You Replaced Major Hardware
If you changed the motherboard or made a significant hardware change, you may need the Activation troubleshooter. If your digital license is linked to your Microsoft account, reactivation is usually smoother.
Step 7: Install Drivers and Run Updates
Fresh installs are clean, but they can be missing drivers (especially Wi-Fi, chipset, or storage controller drivers on some systems).
- Run Windows Update until there are no more updates.
- Install motherboard/laptop drivers from the manufacturer if needed (chipset, graphics, audio).
- For gaming or creative work, install the latest GPU driver directly from NVIDIA/AMD/Intel.
Step 8: Restore Your Stuff (The “Make It Feel Like Home” Stage)
- Reinstall apps (browsers, office apps, creative tools, games).
- Restore files from backup (external drive, cloud, or your previous disk if you kept it).
- Sign into services (OneDrive, Google Drive, Steam, etc.).
Troubleshooting: The Problems Everyone Eventually Meets
Problem: The Drive Doesn’t Show Up in Windows Setup
- Check BIOS/UEFI: Is the drive detected there? If not, re-seat cables or the M.2 drive.
- Storage mode: Some systems use RAID/VMD modes that hide the drive until drivers load. You may need to load the storage controller driver during Setup (the Load driver option).
- Try another port/cable: SATA cables fail more often than anyone wants to admit.
Problem: PC Won’t Boot After Install
- Remove the USB installer.
- Set the new drive as the first boot device.
- Make sure you installed in the correct mode:
- UEFI install typically expects GPT
- Legacy/CSM install typically expects MBR
Problem: Activation Fails
- Confirm you installed the correct edition (Home vs Pro).
- Connect to the internet and try again.
- Use the Activation troubleshooter.
- If your license is a product key, enter it in Activation settings.
Problem: No Internet After Install
- If Wi-Fi drivers are missing, connect via Ethernet temporarily.
- Download network drivers on another PC and install via USB.
Pro Tips (Small Moves, Big Stress Reduction)
- Unplug other drives during install to prevent installing boot files in the wrong place.
- Use UEFI mode unless your hardware is truly ancient.
- Label your USB drives so you don’t accidentally wipe the one with your family photos. (Ask me how people learn this. Actually don’t.)
- Keep drivers handy for storage controllers and networking on picky machines.
Real-World Install Experiences & Lessons Learned (500+ Words)
Clean installs sound neat and tidy on paper, but in real life they tend to come with “character-building moments.” Here are common installation experiences people run intoplus what they teach youso you can skip the stress and get straight to the satisfying “Windows is setting things up…” screen.
Experience #1: “Why is Windows trying to install on Disk 0… which is not my new drive?”
This happens a lot when a PC has multiple drives connected. Windows Setup lists disks in a way that feels logical to a computer and mildly insulting to humans. The fix is usually simple: identify the new drive by capacity and connection type, and if you want maximum safety, temporarily unplug other drives. People who don’t do this often discover later that the boot partition was created on an older drive. Then, when that older drive is removed, the PC suddenly won’t bootlike a soap opera villain returning in season three.
Lesson: During install, fewer connected drives = fewer surprises.
Experience #2: “The installer can’t see my NVMe drive at all.”
On some systems (especially certain laptops and motherboards), the storage controller may be set to RAID/VMD/Intel RST modes that require a driver before Windows Setup will detect the drive. The installer isn’t “broken”it’s just missing the translator for the storage controller’s language. The good news is that Windows Setup has a Load driver option, and manufacturers often provide the driver package. In many cases, switching the BIOS storage mode to AHCI (when appropriate) also makes the drive visible, but that depends on your system and configuration.
Lesson: If a drive is invisible in Setup but visible in BIOS, think “driver or storage mode,” not “dead drive.”
Experience #3: “I installed Windows, but it keeps booting back into the USB installer.”
It’s surprisingly easy to get stuck in an installer loop. The computer restarts, sees the USB still inserted, and boots from it again because USB is still first in boot order. People interpret this as “my install didn’t work,” when really the PC is just being overly obedient. Remove the USB after the first reboot (or change boot order) and you’re usually fine.
Lesson: Boot order matters, and USB installers are clingy.
Experience #4: “Activation used to be automatic, now it’s mad at me.”
After a clean install on the same PC, activation typically happens on its own once you’re online. But if you changed major hardwareespecially the motherboardWindows may treat it like a new device. Many users find that linking a digital license to a Microsoft account ahead of time makes reactivation easier, because the Activation troubleshooter can help match the license back to the machine. If you didn’t link it earlier, you might need the original product key or other recovery steps.
Lesson: Plan activation like you plan snacks for a road trip: you’ll regret it if you don’t.
Experience #5: “Fresh install complete… and I have no Wi-Fi.”
This one is common on laptops and some desktops with newer Wi-Fi chips. Windows 10 can sometimes miss the network driver on a clean install, leaving you staring at a screen that politely asks you to connect to the internetwhile offering no way to connect to the internet. The simplest workaround is plugging in Ethernet temporarily or downloading the Wi-Fi driver on another device and installing it from a USB stick.
Lesson: Keep at least one networking option ready (Ethernet or driver USB) before you wipe anything.
Overall, the “real-world” secret to installing Windows 10 on a new drive is not being a geniusit’s being prepared. Have the installer USB, know your boot key, confirm UEFI/GPT when possible, and keep a backup plan for drivers and activation. Do that, and the process goes from “tech nightmare” to “tech victory lap.”
Conclusion
Installing Windows 10 on a new hard drive is straightforward when you follow a clean sequence: install the drive, create official installation media, boot in UEFI mode when possible, choose the correct drive during Setup, and finish with activation, drivers, and updates. Most issues come from boot mode mismatches, missing storage drivers, or having multiple drives connected during install. Take it step-by-step, and you’ll be up and running on a fresh, uncluttered systemno mystery files, no weird legacy partitions, and no “what even is on this computer?” energy.