Table of Contents >> Show >> Hide
- Start Here: Pick the Right Exterior-Wall Insulation Strategy
- The “Right Way” Mindset: Think in Layers, Not Just R-Value
- Step 1: Do the Safety and Reality Checks Before You Insulate
- Step 2: Air-Seal First (Because Insulation Hates Wind)
- Step 3: Installing Batt Insulation in Exterior Walls (Open Stud Cavities)
- Step 4: Spray Foam in Exterior Walls (When You Need Air-Sealing + Insulation)
- Step 5: Insulating Finished Exterior Walls (Drill-and-Fill Done Smart)
- Step 6: Exterior Continuous Insulation (The Best Time Is When You Re-Side)
- Step 7: Moisture and Vapor Control (So You Don’t Accidentally Grow a Science Project)
- Step 8: Quality Checks (Because “Looks Fine” Is Not a Diagnostic Tool)
- Step 9: The Most Common Exterior Wall Insulation Mistakes (Avoid These)
- When to DIY and When to Call a Pro
- Wrap-Up: What “Right Way” Really Means
- Experience Notes: Real-World Lessons That Make Exterior Wall Insulation Go Smoother (and Work Better)
- 1) The “we insulated, but it’s still drafty” mystery almost always starts with air leaks
- 2) Drill-and-fill is greatuntil you meet the wall’s “surprises”
- 3) Exterior foam retrofits succeed or fail at the windows and water details
- 4) The “best insulation” is the one you can install correctly in your specific wall
- 5) The “last 10%” (inspection and verification) is where confidence comes from
Insulating exterior walls is like giving your house a really good hoodieexcept this hoodie also fights drafts,
lowers energy bills, and makes that one room (you know the one) stop feeling like it’s auditioning to be a walk-in freezer.
The trick is doing it the right way, because wall insulation isn’t just “stuff the cavity and call it a day.”
If you ignore air leaks, moisture, or proper detailing, you can end up with disappointment, funky smells, and repairs that
cost more than the insulation ever did.
This guide breaks down the smartest, most common U.S. methods for insulating exterior wallswhether you’re mid-remodel with
open studs, trying to upgrade finished walls, or already planning to replace siding. You’ll get practical steps, clear
choices by situation, and the “don’t do this” list that saves sanity.
Start Here: Pick the Right Exterior-Wall Insulation Strategy
“Exterior walls” can be insulated from the inside (between studs) or from the outside (continuous insulation under new siding).
Which route you choose depends on whether the walls are open, finished, or already being re-sided.
Option A: Walls are open (remodel, addition, new build)
- Best choices: fiberglass batts, mineral wool batts, spray foam, or a hybrid (foam + batt).
- Why it’s great: you can air-seal properly and fit insulation snugly with fewer compromises.
Option B: Walls are finished (you’re not tearing out drywall)
- Best choices: blown-in (dense-pack) cellulose or blown-in fiberglass via “drill-and-fill,” or injection foam.
- Why it works: it upgrades wall cavities with minimal demolition.
- Reality check: you still must deal with air leaks and moisture risksinsulation isn’t a magic eraser.
Option C: You’re replacing siding (or you can access the exterior sheathing)
- Best choices: exterior continuous insulation (rigid foam boards or mineral wool boards) plus a proper water/air control layer.
- Why it’s the “pro move”: it reduces thermal bridging through studs and helps control condensation in many climates.
The “Right Way” Mindset: Think in Layers, Not Just R-Value
A high-performing wall manages four things, in this order:
water (rain), air (drafts), vapor (moisture diffusion), and heat (insulation).
If you only upgrade the heat layer and ignore the others, you risk trapping moisture or letting air leakage gut your insulation performance.
Translation: your wall can be “R-19” on paper and “R-…meh” in real life.
Step 1: Do the Safety and Reality Checks Before You Insulate
Check for moisture problems first (no exceptions)
Fix bulk water issues before insulating: roof leaks, bad flashing, missing kick-out flashing, leaky gutters,
wet basements, or plumbing leaks. Insulation doesn’t cure waterit hides it.
Know what’s inside your walls
- Electrical: older homes may have wiring that needs evaluation before insulation goes in.
- Plumbing: exterior wall pipes need freeze protection and careful air-sealing.
- Pests: address termites/rodents first so you’re not building a luxury condo for critters.
- Existing insulation: sometimes it’s partial, settled, or poorly installedyour plan should account for that.
Confirm local code and climate requirements
U.S. energy codes set minimum insulation and envelope requirements by climate zone and wall type. Even if you’re DIY-ing,
you want your plan to align with common code expectations (especially for vapor control, ignition barriers, and exterior foam detailing).
Step 2: Air-Seal First (Because Insulation Hates Wind)
Air sealing is the step most people skipthen they wonder why their “new insulation” still feels drafty.
Air leaks can move heat and moisture through wall assemblies, and batts alone do not stop airflow. Before insulation goes in,
seal the cracks, gaps, and penetrations so your insulation can actually do its job.
High-impact air-sealing targets in exterior walls
- Gaps at top and bottom plates
- Wire and pipe penetrations
- Electrical boxes (use rated foam gaskets or seal carefully where allowed)
- Plumbing chases and soffits
- Rim joists and band joists (huge comfort win)
- Window/door rough openings (low-expansion foam or backer rod + sealant)
Pro tip: air sealing is a “continuous line” game. If you skip a section, air will find it.
Air is basically that one friend who always finds the open snack bag.
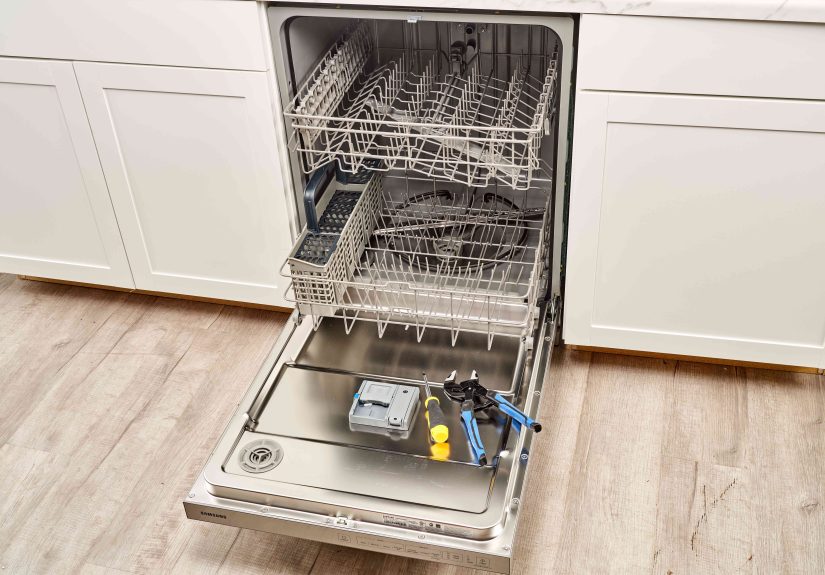
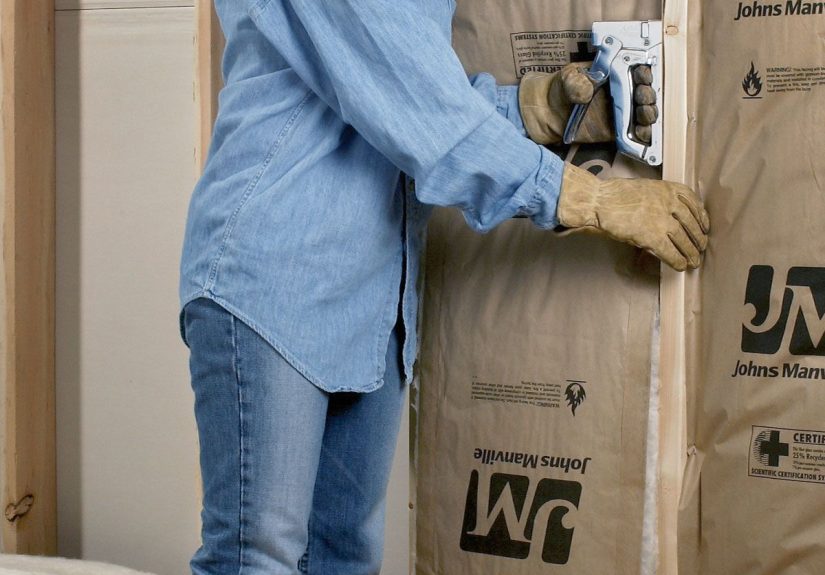
Step 3: Installing Batt Insulation in Exterior Walls (Open Stud Cavities)
Batt insulation can perform wellif it’s installed with care. The goal is full contact and full fill:
no big gaps, no weird voids, no “I’ll just stuff it in there” moments.
Tools and materials you’ll want
- Utility knife with sharp blades (change them often)
- Straightedge or insulation cutting board
- Stapler (if using faced batts with flanges)
- Caulk/foam for sealing
- Gloves, long sleeves, eye protection, and a mask/respirator as appropriate
How to install batts correctly (the “Grade A” version)
- Measure each cavity. Stud bays can vary (especially in older homes). Cut batts to fit snugly.
-
Don’t compress insulation. Squishing fiberglass reduces performance because it loses trapped air space.
If you must fit around something, cut or split the battdon’t mash it. -
Work around wires the right way. If wiring runs through the cavity, split the batt so part goes behind the wire and part in front.
Don’t leave the batt bulging like it’s hiding a secret. -
Fit around boxes and pipes. Cut cleanly so insulation fills behind and around obstructions.
Gaps at electrical boxes are tiny-looking but comfort-killing. - Fill the full depth. The insulation should contact the sheathing side and the drywall side (or be held to the correct plane if you’re adding interior membranes).
-
Install faced batts correctly (if used). In many U.S. situations, kraft facing is placed toward the “warm-in-winter” side.
Local practice and code varyespecially in hot-humid climatesso don’t default to plastic sheeting unless you truly know it belongs.
Fiberglass vs mineral wool batts for exterior walls
- Fiberglass: widely available, cost-friendly, but performance depends heavily on meticulous installation.
- Mineral wool (stone wool): denser, often easier to friction-fit, good sound control, and generally more tolerant of minor handling issues.
Step 4: Spray Foam in Exterior Walls (When You Need Air-Sealing + Insulation)
Spray foam can be a strong solution for tricky walls, rim joists, or areas with lots of penetrations.
It insulates and air-seals in one step, but it’s also the option where “winging it” has the biggest downside.
Open-cell vs closed-cell (quick comparison)
- Open-cell: expands a lot, good air sealing, lower R per inch than closed-cell, more vapor-permeable.
- Closed-cell: higher R per inch, more resistant to vapor movement, adds structural rigidity, usually higher cost.
Doing it the right way
- Follow manufacturer thickness limits per pass (too thick can cause curing problems).
- Meet code requirements for ignition/thermal barriers (often drywall or an approved coating in certain spaces).
- Make sure the cavity is dry and the substrate is suitable before spraying.
If you’re not experienced, consider hiring a qualified installer for spray foam. This is the one insulation method that can go from “amazing”
to “uh-oh” very fast if installed incorrectly.
Step 5: Insulating Finished Exterior Walls (Drill-and-Fill Done Smart)
If you’re not opening walls, “drill-and-fill” is a common approach: you drill access holes into each stud bay and blow in dense-pack cellulose
or fiberglass, then patch the holes. It’s often timed with re-siding (exterior access) or repainting (interior access), so repairs blend in.
Where drill-and-fill shines
- Older homes with empty wall cavities
- Homes with uneven temperatures between rooms
- Projects where drywall removal isn’t in the plan
Basic process (overview)
- Locate studs and mark each bay. You’ll typically need to access every cavity.
- Drill holes near the top (and sometimes mid-wall). Dense-pack aims to fill from top to bottom.
- Blow insulation to proper density. Dense-pack reduces settling and improves performance.
- Watch for obstructions. Fire blocking, diagonal bracing, or old plaster keys can complicate filling.
- Patch and finish. Plug holes, repair siding/drywall, then repaint or touch up.
Common “gotchas” with finished-wall insulation
- Hidden wiring/plumbing: drilling and filling requires care.
- Moisture risk in older walls: if the wall can’t dry, adding insulation may change its behavior.
- Incomplete fills: cavities can look “done” but still have voids if technique is sloppy.
If you want the upgrade without playing wall-cavity roulette, a contractor with the right equipment and diagnostic tools (like infrared imaging)
can help confirm coverage.
Step 6: Exterior Continuous Insulation (The Best Time Is When You Re-Side)
If you’re replacing siding, you have a golden opportunity to add continuous insulation on the outside.
This is a big deal because it reduces thermal bridgingthe heat loss that sneaks through studs even when cavities are insulated.
Exterior insulation can also improve condensation resistance in colder climates by keeping the sheathing warmer.
What “exterior continuous insulation” usually looks like
- Existing wall sheathing
- Air/water control layer (taped sheathing, housewrap, or a membraneinstalled continuously)
- Rigid insulation (often in multiple layers with staggered seams)
- Furring strips (creates a drainage/ventilation gap and provides fastening for siding)
- New siding
Key details that separate “right way” from “redo later”
- Stagger and tape seams on multi-layer foam to reduce air movement and improve performance.
- Flash windows and doors like you mean it. Exterior insulation changes the wall thickness, so openings need thoughtful detailing (extensions, flashing, and water management).
- Use appropriate fasteners and attachment methods for furring/siding through insulation.
- Plan the water path. Your wall should have a clear strategy for draining and drying, not a “hope” strategy.
Step 7: Moisture and Vapor Control (So You Don’t Accidentally Grow a Science Project)
Moisture control is where good insulation jobs become greatand bad ones become expensive. The “right” vapor strategy depends on your climate,
HVAC use, wall materials, and whether you’re adding exterior insulation.
Practical rules that keep you out of trouble
- Don’t insulate over existing water problems. Fix leaks first.
- Be cautious with interior polyethylene sheets. In many mixed or hot-humid climates, interior poly can trap moisture.
- Exterior continuous insulation often improves condensation control in cold climates, but thickness matters.
- Let walls dry in at least one direction unless your assembly is specifically designed not to.
When in doubt, use a wall assembly approach that’s widely accepted for your region and follow local code requirements.
Moisture is patient. It will wait you out.
Step 8: Quality Checks (Because “Looks Fine” Is Not a Diagnostic Tool)
Quick inspection checklist
- No missing insulation in corners, behind tubs, or at rim joists
- No major gaps or voids around electrical boxes and penetrations
- No compressed batts or sloppy stuffing
- Air barrier is continuous (especially at transitions)
- Window/door flashing is integrated with the water-resistive layer
Performance checks that pros use
- Blower door test: measures air leakage (and shows whether air-sealing actually happened).
- Infrared scan: can reveal missing insulation or voids, especially on colder/hotter days.
Step 9: The Most Common Exterior Wall Insulation Mistakes (Avoid These)
- Insulating without air sealing. Drafts + insulation = disappointed homeowner.
- Compressing batts to “make them fit.” That’s not fitting; that’s sabotaging.
- Leaving gaps at boxes and corners. Small gaps add up to big heat loss.
- Using the wrong vapor approach for the climate. Trapped moisture can lead to rot or mold.
- Skipping proper exterior flashing when adding foam. Water always wins if you give it a shortcut.
When to DIY and When to Call a Pro
DIY-friendly situations
- Open-stud walls with straightforward cavities (batts done carefully)
- Air sealing accessible penetrations
- Small rigid foam projects where detailing is simple and well understood
Consider a pro for these
- Drill-and-fill wall insulation (coverage and density matter a lot)
- Spray foam (installation quality and safety requirements are high)
- Exterior foam retrofits with complex window/door detailing
- Homes with known moisture issues or unusual wall assemblies
Wrap-Up: What “Right Way” Really Means
Installing insulation on exterior walls the right way isn’t about chasing the highest R-value headline.
It’s about building a wall that’s comfortable, efficient, and durable: air-seal first, choose the best insulation method
for your wall access, manage moisture thoughtfully, and check your work like you actually want to live there.
Experience Notes: Real-World Lessons That Make Exterior Wall Insulation Go Smoother (and Work Better)
I don’t have personal “jobsite” experiences, but there are clear patterns that show up again and again in real homeowner and contractor
stories, building-science guidelines, and retrofit case studies. Here are the most useful, experience-based lessonsshared in plain English
that tend to separate a smooth project from a weekend of unexpected drywall dust and regret.
1) The “we insulated, but it’s still drafty” mystery almost always starts with air leaks
One of the most common post-project complaints is: “We added insulation and the room still feels cold.”
In many cases, the insulation is technically there, but air is still moving through the assemblyaround outlets,
at rim joists, or through gaps at the top plate into the attic. That airflow can carry heat away and also move moisture,
which is why air sealing is treated as step one in so many professional guidelines. In practice, the most noticeable comfort
improvements often come from sealing the “big offenders” first: rim joists, plumbing penetrations, and window rough openings.
Homeowners frequently describe this as the moment their house stops feeling “leaky” and starts feeling “quiet.”
2) Drill-and-fill is greatuntil you meet the wall’s “surprises”
Drill-and-fill insulation sounds simple: drill a hole, blow in insulation, patch. But older walls can have diagonal bracing,
fire blocking, random repairs, or plaster details that prevent a clean, full cavity fill. That’s why experienced installers
plan for multiple access points and pay attention to density, not just volume. A practical takeaway: if you’re doing drill-and-fill,
expect some bays to behave differently. The “right way” mindset is to treat the wall like a set of individual cavities that each need
confirmationnot a single hollow tube you can fill once and forget. If you’re already re-siding, exterior access can reduce the visibility
of patching and make the overall process feel far less intrusive.
3) Exterior foam retrofits succeed or fail at the windows and water details
People love the idea of exterior continuous insulation (and for good reason), but the field lesson is clear:
the project gets complicated where the wall changes directionwindows, doors, decks, and roof intersections. The “right way” is to plan
those details before you start, because exterior foam changes the thickness of the wall and affects how flashing integrates with the
water-resistive barrier. Homeowners who get great results often describe spending extra time on planning (or paying for it) and being
glad they did. Meanwhile, the projects that feel messy usually skipped that step and ended up improvisingoften with too many sealants and not
enough clear drainage pathways. A simple rule that shows up repeatedly: water management is a system. If your flashing and WRB aren’t integrated,
the wall can’t reliably drain, and insulation is not a substitute for drainage.
4) The “best insulation” is the one you can install correctly in your specific wall
There’s a lot of online arguing about fiberglass vs mineral wool vs foam, but experienced guidance tends to land here:
choose the system you can execute well with your wall access, budget, and timeline. A perfectly installed batt job can outperform a sloppy foam job,
and an exterior foam retrofit can be phenomenal if detailing is correct. The most practical approach many people take is a hybrid:
air seal thoroughly, install cavity insulation carefully, and add exterior continuous insulation when the siding project makes it cost-effective.
It’s not flashy, but it’s how real projects stay on schedule and deliver measurable comfort improvements.
5) The “last 10%” (inspection and verification) is where confidence comes from
Homeowners who feel best about their project often do one extra thing: they verify results. That might be a blower door test,
an infrared scan during a cold snap, or even simply checking every stud bay for full contact and coverage before drywall goes up.
It’s the difference between “I think it’s better” and “Yep, we fixed the problem.” If you’re investing time and money into wall insulation,
that verification step is usually worth itbecause comfort isn’t theoretical. You feel it every day.