Table of Contents >> Show >> Hide
- Before You Touch a Slab: What “DIY Granite” Really Means
- Safety First (Because Granite Doesn’t Care About Your Fingers)
- Tools and Materials Checklist
- How to Install Granite Countertops: 11 Steps
- Step 1: Decide the layout (and where seams must go)
- Step 2: Measure twice, template once (then measure again)
- Step 3: Confirm cabinet strength and add support where needed
- Step 4: Remove old countertops and prep the site
- Step 5: Level the cabinets (this is not optional)
- Step 6: Dry-fit the granite (and don’t be shy about stopping)
- Step 7: Set up seam strategy (clean, clamp, and plan your cleanup)
- Step 8: Apply silicone and set the slabs for real
- Step 9: Pull seams tight and fill them cleanly
- Step 10: Install the sink and reconnect plumbing
- Step 11: Finish edges, backsplash, caulk, and (maybe) seal
- Troubleshooting and Pro-Level Finishing Touches
- Care After Installation: Keep Granite Looking New
- Experience Notes: What I Wish I Knew Before Installing Granite
- 1) Protect the path like you’re moving a piano
- 2) Leveling cabinets is the cheapest insurance you’ll ever buy
- 3) Dry-fit with all the “real life” stuff in place
- 4) Shims are finestacks of shims are a warning sign
- 5) Seams look pro when you treat them like surgery
- 6) Undermount sinks need real support, not just hope
- 7) The final 30 minutes are where the install “looks expensive”
Granite countertops are the kitchen equivalent of showing up to a backyard BBQ in a crisp white shirt: bold, beautiful, and one wrong move away from regret. The stone is heavy, the edges can chip, and a sloppy cabinet can turn your “dream kitchen” into a jigsaw puzzle you didn’t ask for. But if you’re organized, careful, and willing to recruit at least one strong friend (pizza is a valid currency), you can install granite countertops and end up with a pro-looking result.
This guide breaks the process into 11 practical steps, plus the real-world tricks installers use to get tight seams, level surfaces, and a sink that doesn’t try to escape in the middle of Thanksgiving prep.
Before You Touch a Slab: What “DIY Granite” Really Means
Most homeowners don’t cut granite at home. The saws, blades, water management, and dust control are specialized, and mistakes are expensive. A realistic DIY path looks like this:
- You measure and template accurately.
- A stone fabricator cuts, polishes edges, and makes sink/cooktop cutouts.
- You prep cabinets, dry-fit, set the slabs, seam them, and finish the details.
If you’re using prefabricated granite sections (common sizes with finished edges), you can do even more yourselfjust understand you’ll likely have more seams and fewer custom options.
Safety First (Because Granite Doesn’t Care About Your Fingers)
- Plan the lift. Slabs are extremely heavyuse helpers, carry on edge, and clear a wide path.
- Support weak spots. Cutouts and narrow strips can crack if flexed.
- Gear up. Gloves, eye protection, and sturdy shoes are worth it.
Tools and Materials Checklist
Keep it simple: the goal is accuracy, support, and clean seams.
- Long level/straightedge, measuring tape, painter’s tape, marker
- Template material (cardboard/luan strips) + hot glue/CA glue
- Composite shims, wood blocks for temporary supports
- 100% silicone (kitchen/bath), caulk gun
- Color-matched two-part stone epoxy for seams
- Denatured alcohol/acetone, clean rags, razor blades/plastic scraper
- Seam setters or clamps (rent if needed)
- Undermount sink clips/anchors (if applicable) + temporary bracing
- Penetrating stone sealer (only if your granite needs it)
How to Install Granite Countertops: 11 Steps
Step 1: Decide the layout (and where seams must go)
Start with a plan that respects both looks and physics. Fewer seams usually looks better, but you may need a seam for:
- Long runs that exceed slab or prefabricated lengths
- L-shaped kitchens (often two pieces with a corner seam)
- Hard-to-maneuver spaces where a single slab won’t turn the corner
Try to keep seams away from high-traffic “work zones” like the main prep area. If you must place a seam near a sink or cooktop, make sure the fabricator reinforces cutouts and you use proper seam support during install.
Step 2: Measure twice, template once (then measure again)
Accurate templating is where great installs are born. If your fabricator is templating, you still need to clear access and confirm decisions (overhangs, edge profiles, backsplash height). If you’re templating yourself:
- Mark cabinet fronts, walls, and appliance openings.
- Include the overhang you want (commonly about 1 to 1½ inches, but match your existing kitchen style).
- Mark sink and cooktop centers and confirm clearances for faucets and handles.
Pro tip: Old houses love to be “almost square.” Template the walls, not your optimism.
Step 3: Confirm cabinet strength and add support where needed
Granite is strong in compression but not forgiving of twist. Cabinets must be solid, secured to the wall, and able to carry the load. Check:
- Loose cabinet boxes, broken corner braces, or sagging spans
- Wide gaps (for example, a dishwasher opening) that may need brackets or a support rail
- Overhangs greater than typical standard depththese often need steel brackets or corbels
Many installers add a layer of ¾-inch plywood or build-up strips on top of cabinets in certain situations (especially if the stone is thinner or cabinet tops are uneven). Follow your stone supplier’s guidance so you don’t void warranties.
Step 4: Remove old countertops and prep the site
Shut off water at the valves, disconnect the plumbing, and remove the sink and faucet if they block countertop removal. Then:
- Cut caulk lines at the backsplash and countertop edges with a utility knife.
- Remove screws holding the old top to cabinets (usually from inside).
- Lift off sections carefullylaminate can be bulky, and old tile can crack into sharp bits.
Clean the cabinet tops thoroughly. Any debris under granite becomes a tiny “rock” that can create a pressure point.
Step 5: Level the cabinets (this is not optional)
Place your long level across cabinet runs front-to-back and side-to-side. Your job is to create a flat plane so the granite sits evenly. Fix issues by:
- Shimming cabinet bases at the floor (best) to correct height differences
- Adjusting legs (if your cabinets have them)
- Tightening and re-fastening cabinets together so they act like one stable unit
Aim for “dead level,” but in real kitchens, the bigger goal is flat and supported. A countertop can be perfectly level and still crack if a corner is hanging in midair.
Step 6: Dry-fit the granite (and don’t be shy about stopping)
Bring the slabs in and place them without adhesive first. Check:
- Fit against walls and at corners
- Overhang consistency along cabinet fronts
- Appliance openings and door/drawer clearances
- Seam alignment (front edges should be flush)
If something is off, don’t “make it work” with extra force. Granite does not respond to encouragement. Minor adjustments might be possible with shims or by scribing a backsplash, but major fit issues belong back at the fabricator.
Step 7: Set up seam strategy (clean, clamp, and plan your cleanup)
Seams are where DIY installs usually look DIY. The fix is preparation:
- Clean seam edges with denatured alcohol/acetone and let dry.
- Have color-matched epoxy ready and mix only what you can use quickly.
- Stage razor blades and a plastic scraper for squeeze-out.
If you can rent seam setters (the suction-cup tools that pull slabs together), do it. They help align the top surfaces and close the gap without brute force.
Step 8: Apply silicone and set the slabs for real
Once the dry fit looks right, lift one piece at a time and apply small “dabs” or short beads of 100% silicone along the cabinet topsespecially near corners and supports. You’re not icing a cake; you’re creating grip and preventing movement.
Lower the granite gently into place. Use composite shims sparingly to remove rocking and to fine-tune alignment. Place shims near cabinet corners or solid support areas so the load is distributed. Avoid creating point loads right at thin cutout corners.
Step 9: Pull seams tight and fill them cleanly
With slabs positioned, pull the seam together using seam setters or clamps and blocks (protect stone surfaces with padding). Aim for:
- Flush top surfaces (run your fingertips acrossyour eyes lie)
- A tight gap (but not so tight you chip the edge)
- Aligned patterns (the “movement” in the stone should flow)
Pack the seam with color-matched epoxy, then remove excess before it fully cures. The sweet spot is “firm but not rock-hard.” Use a razor held nearly vertical to shave, not gouge. When done well, the seam feels like a faint line, not a speed bump.
Step 10: Install the sink and reconnect plumbing
For an undermount sink, most setups use a combination of silicone (for sealing) and mechanical supports (clips, brackets, or epoxy-set anchors) to hold the sink to the granite. The key steps:
- Dry-fit the sink and confirm reveal (how much sink lip shows).
- Clean the underside of the granite around the cutout.
- Apply a continuous bead of silicone to the sink flange.
- Lift the sink into place and support it from below (a 2×4 brace or strap system) while you attach clips/anchors.
Let silicone cure per the product label before loading the sink with water or garbage disposals. Then reconnect the drain, trap, dishwasher line, and faucet supply. Check for leaks like you’re auditioning for a detective show.
Step 11: Finish edges, backsplash, caulk, and (maybe) seal
Now you make it look intentional:
- Backsplash: If you’re adding a granite backsplash, set it with silicone and/or appropriate adhesive and keep it plumb. Otherwise, plan for a clean caulk line where granite meets the wall.
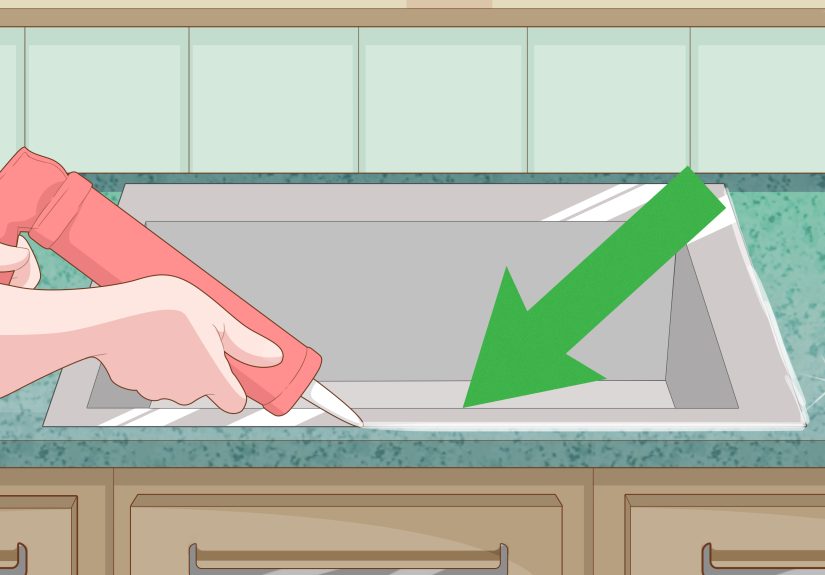
- Caulk: Run a smooth bead where stone meets wall, sink rim (if top-mount), and any joints that could let water sneak behind cabinets.
- Clean: Remove haze and epoxy smears with the right solvent (check epoxy instructions).
- Seal (if needed): Many granites are sealed by the fabricator, but you can test by placing a few drops of water on the surface. If it darkens quickly, it’s time for a penetrating sealer.
Troubleshooting and Pro-Level Finishing Touches
When the wall isn’t straight
Walls rarely are. If there’s a small gap at the back, a backsplash or a clean caulk joint can hide it. If the gap is large, the correct fix is usually at the templating/fabrication stage, not by forcing the slab.
When the granite rocks
Rocking means uneven support. Remove the slab, find the high point (often a cabinet corner), correct the cabinet plane, then reset. Shimming only the granite can create stress points if overdone.
Care After Installation: Keep Granite Looking New
- Clean with a pH-neutral stone cleaner or mild dish soap and water.
- Avoid harsh acids and abrasives that can dull the finish.
- Use trivets and cutting boards; re-seal when the water-drop test says it’s time.
Experience Notes: What I Wish I Knew Before Installing Granite
Granite installs are 70% planning and 30% “please don’t chip, please don’t chip.” Here are the practical lessons I’ve learned that make the difference between a calm install and a chaotic one.
1) Protect the path like you’re moving a piano
Before the slab arrives, clear a straight carry route, pad door jambs with cardboard, and remove anything you can trip over. The stone will be on edge, your hands will be full, and your brain will be busy doing geometry in real time.
2) Leveling cabinets is the cheapest insurance you’ll ever buy
The one time I thought, “close enough,” I ended up chasing a tiny rock in the surface for an hour and shimming like I was playing countertop Jenga. Fix the cabinet plane first (feet shims, cabinet screws, tight joints), then set stone on a stable base.
3) Dry-fit with all the “real life” stuff in place
Check drawer swings, appliance clearances, and faucet reach during the dry fit. I’ve seen perfect-looking slabs that later blocked a dishwasher trim piece by a quarter inchan amount that will haunt you forever.
4) Shims are finestacks of shims are a warning sign
A couple of composite shims near solid support points can stop rocking and perfect an overhang. If you need a pile, the cabinets (or a missing support rail) are the problem. Too many shims can create point loads that invite cracks, especially near cutouts.
5) Seams look pro when you treat them like surgery
Clean the seam edges, stage your tools, and mix epoxy with intention. The best seam I ever did wasn’t because I had “magic epoxy”it was because everything was dry, aligned, and I cleaned squeeze-out at the right moment instead of letting it cure into a glossy ridge.
6) Undermount sinks need real support, not just hope
Silicone helps seal, but hardware does the holding. The smoothest sink installs I’ve done used a simple brace or strap to keep the sink perfectly positioned while clips/anchors were tightened evenly. Rushing here is how you end up with a crooked revealor worse, a sink that slowly sags over time.
7) The final 30 minutes are where the install “looks expensive”
Tape your caulk lines, wipe haze immediately, and do one slow inspection pass from multiple angles (especially under good lighting). Those little detailsclean joints, consistent overhang, tidy sink edgeare what make guests assume you hired someone with a logo on their shirt.