Table of Contents >> Show >> Hide
- Before You Start: Pick the Right Kind of “Vanity Swap”
- Step-by-Step Bathroom Vanity Installation
- 1) Shut off water and make your bathroom “tool-friendly”
- 2) Disconnect the drain (P-trap) and supply lines
- 3) Slice caulk, remove fasteners, and evict the old vanity
- 4) Repair the wall and floor (this is the moment)
- 5) Dry-fit the new vanity cabinet and mark your references
- 6) Mark and cut plumbing access holes (measure twice, drill once)
- 7) Level the cabinet, shim it, then anchor it (in that order)
- 8) Install the faucet and drain on the countertop (do this before the top is glued down)
- 9) Set the vanity top and backsplash with the right sealant
- 10) Reconnect supply lines and rebuild the P-trap
- 11) Leak-test like a responsible adult (even if you aren’t one)
- 12) Finish touches: caulk lines, trim, doors, hardware
- Special Cases and Smart Upgrades
- When to Call a Pro (No Shame, Just Wisdom)
- Conclusion
- Extra: of Real-World “Vanity Install” Experiences (So You Don’t Have To Learn the Hard Way)
Installing a bathroom vanity is one of the fastest ways to make a bathroom feel “new” without taking out a loan,
a wall, or your sanity. It’s also one of the few home projects where success is obvious immediately:
the drawers glide, the doors line up, andmost importantlythe plumbing doesn’t cry.
This walkthrough shows you how to replace a bathroom vanity (cabinet + sink/top) using standard American
plumbing and carpentry practices. We’ll keep it practical, a little funny, and very focused on what actually
makes vanities fail: bad leveling, weak anchoring, and “I’m sure it’ll seal” optimism.
Before You Start: Pick the Right Kind of “Vanity Swap”
Swap-in (same plumbing location) vs. re-plumb (new location)
If your new vanity’s drain and supply hookups line up with the existing plumbing (or close enough to route inside
the cabinet), the job is straightforward. If you’re moving plumbing inside the wall, changing drain height,
or relocating shutoff valves, you’re in “call a plumber or get permits” territory in many areas.
Measure like you’re buying a tux: exact, and with movement
- Width: Measure wall-to-wall and leave clearance for trim, doors, and toe kicks.
- Depth: Check that drawers/doors open without smacking the toilet or door casing.
- Height: Many standard vanities land around the low-30-inch range; comfort height can be taller. Pick what fits your household.
- Floor “shadow”: If the old vanity covered ugly flooring, make sure the new one covers it too.
Tools and materials checklist
Your exact list depends on your vanity type, but most installs call for:
- Stud finder, tape measure, level (2-foot is great), pencil
- Adjustable wrench, basin wrench (for faucet nuts), channel-locks
- Bucket/towels, utility knife, putty knife
- Drill/driver + bits, hole saw (or jigsaw) for plumbing cutouts
- Shims (composite or wood), screws suitable for studs, and/or wall anchors
- Flexible braided supply lines (often 3/8″ compression), P-trap parts if needed
- Sealant/caulk (follow vanity/top manufacturer guidance), painter’s tape for clean lines
- Optional: new shutoff valves if yours are ancient or crusty
Step-by-Step Bathroom Vanity Installation
1) Shut off water and make your bathroom “tool-friendly”
Clear everything out of the vanity and surrounding area. Then shut off the hot and cold shutoff valves under the sink.
Turn the faucet on to relieve pressure and drain leftover water. No shutoffs under the sink? Turn off the main.
Pro tip: Put a towel in the bottom of the cabinet even if you’re “careful.” Water finds confidence.
2) Disconnect the drain (P-trap) and supply lines
Place a bucket under the P-trap. Loosen the slip nuts and remove the trap. Expect a little waterthis is normal and
also why we don’t wear white socks to plumbing parties.
Next, disconnect the supply lines from the shutoff valves. Have a towel ready; those lines love dramatic exits.
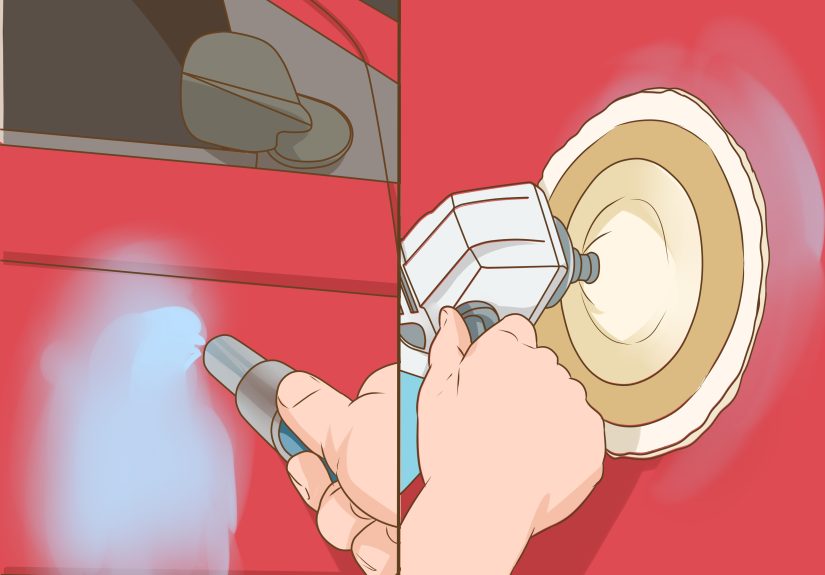
3) Slice caulk, remove fasteners, and evict the old vanity
Run a utility knife along any caulk where the backsplash or top meets the wall. If the top is stuck with adhesive,
gently pry it free. Then remove the screws holding the vanity cabinet to the wall and pull the cabinet out.
If you’re keeping the old top or reusing a sink, slow down here. Porcelain and stone don’t forgive “just yank it.”
4) Repair the wall and floor (this is the moment)
Once the vanity’s out, you may find missing paint, torn drywall paper, or mysterious stains from 2017. Patch holes,
sand smooth, and touch up paint. If you’re adding new baseboard or quarter-round, now’s the cleanest time to plan it.
5) Dry-fit the new vanity cabinet and mark your references
Slide the new vanity into place. If there’s base molding in the way, you may need to notch the vanity back edge or
cut the molding so the cabinet sits flush. A vanity that rocks is a vanity that will eventually squeak, crack caulk,
or both.
- Trace the vanity outline lightly on the wall (optional but helpful).
- Use a stud finder to locate studs and mark them.
- Check door/drawer clearance while the cabinet is empty and easy to move.
6) Mark and cut plumbing access holes (measure twice, drill once)
If your vanity has a solid back, you’ll need openings for the drain and supply lines. The most reliable method is:
measure from the wall and from the floor to each pipe centerline, transfer those measurements to the vanity, then
cut with a hole saw (clean and round) or jigsaw (flexible but messier).
If things don’t line up perfectly, you can often widen holes slightlyinside a cabinet, nobody gives out design awards.
But don’t force pipes to “bend into compliance.” That’s how leaks become hobbies.
7) Level the cabinet, shim it, then anchor it (in that order)
Set the vanity cabinet in place and check level side-to-side and front-to-back. Use shims under low corners until the top
is perfectly level. Then check plumb against the wall.
Once level, anchor the vanity through its mounting rail or upper back frame into the wall studs. Pre-drill pilot holes to
prevent splitting. If studs don’t land where you need them, use appropriate heavy-duty wall anchors per your wall type
(drywall, plaster, tile, etc.). For larger or wall-hung vanities, follow the manufacturer’s bracing requirements.
After anchoring, trim shims flush so they don’t stick out like tiny tongues mocking your trim work.
8) Install the faucet and drain on the countertop (do this before the top is glued down)
It’s dramatically easier to install the faucet and drain when the countertop is not attached to the vanity.
If your top includes an integrated sink, install the faucet and drain assembly first, following the manufacturer instructions.
- Position the faucet with its gasket/plate, then tighten mounting nuts from below.
- Install the drain body; some setups use plumber’s putty, some prefer specific sealantsfollow your drain kit directions.
- Connect the pop-up linkage (if included) and verify smooth open/close action.
9) Set the vanity top and backsplash with the right sealant
Dry-fit the top first. Confirm it sits flat and the back edge meets the wall cleanly. Then apply the recommended sealant
on top of the cabinet (often a bead or dots near corners). Carefully set the top in place and press down evenly.
If you have a separate backsplash, apply a bead of sealant on the back and press it firmly against the wall. Wipe away
excess immediately. (Dried caulk is basically fossilized regret.)
10) Reconnect supply lines and rebuild the P-trap
Reconnect the faucet supply lines to the shutoff valves. If your supplies are old, replace thembraided stainless lines are
cheap insurance. Tighten snugly but don’t crank fittings like you’re starting a lawnmower.
Reinstall the P-trap. If your wall drain and sink tailpiece don’t align, you may need a trap extension or a different trap
configuration. Keep the trap connection clean and straight to avoid leaks.
11) Leak-test like a responsible adult (even if you aren’t one)
Turn the shutoff valves on slowly. Watch every connection while the system pressurizes. Then run water:
- Check supply connections at both ends.
- Fill the sink, then drain it while watching the trap and tailpiece joints.
- Cycle the pop-up drain a few times and look for seepage around the drain flange.
If you see a leak: stop, tighten gently, reseat washers if needed, and retest. Don’t “wait and see.” Water is extremely patient.
12) Finish touches: caulk lines, trim, doors, hardware
Caulk the seam where the backsplash meets the wall and where the top meets the backsplash (if separate).
Add quarter-round or base trim if you have gaps at the floor or wall. Reinstall doors, drawers, and hardware.
Clean the countertop and step back for the ceremonial “look how grown-up I am” moment.
Special Cases and Smart Upgrades
Floating (wall-hung) vanities
Wall-hung vanities demand serious wall supportusually studs or added blocking/bracing behind the drywall. If you don’t have
solid backing, don’t improvise with wishful thinking and drywall anchors. Follow the vanity manufacturer’s requirements.
When the pipes don’t line up
Slight misalignment can be handled with trap extensions, adjustable slip-joint fittings, or widening cabinet cutouts.
Big misalignmentlike a drain that’s too high/low or supply lines that land outside the cabinetoften requires moving plumbing.
That’s where pros earn their keep (and your future weekends).
Vanity height and mirror placement
Vanity height is more than aestheticsit affects comfort and whether existing plumbing and outlets still make sense.
A taller vanity can be great, but may require adjusting plumbing rough-ins. Mirrors are commonly placed so the bottom edge sits several inches above the vanity,
often around 5–10 inches depending on the mirror and users.
When to Call a Pro (No Shame, Just Wisdom)
- Your shutoff valves won’t fully close (or look like they belong in a shipwreck museum).
- You need to relocate drain/supply lines inside the wall.
- You’re installing a large wall-hung vanity that requires structural backing.
- You have persistent leaks or evidence of water damage/mold.
Hiring help can cost more upfront, but it can also prevent expensive water damage. Labor and total installation costs vary widely by region and project complexity.
If you’re comparing DIY vs. pro, factor in your time, tool purchases, and the cost of fixing “learning moments.”
Conclusion
A bathroom vanity install is really three jobs wearing a trench coat: light demo, cabinet installation, and basic plumbing reconnection.
If you keep the cabinet level, anchor it solidly, and reconnect plumbing patiently, you’ll end up with a vanity that looks built-in (not “balanced”).
Take your time on measurement and dry-fitting, don’t skimp on leak testing, and remember: caulk is a sealant, not a personality trait.
Extra: of Real-World “Vanity Install” Experiences (So You Don’t Have To Learn the Hard Way)
You can read a hundred how-tos and still get surprised by the two most powerful forces in home improvement: (1) walls that aren’t straight and
(2) floors that aren’t level. Nearly every DIY vanity install story starts with “I assumed it would…” and ends with
“…so I bought shims.” The good news is that shimming isn’t failureit’s normal. The “pro look” comes from patiently
leveling the cabinet, not from owning a tool belt with seventeen pockets.
Another common experience: the old vanity comes out easily… and the wall behind it looks like it’s been through an emotional breakup.
Paint lines, missing drywall paper, nail holes, and a random gap where trim used to betotally typical. The trick is to treat
wall patching as part of the project, not an annoying side quest. Ten minutes of spackle and a quick touch-up coat will make your
new vanity look intentionally installed instead of “placed there to hide the evidence.”
Plumbing surprises are also a rite of passage. The P-trap that “should” loosen by hand often disagrees. A bucket underneath is non-negotiable,
because even when you drain the sink, the trap holds water by design. People also discover that supply lines are not immortal.
If a braided line looks kinked, corroded, or older than your streaming subscriptions, replacing it is cheap peace of mind.
The same goes for shutoff valvesif they’re stiff, crusty, or won’t fully stop water, that’s not a personality quirk; it’s a future leak risk.
The biggest “aha” moment for many installers is realizing how much easier it is to mount the faucet and drain before the countertop is attached.
Working upside down in a dark cabinet feels like doing surgery through a mailbox slot. Installing hardware on a stable countertop (on the floor or a workbench)
is faster, cleaner, and less likely to end with you Googling “basin wrench alternative” at 11:47 p.m.
Finally, caulk. Caulk has a reputation for being messy because it punishes impatience. The most reliable real-world trick is painter’s tape:
tape both sides of the seam, lay a smooth bead, tool it (a damp finger works), and pull the tape before it skins over.
You’ll get a crisp line that looks like you meant it. And if you don’t get a perfect bead the first time?
Congratulationsnow you have the exact same experience as everyone else who has ever caulked anything in a bathroom.