Table of Contents >> Show >> Hide
- Why Grow Garlic in Water?
- What You Need Before You Start
- How to Grow Garlic in Water: 8 Steps
- Step 1: Pick the Best Cloves
- Step 2: Pre-Sprout the Clove (Optional, but Helpful)
- Step 3: Place the Clove in a Container the Right Way
- Step 4: Add Water (But Don’t Drown It)
- Step 5: Move It to a Sunny Spot
- Step 6: Refresh the Water Regularly
- Step 7: Harvest the Garlic Greens
- Step 8: Decide What’s Next
- Sprouts & Beyond: Can Garlic Grown in Water Become a Full Bulb?
- Common Mistakes When Growing Garlic in Water
- Troubleshooting: Quick Fixes for Garlic Drama
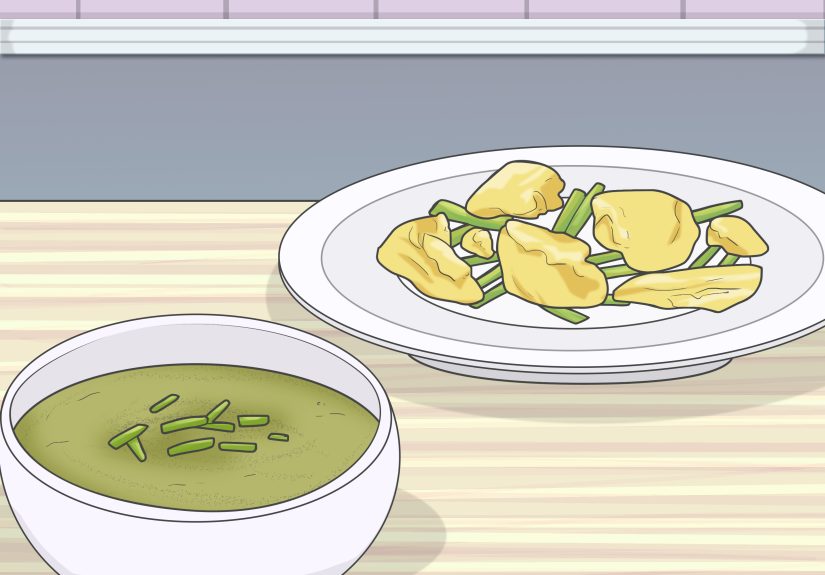
- What to Do with Garlic Greens
- Garlic Growing Basics for the Next Level
- 500+ Words of Real-World Experiences With Growing Garlic in Water
- Final Thoughts
- SEO Tags
If you’ve got a garlic bulb, a glass, and a sunny windowsill, congratulationsyou’re already halfway to becoming the proud parent of tiny, spicy green shoots. Growing garlic in water is one of the easiest indoor gardening projects around. It’s fast, cheap, and surprisingly satisfying. Plus, it makes you look like the kind of person who casually grows ingredients next to the toaster.
But let’s set expectations early: growing garlic in water is excellent for garlic sprouts (also called garlic greens), not for producing full garlic bulbs. If your dream is a big, plump bulb for roasting, you’ll need soil, time, and patience. If your dream is fresh, garlicky greens for eggs, soups, noodles, and ramen upgrades, water-growing is your new best friend.
In this guide, we’ll walk through 8 simple steps to grow garlic in water, explain what happens after the sprouts, and share practical tips to avoid mold, mush, and mystery smells. We’ll also cover how to move from “sprouts on the windowsill” to “actual bulbs later” if you want to level up.
Why Grow Garlic in Water?
Growing garlic in water is popular because it gives you a quick harvest of greens without potting mix, garden space, or a lot of fuss. It’s perfect for apartment kitchens, winter months, and people who want to dip a toe into indoor gardening before buying six grow lights and accidentally starting a basil empire.
What You’ll Actually Harvest
When you grow garlic in water, you’re harvesting the green shoots that grow from a clove. These greens taste like a cross between garlic chives and scallionsmild, fresh, and garlicky. They’re fantastic as a garnish or mixed into cooked dishes. Full bulbs, however, need a much longer growing cycle and usually require soil, drainage, and more light.
What You Need Before You Start
- 1 garlic bulb (preferably firm, healthy cloves)
- A clear glass, jar, or small cup (shot glasses are great for single cloves)
- Clean water (room temperature is ideal)
- A sunny windowsill
- Optional: paper towel for pre-sprouting
- Optional: scissors or herb snips for harvesting
Pro tip: If you plan to eventually grow bulbs in soil, use seed garlic from a garden center when possible. Grocery-store garlic can work for sprouts, but it may be older or treated in ways that make it less reliable for planting.
How to Grow Garlic in Water: 8 Steps
Step 1: Pick the Best Cloves
Start with a firm garlic bulb. Avoid cloves that feel soft, mushy, or moldy. Separate the bulb into individual cloves, but keep the papery skin on each clove. That skin helps protect the clove while it starts growing.
If you already have garlic that has started sprouting in your kitchen, even better. You’re not “behind”you’re just pre-approved by nature.
Step 2: Pre-Sprout the Clove (Optional, but Helpful)
You can place a clove directly into water, but pre-sprouting speeds things up. Wrap the clove in a lightly damp paper towel and leave it in a warm spot for a day or two. Once a little green tip appears, it’s ready.
This step is especially useful if your garlic is very fresh and hasn’t started waking up yet.
Step 3: Place the Clove in a Container the Right Way
Put the clove in a glass with the pointy end up and the flat root end down. If the clove is wobbly, use a smaller container so it can sit upright. A shot glass, spice jar, or narrow drinking glass works well for one clove. For multiple cloves, use a wider jar, but don’t crowd them too tightly.
Orientation matters. Pointy side up = green shoots. Root side down = roots where roots belong.
Step 4: Add Water (But Don’t Drown It)
Fill the container with water so it covers only the bottom portion of the clove. The goal is to keep the root end in water while the rest of the clove stays mostly dry. If you submerge the whole clove, it may rot before it grows.
Think “spa day for the roots,” not “garlic submarine mission.”
Step 5: Move It to a Sunny Spot
Place the glass on a sunny windowsill. Garlic does best with strong light. For sprouts, a bright window usually works well. If you’re trying to extend growth beyond greens, garlic likes a lot of lightideally six or more hours a day, and even more is better.
If the shoots look pale or floppy, they probably need more light. If they look scorched or wilted fast, the window may be too intense and hotmove them a little farther back.
Step 6: Refresh the Water Regularly
Check the water daily. If it turns cloudy, dump it and refill with clean water. Even if it looks okay, changing it regularly helps prevent odor and bacterial growth.
Good signs: white roots, green shoots, no funky smell. Bad signs: slime, brown mush, or a clove that looks like it has given up on life. If that happens, toss it and start with a fresh clove.
Step 7: Harvest the Garlic Greens
In about a week (sometimes a little longer), you should see a nice cluster of green growth. Many growers harvest when the shoots reach around 4 to 7 inches tall.
Use clean scissors and snip the greens, but leave some growth behind so the clove can resprout. A good rule is to leave at least 1 inch of green. The flavor is best when the greens are fresh, so clip only what you need.
Step 8: Decide What’s Next
After a few harvests, the clove will weaken. At that point, you have three choices:
- Compost it and start over with a fresh clove.
- Keep it going for a little longer if it’s still producing good greens.
- Transplant it to soil if you want to try growing a full bulb later.
For a continuous supply of garlic greens, start a new clove every 1–2 weeks. That way, you’ll always have one clove sprouting, one ready to harvest, and one pretending it’s a tiny dragon plant on your windowsill.
Sprouts & Beyond: Can Garlic Grown in Water Become a Full Bulb?
Short answer: not usually in water alone. Water-growing is best for shoots. Full bulb development requires a longer growing period, more nutrients, and usually soil or a proper hydroponic system.
If You Want Bulbs, Do This Instead
Transplant your sprouted clove into a pot with drainage and well-draining potting mix. Plant the clove pointy-side up and cover it lightly with soil. If you’re growing for bulbs indoors, choose a container at least 6 inches deep and give each clove enough space (about 6 inches apart is a solid target for bulbs; closer spacing is fine for greens).
Indoor bulb-growing also works better with softneck garlic in many cases, while hardneck varieties typically need a stronger cold period (vernalization) to bulb up properly. If your goal is bulbs, the garlic may need a chilling period before planting and then several months of growth.
How Long Does “Beyond” Take?
Garlic greens are the instant gratification versionoften ready in 7 to 10 days. Bulbs are the slow cooker version. Expect several months, commonly around 7 to 9 months indoors if conditions are good. Outdoor timelines vary by climate and variety, but garlic is generally a long-season crop.
Common Mistakes When Growing Garlic in Water
1) Submerging the Whole Clove
This is the fastest route to rot. Keep just the base in water.
2) Forgetting to Change the Water
Cloudy water leads to odor and decay. Garlic is low-maintenance, not no-maintenance.
3) Using Soft or Moldy Cloves
Starting with weak cloves usually ends in disappointment. Pick firm ones.
4) Expecting Giant Bulbs in a Shot Glass
The water method is for greens. For bulbs, move to soil (or a more advanced hydroponic setup) and settle in for the long game.
5) Not Enough Light
Garlic can tolerate a lot, but it still wants sunshine. Leggy, pale growth usually means the clove is asking for brighter conditions.
Troubleshooting: Quick Fixes for Garlic Drama
My garlic smells weird
Change the water immediately. Rinse the container. If the clove feels mushy or slimy, discard it.
The water gets cloudy fast
This usually means the clove is breaking down or the water needs frequent changes. Use clean water, keep the clove only partly submerged, and avoid overly warm spots.
The shoots turned yellow
This can happen when the clove runs out of energy, gets too hot, or doesn’t get enough light. Harvest what you can and start a new clove.
Can I use sprouted garlic from my pantry?
Absolutely. In fact, sprouted garlic is often ideal for this project. Sprouting doesn’t automatically make garlic unsafe to eat, but the green center can taste more bitter in some dishes. If the clove is firm and not moldy, it’s usually fine to use.
What to Do with Garlic Greens
Once you’ve harvested your garlic sprouts, the real fun starts. These greens are mild enough to use like chives but flavorful enough to make plain food taste intentional.
- Snip over scrambled eggs or omelets
- Stir into ramen, soups, or noodle bowls
- Mix into cream cheese or sour cream for a quick dip
- Use as a garnish on baked potatoes
- Add to stir-fries at the end of cooking
- Sprinkle over avocado toast (because of course)
- Blend into herb butter with parsley and lemon
Garlic Growing Basics for the Next Level
If this little windowsill project gets you hooked, welcome to the club. Here are a few garlic-growing basics to know before you graduate to pots or a garden bed:
- Soil: Garlic prefers well-drained, fertile soil with a pH around 6.0 to 7.0.
- Sun: Full sun is best for strong growth and bulb development.
- Water: In soil, garlic generally likes consistent moisture but not soggy conditions.
- Spacing: Close spacing is fine for greens; bulbs need more room.
- Timing: Outdoor garlic is often planted in fall and harvested in summer.
- Varieties: Softneck stores longer; hardneck produces scapes and often does better in colder climates.
500+ Words of Real-World Experiences With Growing Garlic in Water
One of the most common experiences people have with growing garlic in water is surprisemostly because it works faster than expected. A lot of beginners assume garlic is a long-term garden crop only (which is true for bulbs), so when they see green shoots in a week, it feels like a tiny kitchen miracle. This quick result is a huge confidence boost, especially for people who have “accidentally over-loved” houseplants in the past.
Another very common experience is discovering that not all cloves behave the same way. In the same jar, one clove may shoot up like it’s training for the Olympics while another sits there doing absolutely nothing. This usually comes down to clove health, age, and storage history. Some grocery-store cloves were stored longer, exposed to different temperatures, or just weren’t as viable. The practical lesson most growers learn quickly: start more than one clove. It’s like a backup plan, but greener.
People also tend to notice that water quality and water changes matter more than expected. On day one, the setup feels almost too easyadd clove, add water, done. But by day three or four, the water can turn cloudy if the clove is too submerged or the room is warm. Beginners often think they did something terribly wrong, when really they just need to change the water and reduce the water level. Once they make that adjustment, the clove often rebounds and keeps growing just fine.
Light is another “aha” moment. Many growers place garlic in a bright-looking kitchen corner, only to realize that “bright-looking” and “plant-bright” are not the same thing. Garlic sprouts grown in weak light tend to be pale, thin, and floppy. Move that same clove to a sunnier window, and within a few days the new growth usually looks stronger and greener. This is one of those experiences that teaches people more about indoor gardening than any fancy plant label ever will.
There’s also a fun cooking connection that keeps people motivated. Unlike some indoor projects that take months to produce anything edible, garlic greens can be snipped and eaten quickly. Many first-time growers toss the greens onto eggs or noodles and immediately decide to keep the project going. Once they realize they can start a new clove every week or two, it becomes part of a routinealmost like keeping a small rotating herb garden, but with less fuss and more garlic.
Another frequent experience is the “sprouted pantry garlic rescue.” Someone finds garlic in the kitchen with green centers, thinks it’s ruined, then uses those cloves for water-growing instead of throwing them out. This turns food waste into a mini growing project, which feels practical and satisfying. Even when the cloves are no longer ideal for raw recipes because the sprouts taste stronger or more bitter, they can still be useful for growing greens or cooking.
Finally, a lot of people use this project as a gateway to bigger gardening goals. They start with one clove in a glass, then try several cloves, then move a sprouted clove into a pot of soil, and suddenly they’re reading about softneck vs. hardneck garlic and wondering if they should plant a raised bed next fall. In that way, growing garlic in water is more than a kitchen hackit’s a low-risk, high-reward way to learn how plants work. And if all you ever do is grow a few garlicky greens for dinner, that’s still a win.
Final Thoughts
Growing garlic in water is one of the easiest ways to get fresh edible greens indoors. It’s simple, fast, and beginner-friendly, and it turns an ordinary garlic clove into a tiny, productive kitchen crop. Just remember: water-growing is best for sprouts, while full bulbs need soil, time, and stronger growing conditions.
If you want a fun, low-cost project with a delicious payoff, start with one clove today. A week from now, you’ll be snipping fresh garlic greens and feeling suspiciously proud of your windowsill.