Table of Contents >> Show >> Hide
- Why crayon is annoying (and why your first try sometimes “smears it worse”)
- Before you touch the crayon: 60 seconds that can save your paint job
- Quick cheat sheet: pick your method in 10 seconds
- Method 1: Dish soap + warm water (the safest place to start)
- Method 2: Baking soda paste (gentle abrasion that works shockingly well)
- Method 3: Hair dryer + wipe (melt the wax, don’t smear it)
- Method 4: Iron + cloth barrier (fast for heavy crayon, but use common sense)
- Method 5: Magic Eraser (melamine sponge) quick, but handle with care
- Method 6: Toothpaste (the non-gel, mildly abrasive backup plan)
- Method 7: Vinegar + soap solution (for smudgy residue and “ghost marks”)
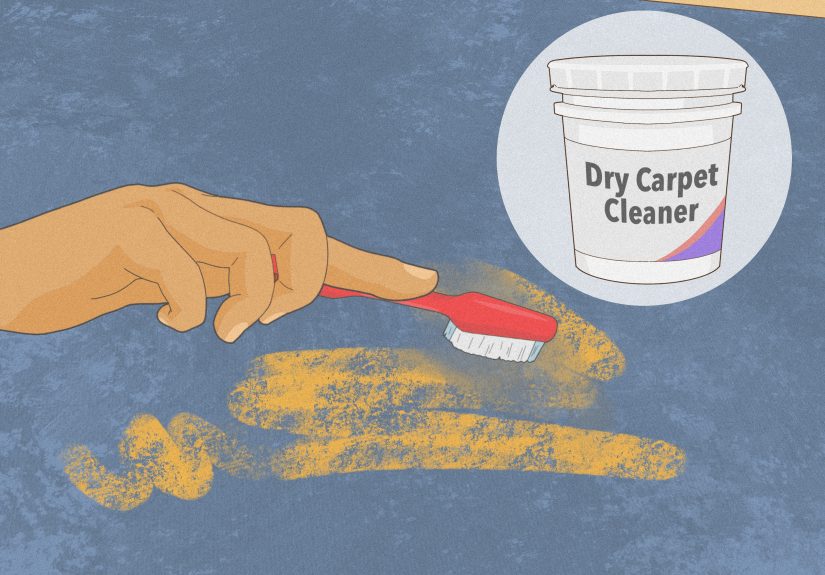
- Last-resort options (use only if gentle methods fail)
- Special cases: wall finish and surface type matter
- What NOT to do (unless you enjoy repainting)
- When cleaning isn’t enough: the “crayon shadow” problem
- Mini FAQ
- Real-world experiences and lessons learned (the “been there” section)
- Conclusion
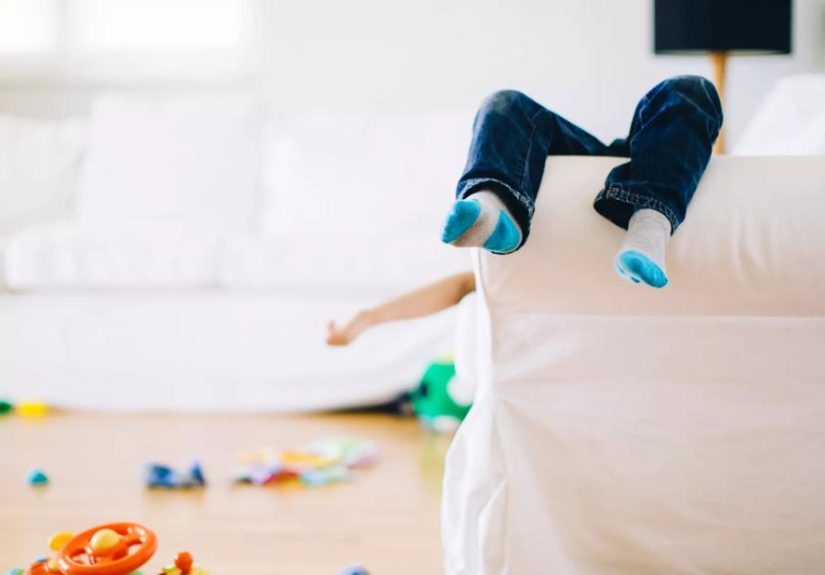
Your wall was minding its own businessbeing vertical, holding up your life, not asking for muchwhen a tiny artist
decided it needed a “limited-edition mural.” In wax. In neon. In a place guests can see from space.
The good news: most crayon comes off without repainting, drama, or summoning a professional exorcist. The trick is
using the right method for your wall finish and starting gentle before you go full “science fair” on your paint.
This guide walks you through quick, low-effort options first, then the stronger stuff if the wax is feeling stubborn.
Why crayon is annoying (and why your first try sometimes “smears it worse”)
Crayons are basically pigment trapped in wax. Wax doesn’t dissolve in water, so a wet paper towel often turns your
masterpiece into a glossy, colorful fog. That’s why the best methods do one of three things:
- Lift wax mechanically (gentle abrasion like baking soda or a melamine sponge).
- Soften wax (heat from a hair dryer or an iron barrier method).
- Break wax’s grip (mild soap, a little vinegar, or carefully chosen cleaners).
Before you touch the crayon: 60 seconds that can save your paint job
1) Identify your wall finish
Higher-sheen paints (satin, semi-gloss, gloss) usually tolerate cleaning better. Flat/matte finishes can burnish,
dull, or show “clean spots” if scrubbed aggressively. If you’re not sure, look at the wall from the side under a lamp:
shiny = tougher; chalky/low-shine = delicate.
2) Do a quick dust pass
Wipe with a dry microfiber cloth or use a vacuum brush attachment first. Dust + moisture = gritty paste, and gritty
paste + paint = regret.
3) Test in a hidden spot
Test every method in an inconspicuous area (behind a picture, near baseboards). This is especially important on flat
paint, older paint, or specialty finishes. The goal: remove crayon, not the wall’s will to live.
Quick cheat sheet: pick your method in 10 seconds
- Fresh crayon on most painted walls: dish soap + warm water.
- Stubborn wax or thick lines: baking soda paste (gentle abrasion).
- Big waxy areas (crayon really committed): hair dryer or iron + cloth method.
- Gloss/satin paint with lingering marks: Magic Eraser (light touch).
- Textured walls: heat + blot, then soft brush + mild cleaner.
- Wallpaper: dry methods first; be extra cautious (and test twice).
Method 1: Dish soap + warm water (the safest place to start)
If you do only one thing: start here. Mild dish soap helps emulsify oily residue and lifts surface grime without
attacking most paint finishes.
What you need
- Warm water
- Mild dish soap (a few drops)
- Microfiber cloth or soft sponge
- Optional: a second cloth and a rinse bowl/bucket
Steps
- Mix warm water with just a few drops of dish soaplight suds, not a bubble bath.
- Dampen the cloth and wring it well. The cloth should be barely wet, not dripping.
- Wipe the crayon gently in small circles, working from the outside of the mark toward the center.
- Rinse your cloth often so you’re not redecorating with diluted crayon.
- Finish with a clean damp (water-only) cloth to remove soap residue, then dry with a towel.
Pro tip: Avoid over-wetting drywall. Too much water can soften paint, raise paper, or leave a spotty
“tide line,” especially on older walls.
Method 2: Baking soda paste (gentle abrasion that works shockingly well)
Baking soda is a mild abrasive. Used gently, it can lift wax and pigment without harsh chemicalsespecially helpful
when soap alone isn’t enough.
What you need
- Baking soda
- Water
- Soft cloth or sponge
Steps
- Make a paste: start with about 3 parts baking soda to 1 part water. Aim for “toothpaste-ish.”
- Apply paste to a damp cloth (not directly to the wall if you’re nervous about texture/paint).
- Buff lightly in small circles. Let the paste do the workdon’t sand the wall like you’re refinishing a boat.
- Wipe clean with a damp cloth, then dry.
When to be extra careful: dark paint, flat paint, or freshly painted walls. Light abrasion can change
sheen (“shiny spot syndrome”). If you see the finish changing, stop and switch to heat-and-blot.
Method 3: Hair dryer + wipe (melt the wax, don’t smear it)
Heat is a classic wax strategy: soften it so it lifts cleanly. A hair dryer is the gentlest heat tool most people own.
What you need
- Hair dryer
- Soft cloths or paper towels
- Mild soap solution for a final wipe
Steps
- Set the hair dryer to medium heat. Hold it a few inches from the wall.
- Warm the crayon for a few seconds until it looks slightly glossy/soft.
- Blot (don’t scrub) with a clean cloth to lift softened wax.
- Repeat as needed, always using a clean section of cloth.
- Finish with a mild soap-and-water wipe to remove residue, then rinse and dry.
Why blotting matters: Scrubbing warm wax spreads it into paint pores. Blotting lifts it like a tiny,
colorful oil spill you’re politely escorting off the premises.
Method 4: Iron + cloth barrier (fast for heavy crayon, but use common sense)
If the crayon is thick or widespread, the iron method can transfer melted wax onto fabriclike a reverse stamp.
This method is powerful, so keep the heat moderate and the barrier thick.
What you need
- Iron
- Old cotton T-shirt or several layers of cotton cloth
Steps
- Set the iron to medium (no steam).
- Fold the cloth into several layers and place it over the crayon mark.
- Press the iron gently over the cloth and move it slowly for a few seconds.
- Lift and check. Refold to a clean section of cloth so you don’t transfer wax back onto the wall.
- Finish with mild soap-and-water to remove any remaining film, then rinse and dry.
Safety note: Keep the iron moving and avoid high heatpaint can soften. If you’re nervous, use the hair
dryer method instead. It’s slower, but less risky.
Method 5: Magic Eraser (melamine sponge) quick, but handle with care
Magic Erasers work because melamine foam is a micro-abrasive. That’s why it removes crayon fastand also why it can
dull certain paint finishes if you go too hard.
Steps
- Wet the sponge and squeeze it out until it’s barely damp.
- Test in a hidden spot.
- Use light pressure and short strokes. Stop the moment the crayon lifts.
- Wipe with a damp cloth to remove residue, then dry.
Best for: eggshell/satin/semi-gloss paints, scuffs mixed with crayon, and “I need this gone before my
in-laws arrive” situations.
Method 6: Toothpaste (the non-gel, mildly abrasive backup plan)
Plain white toothpaste (not gel) can act like a gentle polish. It’s especially handy for small marks.
Steps
- Put a pea-sized dab of white toothpaste on a damp microfiber cloth.
- Rub gently in circles over the crayon.
- Wipe with a clean damp cloth to remove paste, then dry.
Tip: If your wall finish is flat or you’re dealing with dark paint, test carefullyany abrasive can
change the sheen.
Method 7: Vinegar + soap solution (for smudgy residue and “ghost marks”)
Sometimes you remove the wax, but a faint stain remains. A mild vinegar-and-soap mix can help cut residue without
going nuclear.
Quick mix
- 1 quart warm water
- 1 teaspoon dish soap
- 1/2 cup distilled white vinegar
Steps
- Dampen a microfiber cloth in the solution and wring well.
- Gently wipe the area.
- Rinse with clean water on a separate cloth, then dry.
Important: Vinegar can be too strong for some paints if left sitting. Use a light touch, rinse, and
dry promptly.
Last-resort options (use only if gentle methods fail)
Option A: Oil-based “wax breakers” (mayo or a tiny bit of cooking oil)
Because crayon is waxy, oils can loosen it. The catch: oils can also leave greasy residue that attracts dirt. If you
try this, you must follow up with dish soap and water.
- Apply a small amount of mayonnaise (or a drop of oil) to a cloth, not directly to the wall.
- Rub lightly and let it sit for a few minutes.
- Wipe away, then wash with dish soap and water, rinse, and dry.
Option B: Strong cleaners / solvents (proceed carefully)
Some guides mention rubbing alcohol or commercial wall cleaners for tough marks. These can work, but they may also
soften or remove paintespecially on flat finishes or older walls. If you use anything stronger than dish soap:
spot test, use minimal product, and stop if paint transfers to your cloth.
Special cases: wall finish and surface type matter
Flat and matte paint: the “looks great, cleans like a peach” problem
Flat paint hides imperfections beautifully… and then punishes you for touching it with enthusiasm. For flat/matte:
- Start with water or dish soap, using minimal moisture.
- Prefer heat-and-blot over scrubbing if wax is thick.
- If you must use baking soda or a Magic Eraser, use feather-light pressure and stop early.
Eggshell, satin, semi-gloss: generally more forgiving
These finishes typically tolerate gentle cleaners better. Dish soap, baking soda paste (lightly), and a Magic Eraser
(carefully) are usually effective here. Still: test first.
Textured walls (orange peel, knockdown)
Texture grabs wax like it’s trying to start a long-term relationship. Use heat (hair dryer) to soften wax, then blot.
For remaining pigment in grooves, use a soft toothbrush with mild soap solutiongentle strokes.
Wallpaper
Wallpaper can be washable, wipeable, or “touch it wrong and it cries.” Avoid soaking. Try the least wet approach first:
gentle dry rubbing with a soft cloth, then tiny amounts of mild cleaner on a cloth. If you’re unsure, stop and consult
the wallpaper manufacturer’s cleaning instructions.
What NOT to do (unless you enjoy repainting)
- Don’t use green abrasive scrub pads (they can scratch and burnish paint).
- Don’t scrape with a razor (you’ll gouge drywall faster than you can say “touch-up kit”).
- Don’t flood the wall with water (drywall and moisture are not best friends).
- Don’t start with harsh solvents (jumping to “strong stuff” is how paint disappears).
- Don’t forget the rinse (cleaner residue can attract dirt and make a new stain magnet).
When cleaning isn’t enough: the “crayon shadow” problem
Occasionally, especially on flat paint or porous surfaces, you’ll remove the wax but still see a faint tintlike the
wall remembers the art emotionally. If multiple gentle passes don’t fix it, your best move may be:
- Clean thoroughly, rinse, and let it dry completely.
- If a stain remains, use a stain-blocking primer and touch-up paint (best matched to your wall).
This is also a smart option if the wall finish got burnished by scrubbingtouch-up can restore an even sheen where
cleaning can’t.
Mini FAQ
Will a Magic Eraser remove paint?
It can, especially on flat/matte paint or if you use heavy pressure. Think of it as ultra-fine sandpaper in sponge
form: effective, but deserving of respect. Spot test and use a light touch.
What if the crayon is “washable”?
Washable crayons usually come off more easily with dish soap and warm water. Still, wax is waxheat and gentle abrasion
can help if soap alone struggles.
How do I avoid clean spots?
Use the gentlest method that works, blend outward beyond the stain slightly, and dry the area evenly. Over-scrubbing
one small spot (especially on flat paint) can change the sheen.
Real-world experiences and lessons learned (the “been there” section)
If you’ve ever walked into a room and immediately sensed something was “off,” you know the feeling: the wall looks
normal from across the room… until you get closer and realize someone has signed their name in fluorescent green
crayon at eye level. The first lesson most people learn is that speed beats strength. Fresh crayon
comes off with dish soap and warm water far more easily than crayon that’s had a full weekend to bond with your paint.
A quick wipe the day-of often prevents the whole “cleaning marathon” later.
The second big lesson is about paint finish. Folks with satin or semi-gloss walls tend to have a
straightforward cleanup: soap, rinse, dry, done. But anyone with matte/flat paint learns the hard way that aggressive
scrubbing can leave a shiny “clean spot” that’s almost worse than the crayon. In those cases, heat-and-blot becomes
the hero. It feels counterintuitivewarming the wall like you’re giving it a spa treatmentbut it removes wax with less
friction. Less friction means fewer visible changes to the finish.
Another common experience: texture changes everything. On an orange-peel wall, the wax can settle into
little valleys, and wiping smears pigment across the peaks. The trick that usually saves the day is to soften the wax
with a hair dryer, blot it up, then use a soft toothbrush with mild soapy water to coax color out of the tiny grooves.
People who try to “power-scrub” texture often end up fuzzing the paint surface or snapping off bits of dried wax that
leave even more streaks.
Then there’s the “I used the Magic Eraser and now the wall looks… different” moment. This happens when the eraser is
used like a sanding block instead of a gentle spot tool. The best real-life workaround is to stop early.
If you can get 90% of the crayon off with light pressure, do itand finish the last 10% with heat or mild soap rather
than grinding away at the paint. Many people also find it helps to wipe a slightly larger area (lightly) so the sheen
blends, instead of creating a bright, crisp circle where the wall was “polished” into a new personality.
One more experience that pops up a lot: the dreaded ghost stain. You cleaned, you rinsed, you dried,
and yet there’s still a faint shadowusually from darker crayons like red, blue, or black. This is where patience
matters. Let the wall dry completely (seriouslywalk away, drink water, resist the urge to keep rubbing). Sometimes the
damp paint makes the stain look worse than it is. If it’s still there when dry, a gentle vinegar-and-soap wipe can help.
And if that doesn’t work? The most practical “grown-up” solution is spot priming and touch-up paint. It’s not defeat;
it’s home maintenance. Even the best walls occasionally need a little cosmetic reset after an art exhibit.
Finally, many parents (and babysitters, and exhausted older siblings) discover a sneaky bonus: teaching cleanup can be
part of the lesson. Not as punishmentmore like “Hey, artists clean their brushes.” Hand over a damp cloth (safe,
non-toxic, supervised), and let the tiny Picasso help. It won’t be perfect, but it builds the habit that walls are not
a free-for-all gallery. Plus, it reduces the odds of your hallway turning into a recurring series titled
“Crayon Seasons: Now in 12 Episodes.”
Conclusion
To get crayon off the wall quickly, start gentle: dish soap and warm water with a wrung-out microfiber cloth. If wax
clings, move up to baking soda paste or heat-and-blot with a hair dryer. Save Magic Erasers and stronger options for
tough casesand always test first, especially on flat paint. With the right method, you’ll get your wall back to its
original job description: quietly existing and not starring in modern art.