Table of Contents >> Show >> Hide
- Quick 30-Second Check: Does This Video Even Have a Transcript?
- Way 1: Use YouTube’s Built-In “Show Transcript” (Fastest + Free)
- Way 2: Download Captions as a Transcript (Best for Your Own Videos)
- Way 3: Create a Transcript When YouTube Doesn’t Provide One
- Option A: Google Docs Voice Typing (Surprisingly Effective)
- How to Improve Accuracy (So Your Transcript Doesn’t Read Like Alien Poetry)
- Option B: Chrome Live Caption (Great for Quick Captions While You Work)
- Option C: Windows 11 Live Captions (System-Level Captions for Any Audio)
- Option D: Use a Transcription Service (Best for “I Need This Clean”)
- Common Problems (and Fixes That Don’t Involve Screaming at Your Screen)
- FAQ
- Real-World Transcript Experiences (500-ish Words of “Yep, Been There” Energy)
- Conclusion
YouTube transcripts are the secret weapon of students, creators, researchers, and anyone who’s ever yelled,
“WHAT did they say?!” at a laptop. A good transcript lets you skim instead of scrub, quote accurately, translate faster,
and find that one perfect line without replaying the same 12 seconds like it’s a cursed GIF.
Here’s the catch: YouTube only shows a built-in transcript when a video has captions available (creator-added or auto-generated).
When captions don’t existor are disabledyou can still get a transcript, but you’ll need to generate one yourself using speech-to-text.
That’s exactly what this guide covers, in three easy, practical ways.
Quick 30-Second Check: Does This Video Even Have a Transcript?
- Look for captions: If the video has captions, you’ll usually see a CC option in the player controls (or in Settings).
- No captions = no built-in transcript: If captions are disabled or unavailable, the “Show transcript” option may not appear at all.
- Auto-captions can take time: New uploads sometimes need processing time before captions/transcripts show up.
Way 1: Use YouTube’s Built-In “Show Transcript” (Fastest + Free)
This is the easiest method because YouTube hands you the transcript on a silver plattertimestamps and all.
Great for studying, quoting, taking notes, and pretending you “read the whole video” (we won’t tell).
On Desktop (Chrome, Edge, Safari, etc.)
- Open the video on YouTube.
- Open the description area (often by clicking …more or expanding the description under the title).
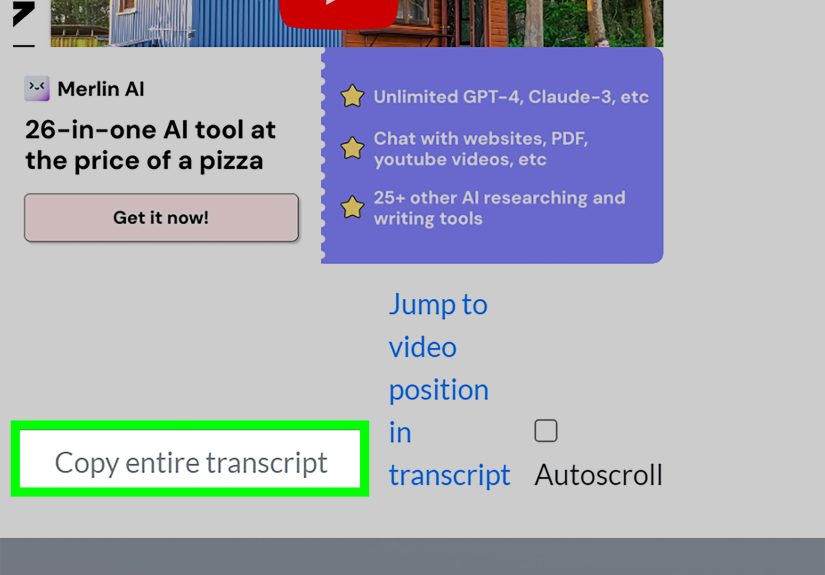
- Click “Show transcript.” A transcript panel will appear beside or below the video.
-
Jump to any moment: Click a line in the transcript and the video should jump to that spot.
(It’s basically “teleportation,” but with fewer side effects.) - Copy the text: Click into the transcript panel, highlight what you need, then copy/paste into Notes, Google Docs, Word, or wherever your ideas live.
Pro Tips for Desktop
-
Search inside the transcript: After clicking into the transcript panel, use Ctrl+F (Windows) or Cmd+F (Mac)
to find keywords fastlike “budget,” “formula,” or “the part where they finally explain the thing.” -
Toggle timestamps (if available): Some videos show a menu in the transcript panel that lets you hide timestamps,
making it easier to copy clean text. -
Try another language: If the video has multiple caption tracks, the transcript may let you switch languages.
Handy for language learners and bilingual households (or anyone who accidentally clicked a tutorial in Spanish and decided to commit).
On Mobile (YouTube App)
Mobile transcript access can vary a bit by device and app version, but here’s the typical path:
- Open the video in the YouTube app.
- Tap the title or “More” to expand the description/details area.
- Tap “Show transcript.” The transcript should appear as a scrollable panel.
Mobile Copying Tricks (Because Phones Love Making Simple Things Weird)
-
Try “Desktop site” in your mobile browser: If copying from the app is annoying,
open the video in a mobile browser and request the desktop version of the siteoften easier to highlight and copy. -
Copy only what you need: If full-copy is stubborn, grab key quotes plus timestamps.
You’ll still look extremely prepared in your meeting/classeven if you did it in the elevator.
Way 2: Download Captions as a Transcript (Best for Your Own Videos)
If you’re the video owner (or have channel access), YouTube Studio gives you more control than the public “Show transcript” view.
You can download caption files (like .srt or .vtt) and turn them into clean text.
Step-by-Step in YouTube Studio
- Sign in and open YouTube Studio.
- Go to Subtitles in the left menu.
- Select the video you want.
- Under the language track, click Edit (or open the track), then find the Options menu.
- Select “Download subtitles.” Your browser downloads the caption file.
Which File Format Should You Choose?
- .SRT (SubRip): Common, easy to edit, includes timestamps and sequence numbers.
- .VTT (WebVTT): Web-friendly caption format, also includes timing.
- .SBV: Another YouTube-supported caption format you may see depending on your options.
Turn a Caption File Into Clean Text (No Fancy Software Needed)
If you just want plain text, here’s a simple approach:
- Open the downloaded file in a text editor (Notepad, TextEdit, VS Code, etc.).
- Delete timestamp lines (they look like 00:00:01,000 –> 00:00:04,000 in SRT).
- Delete number-only lines (SRT often has 1, 2, 3… as caption counters).
- Join lines into paragraphs and add punctuation where it improves readability.
Why this method rocks: you can edit mistakes, keep a clean archive, repurpose content into blog posts,
and create accurate quotes without playing detective with the pause button.
Way 3: Create a Transcript When YouTube Doesn’t Provide One
Sometimes “Show transcript” is missing because captions are unavailable, disabled, or the audio is mostly music.
In those cases, you can still get a usable transcript by generating your own with speech-to-text tools.
This method is also great when you want a transcript in your own style (cleaner sentences, speaker labels, fewer “ummms,” etc.).
Option A: Google Docs Voice Typing (Surprisingly Effective)
Google Docs can type what it hears. So if you play the YouTube video out loud and let Google Docs “listen,”
you’ll get a rough transcript you can polish.
- Open Google Docs in a supported browser (Chrome is the usual best bet).
- Create a new document.
- Go to Tools > Voice typing.
- Choose the language, then click the microphone icon.
- Play the YouTube video on speakers (moderate volume, quiet room), and let it transcribe.
- When done, click the microphone again and edit the text.
How to Improve Accuracy (So Your Transcript Doesn’t Read Like Alien Poetry)
- Use clean audio: Reduce background noise and avoid echo-y rooms.
- Speak punctuation (optional): If you’re dictating yourself, saying “comma” and “period” helps formatting.
- Work in chunks: Pause every few minutes to let the text catch up, then continue.
- Do a quick cleanup pass: Fix names, technical terms, and homophones (their/there/they’rethe classic trio of chaos).
Option B: Chrome Live Caption (Great for Quick Captions While You Work)
If you mainly need to read along, grab key quotes, or follow complex speech, Chrome’s Live Caption can display real-time captions
for audio playing in the browser.
- Open Chrome.
- Go to Settings > Accessibility.
- Turn on Live Caption.
- Play your YouTube video and watch captions appear in a small caption bubble.
Note: Live Caption is fantastic for understanding and note-taking. Exporting it as a perfect transcript isn’t always seamless,
but it’s a lifesaver when you just need the words on screen right now.
Option C: Windows 11 Live Captions (System-Level Captions for Any Audio)
Windows 11 can generate live captions across apps, not just inside one browser tab.
That means you can caption YouTube audio (and basically anything else making noise on your PC).
- Shortcut: Press Win + Ctrl + L to open Live Captions (if enabled on your device).
- Customize caption style and language in the Live Captions settings panel.
Option D: Use a Transcription Service (Best for “I Need This Clean”)
If you need high accuracylike for publishing, accessibility, or quoting in professional workconsider transcription services.
Many can generate a transcript from uploaded audio/video files and provide exports you can edit.
- Human + AI services: Often more accurate, especially for multiple speakers, names, and technical topics.
- AI-first tools: Usually faster and cheaper; great if you’re okay doing a cleanup pass.
Important: Only transcribe content you have the rights or permission to use. For public videos, transcripts are often fine for
personal study and note-taking, but publishing large chunks may raise copyright issues. When in doubt, quote short sections and add your own commentary.
Common Problems (and Fixes That Don’t Involve Screaming at Your Screen)
“Show transcript” isn’t there
- Captions may be unavailable or disabled by the creator.
- The video may still be processing auto-captions (especially new uploads).
- You may need to sign in for age-restricted or limited-access videos.
- Try desktop: Some features are easier to access on desktop than mobile.
The transcript exists, but it’s messy
- Auto-captions aren’t perfectaccents, background noise, and fast speech can confuse transcription systems.
- Fix it fast: Keep the original transcript for reference, then paste into a document and clean it into readable paragraphs.
- Keep timestamps for citations: If you’re using the transcript for research, timestamps help you quote accurately.
FAQ
Can I get a transcript from “any” YouTube video?
You can get a transcript from any video in practice, but the method changes. If captions are available, YouTube’s built-in transcript is easiest.
If captions are unavailable or disabled, you’ll need to generate your own transcript using voice typing, live captions, or a transcription tool.
Is a transcript the same as subtitles/captions?
They’re closely related. YouTube transcripts usually reflect the caption track (creator-made or auto-generated).
Captions/subtitles are timed for playback; transcripts are typically the readable, scrollable text version.
Can I download a transcript directly from YouTube?
For most viewers, YouTube makes it easiest to copy from the “Show transcript” panel. For creators, YouTube Studio lets you
download subtitle files you can convert to text.
Real-World Transcript Experiences (500-ish Words of “Yep, Been There” Energy)
Imagine you’re studying for a test and your professor assigns a 42-minute YouTube lecture titled something like
“Unit 7 Review (FINAL) (Actually Final) (Promise).” You start with the best intentions. Five minutes in, the lecturer says,
“This next part is important,” and your brain immediately files that under “future me problem.”
That’s where transcripts save the day. You pop open Show transcript, hit Ctrl+F, and search for keywords from your notes:
“mitosis,” “opportunity cost,” “derivative,” whatever academic monster you’re facing. Suddenly, instead of rewatching the whole video,
you’re jumping straight to the exact lines you need. It feels less like studying and more like having a cheat code for time.
Or picture a small business owner trying to turn one YouTube livestream into a week of content (because productivity is basically a sport now).
With the transcript copied into a doc, they highlight customer questions, pull out the best one-liners, and turn them into:
a blog post, five social captions, and a tidy FAQ page. Without a transcript, this “repurposing” plan becomes a “rewatching” plan,
which becomes a “staring at the ceiling” plan. With a transcript, it’s suddenly realistic to grab quotes like:
“Here’s the one mistake everyone makes when picking a budget…” and build content around itfast.
Then there’s the moment you realize the video you need has no transcript option at all. Maybe it’s older, maybe captions are disabled,
or maybe the audio is more “mysterious background music” than “clear spoken words.” This is when DIY transcription earns its paycheck.
Google Docs Voice Typing becomes your scrappy sidekick: you set your laptop volume to a reasonable level, turn on voice typing,
and let it capture the audio as text. The first draft comes out a little roughnames misspelled, punctuation missing, and at least one sentence
that reads like it was written by a sleepy raccoonbut you can clean it up. The key is that you now have something editable.
You can add speaker labels, break up paragraphs, and fix the technical terms that the microphone bravely guessed at.
And yes, sometimes you only need one specific quote. The transcript helps you avoid the classic “rewind 10 seconds… no, too far…
forward 5… wait, what did they say?” loop. You can grab the line, note the timestamp, and move on with your life like a calm, organized human.
Transcripts don’t just save timethey reduce frustration. And in the modern world, that’s basically priceless.
Conclusion
If a YouTube video has captions, YouTube’s built-in transcript feature is your fastest route: open Show transcript, search, jump, copy, done.
If you own the video, YouTube Studio lets you download caption files and convert them into clean text. And if the transcript doesn’t exist at all,
tools like Google Docs Voice Typing, Chrome Live Caption, or Windows Live Captions can help you create one anyway.
Pick the method that matches your situation, and you’ll spend less time hunting for words and more time actually using themstudying, writing,
editing, learning, building, shipping. (Or, at minimum, finishing the assignment before midnight.)