Table of Contents >> Show >> Hide
- Quick Diagnosis: What’s Actually Wrong?
- Tools & Supplies You’ll Actually Use
- Step 1: Shut Off Water and Set Yourself Up for Success
- Fix #1: Stop a Drip from the Spout (Cartridge Replacement)
- Fix #2: Leak at the Base of the Spout (O-Rings and Spout Seals)
- Fix #3: Low Water Pressure or Weak Flow (Aerator, Screen Washer, Filters)
- Fix #4: Sprayer Problems (Leaks, No Retract, Quick-Connect Confusion)
- Fix #5: Handle Problems (Stiff, Loose, or Won’t Stay Put)
- Fix #6: Hot and Cold Are Reversed
- When It’s Time to Call a Pro
- 5-Minute Maintenance That Prevents 50-Minute Repairs
- Real-World Repair Experiences (Lessons You’ll Probably Recognize)
- Conclusion
A Moen kitchen faucet is basically the MVP of your sinkuntil it starts dripping like it’s auditioning for a sad indie film.
The good news: most Moen faucet problems are repairable with basic tools, a little patience, and the courage to look
under your sink without immediately backing away.
This guide walks you through the most common Moen kitchen faucet fixesdrips, base leaks, low flow, sprayer issues, and stiff handles
using clear steps and model-friendly tips (Moen loves cartridges the way your junk drawer loves mystery keys).
Quick Diagnosis: What’s Actually Wrong?
Before you start removing parts like you’re defusing a movie bomb, match your symptom to the likely cause:
- Drip from the spout (even when “off”): Worn cartridge or internal seals.
- Water leaking at the base of the spout: Spout O-rings are worn or gunked up.
- Leak under the handle/escutcheon: Cartridge seals, retaining nut, or O-rings.
- Low water pressure/weak stream: Clogged aerator, screen washer, inlet filter screens, or debris in cartridge.
- Sprayer wand weak, splattery, or not retracting: Screen washer clog, hose obstruction, weight position, or quick-connect issue.
- Handle stiff/hard to move: Cartridge wear/mineral buildup (replacement usually beats “wrestling”).
- Hot and cold reversed: Cartridge orientation issue on certain models.
Tools & Supplies You’ll Actually Use
Most Moen kitchen faucet repairs don’t require a plumber’s truckjust a small “grown-up LEGO” kit of tools:
- Adjustable wrench (or two, if you like options)
- Phillips and flathead screwdrivers
- Hex (Allen) wrenches3/32″ is common on Moen set screws, but have a small set handy
- Channel-lock pliers (use gently, like you’re holding a sandwich)
- Needle-nose pliers (great for clips and tiny parts)
- Silicone plumber’s grease (not petroleum jellyyour O-rings deserve better)
- Replacement parts: cartridge (1225 / 1255 / 4000 / 40002 / 1224), O-rings, aerator, screen washer
- Towel, small bowl, flashlight, and something to plug the drain
- Optional but helpful: cartridge puller tool (for stuck 1200/1225-style cartridges)
Step 1: Shut Off Water and Set Yourself Up for Success
- Turn off the hot and cold shutoff valves under the sink (clockwise). If they’re stiff, go slowforcing old valves can create a new problem.
- Open the faucet to relieve pressure and confirm the water is off.
- Plug the drain or cover it with a towel. Tiny clips love disappearing.
- Take a quick photo of the faucet/parts as you go. This is your “reassembly insurance.”
Fix #1: Stop a Drip from the Spout (Cartridge Replacement)
If your Moen kitchen faucet drips from the spout when it’s off, the cartridge is the usual suspect.
Moen uses several cartridge styles depending on faucet type and age. Your job is to identify which one you havethen swap it.
Identify Your Moen Cartridge (The “Know Thy Cartridge” Moment)
Many Moen single-handle kitchen faucets use cartridges like 1225, 1255 (Duralast), or
4000/40002. Two-handle Moen faucets commonly use 1224 cartridges (one per handle).
If you don’t know the installation year, you may need to remove the handle to confirm.
Helpful clues:
- Single-handle with a U-shaped retaining clip: Often a 1225-style setup.
- Single-handle with a big hex retaining nut: Common with 4000/40002 and some newer designs.
- Two handles (hot/cold): Often 1224 cartridges (replace the leaking side).
Remove the Handle (Without Starting a Handle-War)
- Find the set screw (often behind a small red/blue plug or on the back/side of the handle).
- Use the correct hex wrench3/32″ is common on many Moen kitchen handles, though some models use a different size.
- Loosen the set screw and lift off the handle. If it’s stuck, gently wiggledon’t pry like you’re opening a paint can.
- Remove any decorative cap, dome, or trim piece to expose the cartridge retaining method (clip or nut).
Remove the Retainer (Clip or Nut)
If you see a U-shaped clip:
- Use needle-nose pliers to pull the clip straight up.
- Set it somewhere safe (preferably not “the countertop void”).
If you see a brass hex retaining nut:
- Use pliers or an adjustable wrench to turn the nut counterclockwise.
- Go steadyover-aggressive teeth can scar soft metal. A cloth between tool and nut helps.
Pull the Cartridge (and What to Do If It’s Stuck)
- Grip the cartridge stem and pull straight out.
- If it won’t budge, twist gently to break mineral buildup before pulling again.
-
If it’s truly stuck, consider using a cartridge puller tool designed for that cartridge style.
This is especially useful on older cartridges that have bonded themselves to the valve body like they’re paying rent.
Pro tip: Once the cartridge is out, look inside the valve body. If you see grit or mineral buildup, wipe it clean and flush briefly (with the cartridge removed) to clear debrisjust keep the water controlled and aim it safely into a bucket or towel.
Install the New Cartridge Correctly
- Match the new cartridge exactly to the old one (shape, tabs, length).
- Lightly apply silicone plumber’s grease to O-rings (a thin film, not a frosting job).
- Align cartridge tabs with the notches inside the valve body and press it fully into place.
- Reinstall the retaining clip or nut. Tighten snuglydon’t over-tighten like you’re sealing a submarine hatch.
- Reassemble the handle and trim.
Test for Leaks
- Turn water back on slowly under the sink.
- Run the faucet and check for leaks at the handle base and under the sink.
- Turn off and confirm the drip is gone. If it still drips, re-check cartridge seating and alignment.
Fix #2: Leak at the Base of the Spout (O-Rings and Spout Seals)
If water pools around the faucet base or you see moisture creeping out from under the spout,
you’re usually looking at worn spout O-rings. The good news: O-rings are cheap. The bad news: they can be oddly determined to stay hidden.
How to Replace Moen Spout O-Rings
- Shut off water and relieve pressure (yes, againthis is your new pre-game ritual).
- Remove the handle and handle mechanism components as needed to access the spout collar/retainer.
- Depending on the model, you may remove a collar nut (often by turning counterclockwise) and then lift/rotate the spout off the valve body.
- Remove old O-rings. Clean the valve body and inside of the spout using a 50/50 vinegar-water solution to dissolve mineral buildup.
- Lubricate new O-rings with silicone grease, install them in the correct grooves, and lightly grease the mating surfaces.
- Reinstall the spout, retainer, and handle components.
Why this works: Those O-rings are the seals that stop water from traveling up and out around the spout base. When they flatten, crack, or get coated in mineral crust, they leakno drama required.
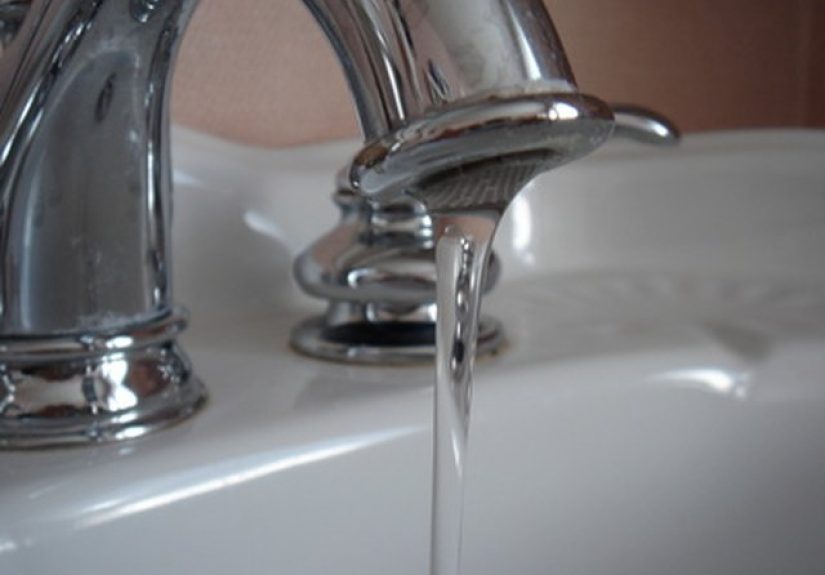
Fix #3: Low Water Pressure or Weak Flow (Aerator, Screen Washer, Filters)
If your Moen kitchen faucet flow suddenly feels like it’s trying to conserve water for a desert trek, don’t assume the faucet is “done.”
Most low-flow problems are simple blockages: aerator debris, clogged screen washers, or sediment in inlet filter screens.
Step A: Clean the Aerator
- Unscrew the aerator at the tip of the spout.
- Rinse debris and soak parts in vinegar-water if there’s mineral buildup.
- Reinstall and test flow.
Heads-up about threading: Most aerators loosen when turned counterclockwise while looking up at the faucet tip (from below).
However, some designs and “cache” aerators can feel reversed depending on how they’re seated. If it won’t move, don’t force ittry the opposite direction and use the correct aerator key for recessed aerators.
Step B: Clean the Screen Washer in the Wand (Pull-Down/Pull-Out Models)
If your faucet has a pull-down/pull-out spray wand, there’s often a screen washer where the wand connects to the hose.
When it clogs, the wand output turns sad and chaoticlike a sprinkler with stage fright.
- Pull the wand out as far as the hose allows.
- Tie a cloth around the hose so it can’t retract while the wand is removed.
- Unscrew the wand from the hose coupling by hand while holding the coupling steady.
- Remove the screen washer from inside the hose coupling or the wand’s threaded end.
- Rinse the screen washer under running water; remove debris.
- Reinstall the screen washer, reconnect wand hand-tight, then tighten just a tiny bit more (about 1/8 turn) if needed to stop leaks.
Step C: Check for Supply Line Filter Screens (Some Models)
Some newer Moen faucet setups include filter screens in the supply line connections.
If those screens clog with sediment, you’ll get low flow no matter how clean your aerator is.
Cleaning these screens (and reinstalling them) can restore normal performance.
Fix #4: Sprayer Problems (Leaks, No Retract, Quick-Connect Confusion)
Sprayer Won’t Retract (or Feels “Sticky”)
Most retraction issues are mechanical, not magical:
- Hose snagging on cleaning bottles, pipes, or the shutoff valves under the sink.
- Weight out of position on the hose (common after someone stores “just one thing” under the sink… and it becomes a whole pantry).
- Mineral buildup causing friction at the spout outlet.
Clear the cabinet area around the hose path and make sure the weight can move freely without hitting obstacles.
Quick-Connect Hose Leaks or Disconnections
Moen uses several quick-connect styles under the sink depending on era and model.
The disconnect method depends on the connector:
- Black connector with white release tabs: Squeeze tabs and push in, then pull hose free.
- White connector with black release tab/button: Press and hold the tab/button while pulling hose free.
When reconnecting, you should usually feel or hear an audible “click,” then give a gentle tug test to confirm it’s locked.
If it still leaks, inspect O-rings or replace the connector/service kit for that hose style.
Fix #5: Handle Problems (Stiff, Loose, or Won’t Stay Put)
Handle Is Hard to Operate
If a Moen kitchen faucet handle feels stiff, gritty, or harder to move than it used to be, the cartridge is often worn or mineral-bound.
In many cases, replacing the cartridge is the cleanest fix (and saves you from daily thumb workouts you didn’t ask for).
Handle Is Loose or Wobbly
- Locate the set screw (behind the cap or on the handle).
- Tighten it with the correct hex wrench.
- If it keeps loosening, check for stripped threads or a worn handle adapter.
Handle Won’t Stay in the “On” Position After a Cartridge Swap
This can happen if the cartridge isn’t seated correctly, the retaining nut is loose, or a small washer/connector part wasn’t transferred during installation (depending on model).
Double-check alignment, snug the retaining nut, and review the handle connector pieces before assuming the faucet is possessed.
Fix #6: Hot and Cold Are Reversed
Some cartridge-based designs can end up reversed if the cartridge orientation is wrong during reinstallation.
If your faucet suddenly thinks “hot” means “arctic,” the fix may involve reorienting the cartridge or following the model-specific reversal procedure.
If you’re unsure, consult your model’s parts diagram and follow the recommended cartridge orientation.
When It’s Time to Call a Pro
DIY is greatuntil it isn’t. Consider calling a plumber if:
- Shutoff valves won’t close or begin leaking when touched
- The faucet body is corroded or cracked
- Leaks persist after replacing the correct cartridge and seals
- You find cabinet or countertop water damage that needs attention
Typical professional repairs for a leaky faucet are often in the low hundreds depending on complexity and local rates.
If you’ve already tried the easy fixes, paying for an expert diagnosis can be cheaper than replacing cabinetry later.
5-Minute Maintenance That Prevents 50-Minute Repairs
- Clean the aerator every few months (more often with hard water).
- Rinse screen washers if you notice spray changes or reduced flow.
- Keep the hose path clear under the sink so the wand retracts smoothly.
- Avoid over-tightening fittingssnug is good; crushed seals are not.
- Use silicone grease on O-rings during seal work to reduce friction and wear.
Real-World Repair Experiences (Lessons You’ll Probably Recognize)
Here’s the part nobody puts on the faucet box: fixing a Moen kitchen faucet is rarely “hard,” but it can be
weirdly specific. Most DIYers don’t get stuck because the repair is advancedthey get stuck because one tiny detail
changes between models, years, or handle styles. If you’ve ever removed a screw and immediately thought, “Well, that wasn’t in the video,”
congratulations: you’re officially repairing a faucet in real life.
A common experience: you go in to fix a simple drip and discover the handle isn’t held on by a top screw like you expected.
On many Moen kitchen faucets, the set screw is tucked behind a tiny plug or hidden on the back of the handle. You find it, you loosen it,
and the handle still won’t liftbecause mineral buildup has basically glued it in place. At this point, the best move is patience:
gentle rocking, steady upward pressure, and zero crowbar energy. A surprising number of “stuck handle” moments end with the handle popping off
dramatically (and you trying to look calm in case your neighbors saw).
Another classic: the cartridge is stuck. You pull. Nothing. You pull harder. Still nothing. You briefly consider whether the faucet and the cartridge
are now a single fused object. This is where twisting can help break the seal of mineral buildupespecially in hard-water homes.
If it still won’t come, many DIYers end up using a cartridge puller tool designed for the cartridge type. The emotional arc here is predictable:
denial, bargaining, one more pull, then “Okay, fine, I’ll use the tool.” The moment the cartridge finally releases, you’ll feel like you won an Olympic event
called Indoor Plumbing Wrestling.
Low flow repairs also have a familiar storyline. People clean the aerator, reinstall it, and… nothing changes. That’s when you remember:
pull-down and pull-out faucets often have a screen washer at the wand connection, and it can clog with debris that never reaches the aerator.
When you unscrew the wand and see the tiny screen, it’s usually either packed with grit or coated with mineral scale.
After a rinse and reinstall, the faucet suddenly returns to normal power, and you realize you’ve been living with “weak faucet life” for way too long.
Then there’s the under-sink “quick-connect surprise.” Many people expect a threaded fitting but find a plastic connector with tabs or a release button.
The first attempt often involves pulling without pressing the releasebecause it looks like it should just pull off. It won’t. Once you learn the trick
(squeeze tabs, press the button, then pull), the connector comes apart neatly. When you reconnect, that audible click is your best friend.
Without it, you may turn the water back on and get a bonus shower in the cabinet.
Finally, there’s the “why is it still leaking?” moment. In many cases, it’s not because the repair failedit’s because something is slightly misaligned,
a retaining nut isn’t snug, or a small seal didn’t seat correctly. This is why photos and part organization matter.
Lining up cartridge tabs with valve-body notches, reinstalling clips fully, and keeping seals lightly lubricated solves a huge percentage of repeat leaks.
The best DIY repairs aren’t heroic; they’re careful. And yescareful is still cool.
Conclusion
If your Moen kitchen faucet is dripping, leaking at the base, spraying strangely, or moving like it’s full of sand, you usually don’t need a full replacement.
Most fixes come down to a few serviceable parts: a cartridge, a couple O-rings, a clogged aerator, or a screen washer that’s doing its best to trap every speck of debris in your plumbing.
Work methodically: shut off water, identify the cartridge style, replace seals or cartridges as needed, clean flow restrictors/screens, and reassemble carefully.
With the right part and a calm approach, you can get your Moen faucet back to smooth, leak-free serviceno dramatic soundtrack required.