Table of Contents >> Show >> Hide
- Do You Really Need to Drain Your Pool?
- Best Time to Drain and Refill a Swimming Pool
- Tools and Supplies You May Need
- How to Drain and Refill Your Swimming Pool: 12 Steps
- Step 1: Test the Water and Confirm Why You’re Draining
- Step 2: Check Your Pool Type and Risk Level
- Step 3: Review Local Discharge Rules
- Step 4: Lower or Neutralize Chemicals if Required
- Step 5: Turn Off the Pool Equipment
- Step 6: Check Hydrostatic Risk Before a Full Drain
- Step 7: Clean Debris Before or During the Drain
- Step 8: Start Draining Slowly and Monitor the Pool
- Step 9: Inspect and Clean the Exposed Surfaces
- Step 10: Begin Refilling Immediately
- Step 11: Restart the System and Prime the Equipment
- Step 12: Balance the Fresh Water Before Swimming
- Common Mistakes to Avoid
- How Much Water Should You Replace?
- What Pool Owners Usually Experience During This Project
- Final Thoughts
- SEO Tags
Draining and refilling a swimming pool sounds simple enough: remove old water, add new water, admire your sparkling backyard kingdom. In reality, it is one of those home-maintenance jobs that can go from “weekend project” to “why is my pool trying to escape the yard?” surprisingly fast. If you do it correctly, though, a drain and refill can help reset water chemistry, reduce stubborn buildup, and give your pool a fresh start.
This guide breaks the process into 12 practical steps so you can handle the job with fewer surprises, less mess, and a much lower chance of making your pool extremely angry. You will also learn when not to drain a pool, why partial draining is often smarter than a full drain, and how to rebalance the water once the refill is complete.
Do You Really Need to Drain Your Pool?
Before you start hauling hoses around like an aquatic cowboy, make sure a drain and refill is actually necessary. In many cases, a partial drain and refill is enough. Pool owners often replace water to lower high cyanuric acid (CYA), reduce calcium hardness, dilute total dissolved solids, remove metals, or recover from badly neglected water chemistry.
If your water is clear and your test results are mostly reasonable, you may not need a full drain at all. But if your chlorine has stopped working well, your CYA is sky-high, your calcium hardness keeps causing scale, or your water has turned into a chemistry experiment with delusions of grandeur, replacing water may be the cleanest solution.
Situations where you should slow down and call a pro
A full drain is not a casual DIY move for every pool type. Fiberglass pools are especially risky to drain because groundwater pressure can damage or lift the shell. Vinyl liner pools can wrinkle, shift, shrink, or suffer liner damage if left empty too long. Even plaster inground pools can crack, dry out, or suffer structural issues if they are drained at the wrong time or left empty in hot weather.
That means the safest mindset is this: partial drain first, full drain only when truly necessary, and professional help when you are unsure.
Best Time to Drain and Refill a Swimming Pool
Timing matters more than many homeowners realize. Mild weather is your friend. Spring and fall are usually the safest seasons because extreme heat can dry exposed surfaces too quickly, while recent storms or a high water table can increase hydrostatic pressure around the shell.
Avoid draining right after heavy rain. Also avoid leaving an empty pool sitting around while you “get back to it later.” That is how small maintenance projects grow into expensive cautionary tales.
Tools and Supplies You May Need
- Submersible pump or approved drain setup
- Garden hoses for refill
- Pool test kit or quality test strips
- Protective gloves and eyewear
- Pool brush and leaf net
- Sump hose or discharge hose
- Water source for refill
- Pool chemicals for startup balancing
Now let’s get into the main event.
How to Drain and Refill Your Swimming Pool: 12 Steps
Step 1: Test the Water and Confirm Why You’re Draining
Start with a full water test. Check pH, chlorine, total alkalinity, calcium hardness, and cyanuric acid. This gives you a reason for the drain instead of a vague feeling that your pool has “bad vibes.”
For example, if your CYA is too high, a partial drain and refill may solve the problem. If calcium hardness is through the roof and scale keeps returning, water replacement may also be the right move. Testing first helps you figure out how much water really needs to go.
Step 2: Check Your Pool Type and Risk Level
Not all pools handle draining the same way. Above-ground pools, plaster pools, vinyl liner pools, and fiberglass pools each have their own limits. If you have a fiberglass pool, or if you live in an area with a high water table, treat a full drain as a professional-level job. This is not the moment for blind confidence and a YouTube degree.
If your pool is vinyl-lined, draining too much water can damage the liner. In many cases, pool owners should only do a controlled partial drain unless a pro advises otherwise.
Step 3: Review Local Discharge Rules
Before you pump out a single gallon, find out where the water is legally allowed to go. In many areas, chlorinated pool water cannot be sent into the street or storm drain. Some locations require discharge to the sanitary sewer. Saltwater pools may have even tighter restrictions.
This step is not glamorous, but fines are even less glamorous. A quick check with your local water, sewer, or stormwater authority can save you a major headache.
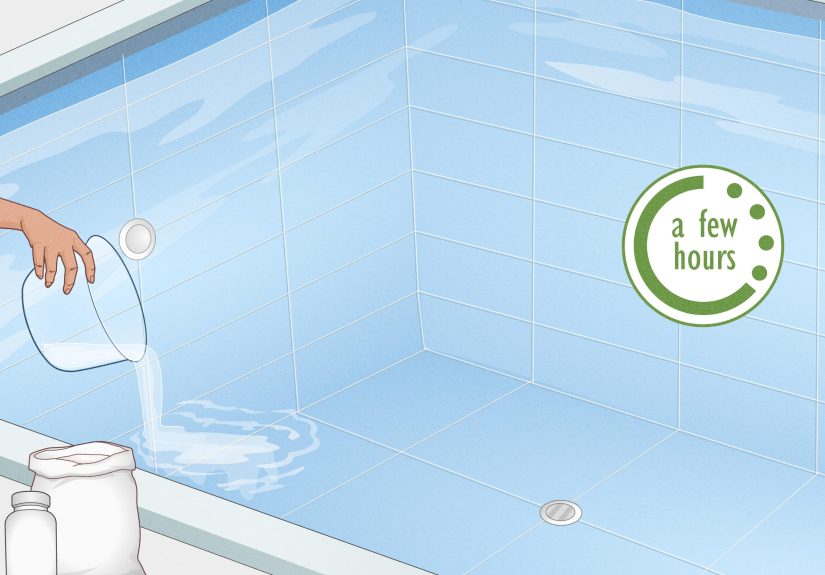
Step 4: Lower or Neutralize Chemicals if Required
If your local rules require dechlorinated water before discharge, plan ahead. Stop adding chlorine before the drain, allow levels to drop naturally if time permits, and test again. You may also need to make sure pH falls into an acceptable range before discharging water.
Think of this as being a good neighbor to the environment, your local waterways, and the person downstream who would prefer not to inherit your chemistry set.
Step 5: Turn Off the Pool Equipment
Shut off the pump, heater, automation, and any other connected equipment before draining. Never let the circulation system run dry. That is a fast track to damaging seals, overheating equipment, and spending your weekend shopping for replacement parts instead of enjoying your pool.
If your setup includes valves, air relief, or a multiport system, make adjustments carefully and only according to your equipment instructions.
Step 6: Check Hydrostatic Risk Before a Full Drain
This is the big safety step for inground pools. If your pool has hydrostatic relief valves or plugs, they must be functioning properly before a full drain. Groundwater pressure under an empty shell can cause a pool to lift, crack, or “pop” upward. That is not an expression. That is a budget-destroying reality.
If you do not know whether your pool has hydrostatic protection, or you are not confident evaluating it, stop here and call a licensed pool professional. A modest service fee beats structural damage every single time.
Step 7: Clean Debris Before or During the Drain
Skim leaves, scoop out branches, and brush debris toward the main collection areas. If your filter system has a waste setting, or if your setup allows bypassing the filter, use that method for heavy debris so you do not clog the filter media with muck. Dirty water belongs in the drain line, not trapped in your equipment like a smelly souvenir.
This step also makes refill and startup much easier because you are not beginning with sludge at the bottom of a freshly filled pool.
Step 8: Start Draining Slowly and Monitor the Pool
Use a submersible pump or the correct drain-to-waste configuration for your system. Keep the discharge hose pointed far enough away that the drained water does not flow back under or around the pool. Monitor the process instead of wandering off to “just do one quick errand.” Pool draining is not a crockpot recipe.
If you are only doing a partial drain, stop once you have removed the amount needed to dilute your chemistry. If you are doing a full drain, move efficiently and do not leave the shell empty longer than necessary.
Step 9: Inspect and Clean the Exposed Surfaces
Once the water is low enough, inspect the pool interior for scale, stains, debris, cracks, or worn fittings. Light cleaning is fine. Aggressive acid washing or surface repair is a separate project and should be approached carefully, especially on plaster.
For most homeowners, this is the ideal time to brush stubborn residue, remove leaves from corners, and check drains, fittings, and tile lines. Keep the work focused. The goal is refresh, not accidental renovation.
Step 10: Begin Refilling Immediately
As soon as you are done cleaning or inspection, start refilling the pool. Do not let an empty pool sit in the sun while you go look at lunch options. Refill as quickly as your water source allows.
If you have a vinyl liner pool, place the hose carefully to avoid shifting the liner. If you have plaster, continuous refill helps reduce the risk of drying and surface stress. In general, faster refill means less exposure and less risk.
Step 11: Restart the System and Prime the Equipment
When the water level is back where it should be, usually around the normal operating level for your skimmer, restart the system. Prime the pump if necessary, open any air relief valves according to your equipment instructions, and check for leaks or odd noises.
This is also the moment to confirm that water is circulating properly through returns, skimmers, and filtration equipment. If something sounds like a coffee grinder trapped inside a dishwasher, shut it back down and investigate.
Step 12: Balance the Fresh Water Before Swimming
Fresh fill water is not magically balanced just because it came from a hose. Test everything again. Adjust pH, sanitizer, alkalinity, calcium hardness, and stabilizer as needed. Do not assume your tap water is soft, neutral, or saintly.
In many home pools, the first priorities are:
- Bring pH into range
- Add chlorine or your chosen sanitizer correctly
- Adjust total alkalinity if needed
- Dial in calcium hardness based on your pool surface
- Add stabilizer only if appropriate for your outdoor pool
Let the water circulate, retest, and only swim once chemistry is in the safe zone and the water is clear.
Common Mistakes to Avoid
- Draining a fiberglass pool yourself: This is a classic “looked easy online” mistake.
- Draining after heavy rain: Groundwater pressure can rise when you least need drama.
- Sending water to the wrong place: Storm drains are often off-limits.
- Leaving the pool empty too long: Sun, heat, and pressure changes can damage surfaces.
- Skipping the post-refill water test: Fresh water still needs balancing.
- Running the pump dry: Your equipment will not forgive you.
How Much Water Should You Replace?
You do not always need a total refill. If your main problem is high CYA or high calcium hardness, replacing part of the water can make a major difference. As a general rule, the chemistry drops roughly in proportion to the amount of old water removed and replaced, though the chemistry of your fill water still matters.
Here is a practical example: if your CYA is around 100 ppm and your target is around 50 ppm, replacing about half the water may get you close. If your fill water is already hard, though, calcium hardness may not drop as dramatically as you hope. That is why testing before and after matters so much.
What Pool Owners Usually Experience During This Project
Let’s be honest: draining and refilling a pool is rarely anyone’s idea of a perfect Saturday. It is usually triggered by one of three scenarios. First, the pool store test comes back with numbers that look like lottery picks. Second, the pool has become stubbornly cloudy, scaly, or algae-prone. Third, a homeowner finally realizes they have been pouring in stabilized chlorine for months and have unintentionally created a tiny cyanuric acid museum.
One common experience is surprise at how long everything takes. The draining part seems straightforward until you realize water moves slower than your patience. Then the refill begins, and suddenly you are checking the hose every 20 minutes like it is a medical procedure. It is not hard work every second, but it does require attention, timing, and a little emotional resilience.
Another frequent experience is discovering that the pool looks worse before it looks better. As the water level drops, hidden debris shows up. Leaves appear from mysterious dimensions. Scale lines become obvious. Dirt clings to corners like it is trying to pay rent. This can be discouraging for first-time pool owners, but it is normal. The point of the project is not to prove your pool was secretly spotless. The point is to hit reset and make it manageable again.
Many homeowners also learn that “fresh water” does not automatically mean “perfect water.” You refill the pool, stand back proudly, run a test, and discover your pH is high, your alkalinity needs work, and your calcium hardness is doing something dramatic. That is why experienced pool owners tend to celebrate only after the second round of testing, not the first sight of a full waterline.
There is also the psychological part nobody mentions enough: draining and refilling a pool makes you unusually aware of every component you have been ignoring. Suddenly you care deeply about the skimmer, the return fittings, the hose routing, the backwash line, and whether your pump basket has “always sounded like that.” It turns pool maintenance from a vague background task into a very real system you now respect.
The good news is that most pool owners who go through the process carefully come away with a better understanding of their water chemistry and equipment. After one proper drain and refill, terms like CYA, calcium hardness, waste setting, and hydrostatic pressure stop sounding like technical jargon and start sounding like things you absolutely do not want to mess up next season.
Perhaps the biggest lesson people report is that prevention is easier than reset. Once you have spent hours managing hoses, testing refill water, and balancing the pool from scratch, you become a lot more motivated to test regularly, use the right chemicals, and avoid overloading the water with products that quietly build up over time. In other words, a drain and refill can be annoying, but it often turns a reactive pool owner into a smarter one.
And that may be the best outcome of all. Sure, sparkling water is nice. But sparkling water that did not require panic, guesswork, or backyard melodrama next month? Even nicer.
Final Thoughts
Learning how to drain and refill your swimming pool safely is really about understanding when to replace water, how to protect the pool structure, and how to restart the chemistry the right way. For many homeowners, a partial drain and refill is the safest and smartest choice. A full drain should be approached with caution, especially for inground, fiberglass, or vinyl liner pools.
If you respect the risks, follow local discharge rules, move quickly, and rebalance carefully, this project can restore your pool water and save you from months of fighting bad chemistry. And that means fewer cloudy-water tantrums, fewer chemical guessing games, and more time using the pool for what it was built for: floating around and pretending you have no responsibilities.