Table of Contents >> Show >> Hide
- What You Need Before You Start
- How to Do a Dip Powder Manicure in 15 Steps
- Step 1: Wash and sanitize your hands
- Step 2: Remove old polish completely
- Step 3: Trim and shape your nails
- Step 4: Gently push back your cuticles
- Step 5: Lightly buff away surface shine
- Step 6: Brush off dust and dehydrate the nail
- Step 7: Apply primer if your kit includes one
- Step 8: Paint a thin layer of base coat on one nail
- Step 9: Dip the nail into powder at a 45-degree angle
- Step 10: Repeat one nail at a time on the whole hand
- Step 11: Apply a second coat for opacity
- Step 12: Add a clear powder layer if desired
- Step 13: Brush away excess powder and apply activator
- Step 14: File and buff the nails smooth
- Step 15: Finish with top coat and cuticle oil
- Common Mistakes That Can Ruin a Dip Powder Manicure
- How Long Does a Dip Powder Manicure Last?
- Is Dip Powder Better Than Gel?
- How to Keep Your Natural Nails Healthy
- What the DIY Experience Is Really Like
- Final Thoughts
If you want nails that last longer than regular polish, skip the smudge drama, and look glossy enough to make your coffee mug jealous, a dip powder manicure is worth learning. Done right, dip powder nails can look smooth, feel strong, and stay pretty for weeks. Done wrong, they can look thick, lumpy, and vaguely like your fingertips lost a fight with powdered sugar.
The good news? You do not need salon superpowers to get a beautiful at-home result. You just need clean prep, thin layers, patience, and the willingness to work one nail at a time like a calm, collected nail wizard. In this guide, you will learn exactly how to do a dip powder manicure in 15 steps, plus the common mistakes to avoid, how long dip nails usually last, and what the real DIY experience feels like when you try it at home.
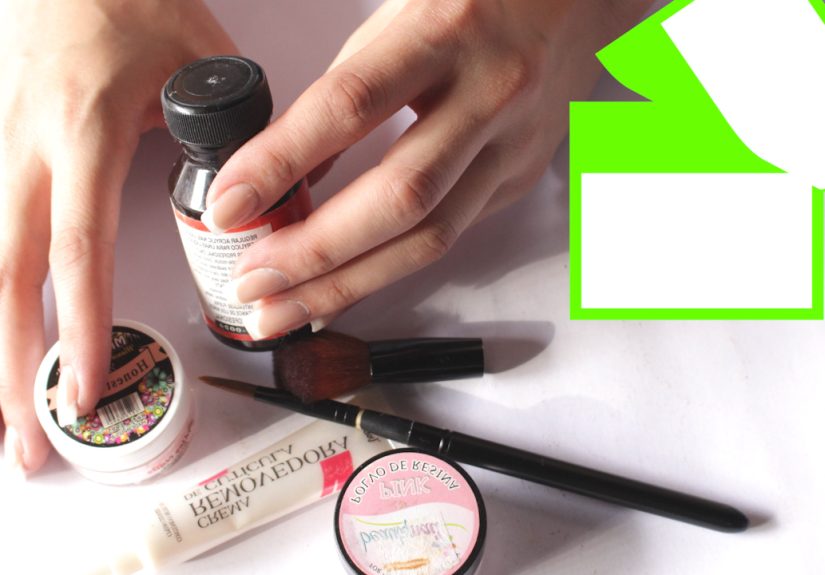
What You Need Before You Start
Before you begin, gather everything in one spot so you are not rummaging through drawers with one sticky finger in the air.
- Dip powder manicure kit
- Base coat or dip base liquid
- Activator
- Top coat
- Dip powder color and clear powder if your kit includes it
- Nail file and buffer block
- Cuticle stick or pusher
- Nail brush or soft makeup brush for dust
- Nail dehydrator or alcohol wipe
- Lint-free wipes or cotton pads
- Cuticle oil
A quick tip before we dive in: do your manicure in a well-ventilated area and avoid using dip products on irritated skin, broken cuticles, or nails that already look damaged. A fresh manicure is fun. A chemistry experiment on angry skin is not.
How to Do a Dip Powder Manicure in 15 Steps
Step 1: Wash and sanitize your hands
Start with clean hands and clean nails. Wash with soap and water, dry thoroughly, and make sure your nails are not damp before moving on. Dip powder sticks best to a clean, dry nail plate, not one that is still recovering from a mini hand spa.
Step 2: Remove old polish completely
Take off any leftover nail polish, oil, or residue. Even tiny traces of old product can interfere with adhesion and cause lifting later. If you are using remover, give your nails a minute to fully dry afterward.
Step 3: Trim and shape your nails
Clip only if you need to, then file your nails into your preferred shape. Round, squoval, almond, and soft square all work well for a dip powder manicure. Keep the shape consistent on every nail, because uneven edges become much more obvious once the color goes on.
Step 4: Gently push back your cuticles
Use a cuticle stick or pusher to gently nudge the cuticle area back. The goal is to clear the nail plate, not launch an attack on your skin. Do not cut your cuticles. Keeping product off the skin helps the manicure last longer and look neater.
Step 5: Lightly buff away surface shine
Use a buffer or a fine-grit file to remove the natural shine from each nail. You are not trying to thin the nail. You are just creating a slightly matte surface so the dip system has something to grip. Think of it as giving the product a better handshake.
Step 6: Brush off dust and dehydrate the nail
Dust is the enemy of a smooth finish, so brush every nail carefully, especially near the sidewalls and cuticle line. Then wipe each nail with alcohol or a nail dehydrator. This removes leftover oils and helps prevent early lifting.
Step 7: Apply primer if your kit includes one
Some dip powder kits come with a primer or bond. If yours does, apply a very thin layer and let it dry as directed. This step can help with adhesion, especially if your nails tend to be oily or your manicures usually chip early.
Step 8: Paint a thin layer of base coat on one nail
Now the real fun begins. Apply the dip base liquid to one nail only, using a thin, even layer. Stay just shy of the cuticle and sidewalls. Flooding the edges with product is one of the fastest ways to get bulky, uneven nails.
Step 9: Dip the nail into powder at a 45-degree angle
Immediately dip that nail into the powder at about a 45-degree angle. Tap off the excess. That angle helps the powder settle more evenly and reduces clumps. If you prefer, you can also spoon or sprinkle powder over the nail instead of dunking deeply into the jar.
Step 10: Repeat one nail at a time on the whole hand
Continue with each nail individually: base coat, dip, tap off. Resist the urge to paint base coat on all five nails first. Dip base dries quickly, and working one nail at a time gives you much better control. Yes, it is slower. Yes, it is worth it.
Step 11: Apply a second coat for opacity
Once the first round is complete, repeat the process with a second thin coat of base and another dip into the powder. Most colors look best after two coats. Some sheer shades or lighter colors may need a third coat. Keep the layers thin so the nails stay smooth instead of turning into tiny shoulder pads.
Step 12: Add a clear powder layer if desired
If your kit includes clear dip powder, add a final thin layer over the color. This can help protect the shade underneath and give you a better surface for filing and buffing. It is especially useful if you plan to smooth the nails more aggressively before top coat.
Step 13: Brush away excess powder and apply activator
Use a soft brush to remove all loose powder. Then apply activator over every nail. This is the step that hardens the layers and turns that soft, powdery finish into a durable manicure. Let it set according to the product directions. Do not rush it. Activator needs its moment.
Step 14: File and buff the nails smooth
Once the activator has dried, refine the shape and lightly buff the surface until the nails look smooth and even. Focus on the apex, sidewalls, and free edge. This is where your manicure goes from “homemade” to “how on earth did you do that yourself?” Wipe away all dust again when you are done.
Step 15: Finish with top coat and cuticle oil
Apply your top coat in thin, even strokes. Many dip systems need one or two coats for maximum shine, so follow the instructions in your kit. Once the top coat is dry, finish with cuticle oil around the nail. Your hands will instantly look more polished, more expensive, and more like someone who has their life together.
Common Mistakes That Can Ruin a Dip Powder Manicure
Even a solid dip powder manicure routine can go sideways if you make a few classic mistakes. Here are the biggest ones to avoid:
- Using thick coats of base liquid: Thick layers trap excess powder and create lumpy nails.
- Getting product on the skin: This can cause lifting, rough edges, and an uneven finish.
- Skipping prep: If the nail is oily, dusty, or shiny, the product may not stick well.
- Not brushing off powder between layers: Leftover powder builds texture you do not want.
- Rushing the activator: Filing too early can leave dents and drag marks.
- Over-buffing the natural nail: You only need to remove shine, not file your nails into sadness.
- Peeling off old dip product: This is one of the fastest routes to thin, weak nails.
How Long Does a Dip Powder Manicure Last?
A well-done dip powder manicure usually lasts around two to three weeks, and some people get even longer wear if they are gentle with their hands. In many cases, nail growth shows before the manicure actually chips. That durability is one reason dip powder nails are so popular with people who type all day, wash dishes, wrangle toddlers, open cans, or otherwise live in the real world where nails are expected to survive things.
To help your manicure last longer, wear gloves for cleaning, avoid using your nails as tools, and apply cuticle oil regularly. Dry, rough skin around the nails can make even a fresh manicure look tired.
Is Dip Powder Better Than Gel?
It depends on what you want. A dip powder manicure is often chosen for its durability, thickness, and long wear. Gel polish usually feels a little lighter and can look slightly thinner on the nail. Dip does not require a UV lamp to cure, which some people appreciate, but it can be trickier to remove and easier to overbuild if you are heavy-handed with the product.
If your priority is a strong, long-lasting manicure with rich color, dip powder nails are a great option. If you prefer a faster polish-style application and a slightly more flexible finish, gel might be more your speed. Neither one is magical if removed badly. Gentle removal matters every single time.
How to Keep Your Natural Nails Healthy
The best dip powder manicure is one that looks good and does not leave your natural nails begging for help afterward. Keep these habits in mind:
- Do not cut cuticles or pick at lifted product.
- Moisturize with cuticle oil daily.
- Give your nails a break if they look thin, sore, or overly dry.
- Do not keep reapplying over damaged nails without checking their condition.
- Remove dip powder gently with acetone and patience instead of prying it off.
If you notice redness, swelling, cracking skin, or pain around the nail, stop using the product and remove it carefully. Beauty is lovely, but discomfort is not a personality trait.
What the DIY Experience Is Really Like
Doing a dip powder manicure at home is one of those beauty tasks that feels hilariously easy in videos and suddenly very character-building in real life. The first time, you will probably move too slowly, wonder whether your base coat is drying faster out of spite, and discover that your non-dominant hand has the elegance of a confused raccoon. That is normal. Very normal.
The first thing most people notice is how much prep matters. If your nails are not clean, shaped, and lightly buffed, the entire manicure seems to go slightly off-script. The powder grabs unevenly, the edges look messy, and suddenly your “quick manicure night” turns into a tiny home renovation project for your fingertips. But when prep is done well, the whole process becomes smoother, and the final result looks dramatically better.
The next surprise is how important thin layers are. Beginners often assume more product equals more durability. In reality, more product usually equals thicker nails, weird lumps near the cuticle, and a manicure that looks less chic and more “I dipped my hands into cake mix and committed.” The sweet spot is controlled, even application. Once you understand that, the whole system starts to make sense.
There is also a distinct learning curve with timing. Dip liquids tend to reward decisiveness. Not panic, just decisiveness. When you paint on base coat and dip right away, the powder usually settles beautifully. When you hesitate because you are choosing between “Rose Petal Dream” and “Slightly Less Rose Petal Dream,” the product starts setting up before you are ready. That is why experienced DIYers often work one nail at a time and keep the powder jar open and close by.
Another very real part of the experience is shaping and buffing after activator. This is where the manicure transforms. Before filing, dip nails can look a little rough, powdery, or thicker than expected. After refining the surface, suddenly the shape sharpens, the curve looks intentional, and the manicure begins to resemble the glossy finish you were hoping for all along. It is the beauty equivalent of seeing your eyebrows after the last few tweezes and going, “Ah, there you are.”
Then comes the satisfaction factor, which is honestly one of the best parts. A successful dip powder manicure feels sturdy in a way regular polish does not. You tap your nails on a table and hear that tiny, confident click. You wash your hands without fear. You make it through a few days of normal life and realize nothing chipped. It is deeply satisfying, especially if you are someone who can destroy regular nail polish just by looking at a set of keys.
Of course, the experience is not perfect. Removal can be the least glamorous chapter, and impatience is the villain. Peeling or forcing off dip product can leave your natural nails weak and rough. But if you remove it slowly and keep your cuticles moisturized, the process becomes much less punishing. Over time, many people find that dip powder works best as an occasional long-wear option rather than a nonstop, back-to-back habit.
In short, the real experience of doing a dip powder manicure at home is a mix of patience, trial and error, tiny victories, and the oddly thrilling moment when both hands match and look like you absolutely know what you are doing. Even if your first attempt is not flawless, the second is usually better, the third is smoother, and by the fourth you may start casually leaving your hands near your face in photos like a person who just discovered main-character nails.
Final Thoughts
Learning how to do a dip powder manicure is mostly about mastering the basics: clean prep, thin layers, one nail at a time, careful filing, and gentle aftercare. Once you get those pieces right, a DIY dip manicure can give you shiny, durable, salon-inspired nails without needing a standing appointment every other week.
Take your time, do not overload the product, and remember that neat application beats fast application every time. Your first try does not need to be perfect. It just needs to be better than a chipped manicure from three days ago, and honestly, that bar is delightfully achievable.