Table of Contents >> Show >> Hide
- Before You Start: Know the Risks (and Why It’s Still Worth It)
- Tools and Supplies Checklist
- The 14 Steps (Disassemble → Clean → Reassemble)
- Step 1: Back Up and Prep Like a Pro
- Step 2: Full Shutdown, Unplug, and Cool Down
- Step 3: Do a Safe Exterior Cleaning First
- Step 4: Avoid the “Blow Dust Deeper” Trap
- Step 5: Remove the Hard Drive Cover (Optional, But Helpful)
- Step 6: Pop Off the Top Cover
- Step 7: Photograph Everything (Seriously)
- Step 8: Remove the Lower Shell and Shields (As Needed)
- Step 9: Disconnect and Remove the Power Supply (Carefully)
- Step 10: Access the Fan Assembly
- Step 11: Clean the Fan (Without “Over-Spinning” It)
- Step 12: Clean the Heatsink and Air Channels
- Step 13: Optional Advanced StepThermal Paste Refresh (Only If You’re Already Removing the Heatsink)
- Step 14: Reassemble, Test, and Fix the Root Cause (Dust Will Be Back)
- Common Mistakes (So You Don’t Become a “Before/After” Horror Story)
- FAQ: Quick Answers You Actually Need
- Extra : Real-World Experiences People Have Cleaning a PS4 Slim
Your PS4 Slim shouldn’t sound like it’s preparing for liftoff every time you launch a game. If the fan is loud, the console runs hot, or you’ve noticed dust bunnies collecting near the vents, a proper cleaning can help restore airflow and reduce heat buildup. This guide walks you through a careful, methodical disassembly and cleaning processthen puts everything back together without leftover screws (a true miracle).
We’ll keep things practical and safe: you’ll learn what to clean, what not to touch, and how to avoid the classic mistakes (like turning your fan into a windmill with compressed air). While this is written for the PS4 Slim, a lot of the best practices apply to any console cleaning session.
Before You Start: Know the Risks (and Why It’s Still Worth It)
Opening a PS4 Slim can void warranties and puts delicate components at risk if you rush or use the wrong tools. On the flip side, dust buildup can trap heat in the cooling path and make your fan work harder, which is why cleaning often helps with overheating warnings, sudden shutdowns, and “my console is screaming at me” fan noise.
Signs Your PS4 Slim Probably Needs a Cleaning
- Fan noise ramps up quickly and stays loud during gameplay
- The console feels unusually warm to the touch or displays overheating messages
- Dust is visibly packed around the vents
- You keep the console in a cabinet, on carpet, near pets, or in a dusty room
Quick Safety Rules (Non-Negotiable)
- Power down completely, unplug all cables, and let the console cool before opening it.
- Don’t use solvents or harsh cleaners on the console shell or inside components.
- Avoid vacuuming the interior directlystatic electricity can damage electronics.
- Use compressed air in short bursts and keep the can upright to reduce moisture risk.
- Hold the fan still when blowing airdon’t let it free-spin at high speed.
Tools and Supplies Checklist
You don’t need a NASA clean room, but you do need the right basics:
- Security Torx driver (commonly TR8/T8 security) and a Phillips screwdriver (#0 / #1)
- Plastic spudger or opening tool (avoid metal prying tools)
- Tweezers (optional, helpful for hair and dust clumps)
- Compressed air or an electric air duster
- Soft anti-static brush or a clean, soft paintbrush
- Microfiber cloth
- Isopropyl alcohol (ideally 90%+) and cotton swabs (for stubborn grime)
- Small containers or a screw organizer (labeling is your best friend)
- Optional (advanced): thermal paste (only if you remove the heatsink/APU interface)
The 14 Steps (Disassemble → Clean → Reassemble)
The goal is to open the console enough to clean the airflow path: vents, fan, and heatsink area. Go slow, take photos as you go, and treat screws like they’re different species (because they often are).
-
Step 1: Back Up and Prep Like a Pro
If you’re planning to remove the hard drive caddy or you’re worried about accidents, back up saves to the cloud (PlayStation Plus) or external storage. Then clear a workspace: good lighting, a flat surface, and enough room to line up screws in “where did you come from?” order.
-
Step 2: Full Shutdown, Unplug, and Cool Down
Power the PS4 Slim off completely (not Rest Mode), unplug the power cable and HDMI, then wait several minutes. Heat and electronics aren’t a great combo when your hands are involved.
-
Step 3: Do a Safe Exterior Cleaning First
Wipe the outside with a dry microfiber cloth. Remove dust around vents and ports gently. If dust is built up in vents, a low-powered vacuum used on the vents (not inside the console) can help pull loose dust awaykeep it gentle and controlled.
-
Step 4: Avoid the “Blow Dust Deeper” Trap
Blasting compressed air into a closed console can move dust to new, worse places. Before using air aggressively, plan to open the shell so dust can actually exit. If you do use air early, keep bursts short and aim across vents rather than straight into them.
-
Step 5: Remove the Hard Drive Cover (Optional, But Helpful)
On the PS4 Slim, the HDD is behind a small plastic cover. Slide the cover off, remove the retaining screw, and slide the drive caddy out carefully. You’re not cleaning the hard drive itselfthis step simply reduces the chance of bumping it during the rest of the work.
-
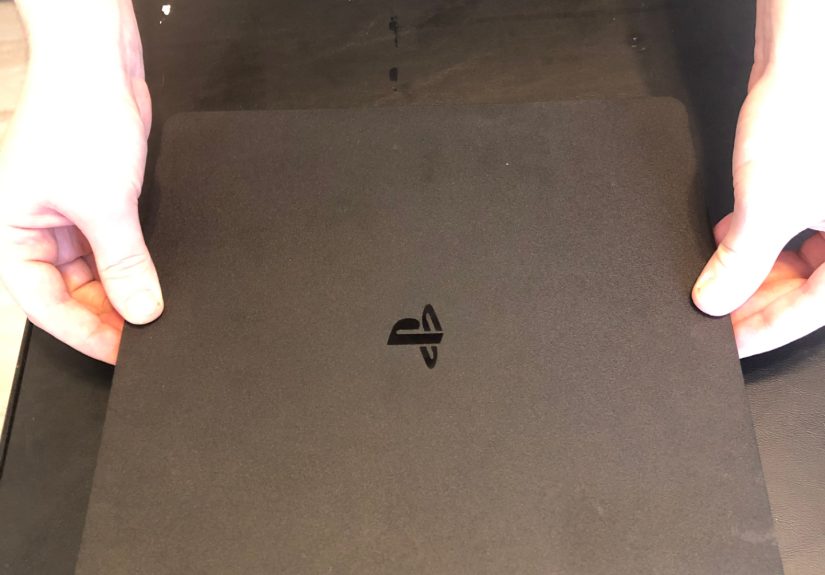
Step 6: Pop Off the Top Cover
With the console right-side up, pry up the two front corners with your fingers. It may take firm pressure and can make a loud click. Slide the cover toward the back corners and lift it off. Congrats: you’re officially “in there.”
-
Step 7: Photograph Everything (Seriously)
Before touching anything else, take a few quick photos from different anglesespecially around cables and screw locations. It’s a tiny time investment that can save you from the “where does this ribbon cable go?” spiral later.
-
Step 8: Remove the Lower Shell and Shields (As Needed)
The deeper you go, the more screws you’ll encounterand they may be different lengths. Keep screws organized by step. If you remove any plates or shields, lift them gently and check for hidden clips or cables before pulling.
-
Step 9: Disconnect and Remove the Power Supply (Carefully)
If your goal is a deep clean of the cooling path, you’ll likely need to remove the power supply to better access the fan/heatsink area. Work slowly: remove screws, disconnect cables by the connector (not the wires), and lift the unit carefully. Do not open the power supply itselfleave it sealed.
-
Step 10: Access the Fan Assembly
Once you’ve opened the console enough to see the fan and surrounding air channels, you’re in the main cleaning zone. Remove the fan assembly only if needed for access; sometimes you can clean effectively without fully removing it, depending on how dusty things are.
-
Step 11: Clean the Fan (Without “Over-Spinning” It)
Hold the fan blades still with a finger (or a cotton swab placed gently to block movement). Use compressed air in short bursts. Then use a soft brush to loosen stubborn dust. If there’s grime on the blades, lightly dampen a cotton swab with isopropyl alcohol and wipenever soak, never drip.
Example: If your PS4 Slim lived near a shedding pet, you may find hair wrapped along the fan edges. Tweezers help hereremove hair gently so you don’t bend blades.
-
Step 12: Clean the Heatsink and Air Channels
The heatsink fins are where dust loves to form a felt blanket. Use a brush to loosen packed dust, then blow it out with air. Aim so dust exits the console instead of relocating deeper. Also clean vent pathways and any “dust shelves” along the casing edges.
Pro tip: Do this outside if possible. Otherwise, your room will look like you’ve been vacuuming a haunted attic.
-
Step 13: Optional Advanced StepThermal Paste Refresh (Only If You’re Already Removing the Heatsink)
Many cleanings don’t require replacing thermal paste. But if you remove the heatsink/motherboard interface, you should replace the thermal paste because separating those parts disrupts the paste layer. If you’re not comfortable with that process, stop at cleaning the fan and heatsink fins.
If you do replace paste: clean old paste with isopropyl alcohol and lint-free swabs, let surfaces dry fully, and apply a small, controlled amount of new paste (too much can be messy and counterproductive). Reassemble carefully to ensure even contact.
-
Step 14: Reassemble, Test, and Fix the Root Cause (Dust Will Be Back)
Reassemble in reverse order. Go gently with cables and ribbon connectors. Confirm each connector is seated before tightening everything down. Once closed:
- Boot the PS4 Slim and listen for fan behavior
- Test a game for 10–15 minutes and check if fan noise improved
- Move the console to a well-ventilated spot with clearance on all sides
- Plan a light vent cleaning every few monthsmore often with pets or heavy dust
Common Mistakes (So You Don’t Become a “Before/After” Horror Story)
- Letting the fan spin freely while using airthis can stress the fan.
- Mixing screw lengthsa long screw in the wrong spot can damage plastic posts or internal parts.
- Yanking connectors by the wiresalways pull from the connector body.
- Using harsh cleanerskeep liquids minimal and controlled, and avoid solvents.
- Vacuuming inside the consolestatic risk is real; use air and a brush instead.
FAQ: Quick Answers You Actually Need
How often should I clean my PS4 Slim?
If your home is dusty, you have pets, or your console sits near carpet, aim for light vent cleaning every 3–6 months. Deep internal cleaning is usually “as needed,” based on fan noise and overheating symptoms.
Will cleaning fix overheating every time?
Cleaning helps when dust is blocking airflow. If overheating continues, check placement (tight cabinet spaces are notorious), room temperature, and whether the fan is functioning normally. In some cases, hardware issues or thermal interface problems may be involved.
Can I just blow air into the vents and call it a day?
Sometimes it helps, but it can also push dust deeper. A better approach is vent cleaning combined with proper placement and periodic maintenance. If the console is already very dusty, opening the shell is usually more effective.
Extra : Real-World Experiences People Have Cleaning a PS4 Slim
If you’ve never opened a console before, your first PS4 Slim cleaning tends to follow a familiar emotional arc: confidence, curiosity, mild panic, then victory. And by “victory,” we mean “it turns on and nothing is left over except a new respect for screw organization.”
One common experience is discovering that the fan isn’t the whole story. People often assume the visible fan blades are the main issue, clean them, reassemble, and wonder why the PS4 Slim is still louder than a blender. The reason is usually airflow: dust doesn’t just sit politely on the fanit migrates and packs itself into heatsink fins and narrow channels where hot air is supposed to move. When those fins clog, the fan can spin harder and harder while heat still struggles to escape. The “aha” moment for many owners is seeing how much dust can hide in places you can’t reach from the outside.
Another very real story: the “screw safari.” The PS4 Slim can involve multiple screw sizes, and it’s surprisingly easy to move one screw to “a safe place” that becomes an alternate dimension. People who have the best outcomes tend to do two things: (1) take photos before disconnecting cables, and (2) group screws by step in labeled cups or on a DIY diagram. The folks who skip this usually end up playing a new mini-game called Guess That Screw Length, and it’s not nearly as fun as it sounds.
Then there’s the compressed air learning curve. A lot of gamers try to “power wash” the dust out with long blasts of air. What typically works better is short bursts combined with brushingbecause packed dust can behave like dryer lint: it clings until you loosen it, then it flies everywhere. Many people also learn (the hard way) that letting the fan free-spin with compressed air is a bad idea. The fan can become a tiny turbine, and while it’s briefly satisfying, it’s not doing the fan any favors. Holding the fan steady makes the cleaning more controlled and reduces the chance of damage.
A big “quality of life” improvement story comes from changing the console’s environment after cleaning. Owners often deep clean their PS4 Slim, enjoy the quieter fan… and then put it right back into the same cramped cabinet next to other heat-producing devices. Predictably, the noise returns. People who keep the PS4 Slim quieter longer typically give it breathing room, keep vents unobstructed, and clean the surrounding area (shelves, TV stand, nearby floor) so less dust is available to get sucked in.
Finally, a note that comes up a lot: sometimes cleaning reveals that dust wasn’t the only factor. If your PS4 Slim still overheats or the fan ramps to max immediately, it may point to deeper issueslike a failing fan, poor thermal contact, or a console that needs professional repair. Most owners still report that even when cleaning isn’t a total miracle cure, it’s rarely wasted effort: it improves airflow, reduces heat stress, and helps the system run closer to how it was designed.