Table of Contents >> Show >> Hide
- Quick Table of Contents
- Identify Your Faucet Type (So You Don’t Fight the Wrong Battle)
- Tools & Supplies
- Safety Setup (The 5 Minutes That Saves 2 Hours)
- How to Disassemble a Two-Handle Bathroom Faucet
- How to Disassemble a Single-Handle Bathroom Faucet
- Stuck Parts, Stripped Screws, Mineral Buildup: Fixes That Actually Help
- If You’re Removing the Entire Faucet (Not Just the Internals)
- Reassembly & Testing
- When to Call a Plumber
- Real-World Experiences & Lessons Learned (Extra )
- SEO Tags (JSON)
Disassembling a bathroom faucet is one of those DIY jobs that feels intimidating until you realize the faucet is basically a fancy hat
sitting on top of a few screws, a nut, and a stubborn little cartridge that’s been quietly plotting against you since 2012.
Whether you’re chasing a drip, replacing a cartridge, cleaning mineral buildup, or just trying to figure out why your handle now
turns like a rusty doorknob in an abandoned mansionthis guide walks you through it step-by-step.
The key to a stress-free faucet teardown is simple: shut the water off, protect the finish, keep parts organized, and don’t let a tiny
set screw roll into the drain (because it will, and it will do it gleefully). Let’s get into it.
Quick Table of Contents
- Identify your faucet type (so you don’t fight the wrong battle)
- Tools & supplies
- Safety setup (the 5 minutes that saves 2 hours)
- How to disassemble a two-handle bathroom faucet
- How to disassemble a single-handle bathroom faucet
- Stuck parts, stripped screws, mineral buildup: fixes that actually help
- If you’re removing the entire faucet (not just the internals)
- Reassembly & testing
- When to call a plumber
- Real-world experiences & lessons learned (extra )
- SEO tags (JSON)
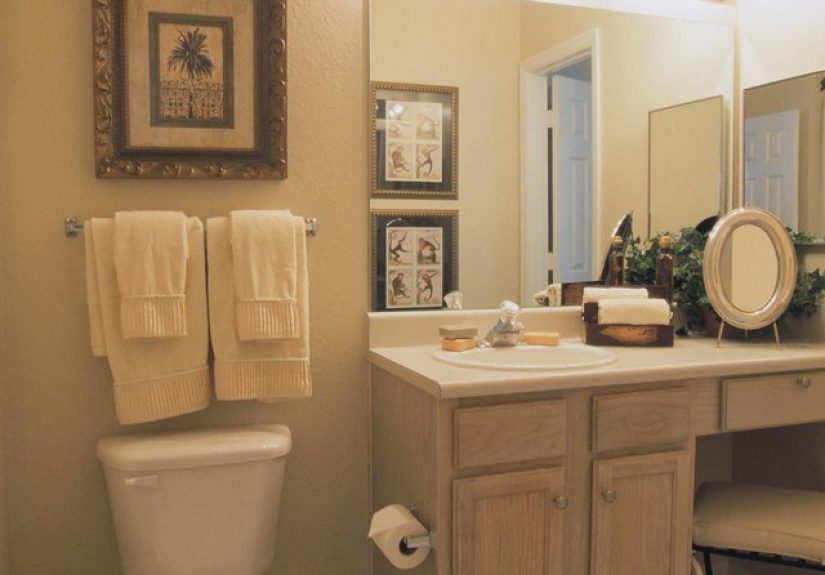
Identify Your Faucet Type (So You Don’t Fight the Wrong Battle)
Bathroom faucets look similar from above, but the disassembly steps depend on two big things:
(1) how many handles and (2) what’s under the handle.
Common bathroom faucet “shapes”
- Centerset (3-hole, compact): Two handles and a spout on one base.
- Widespread (3-hole, spaced out): Two handles and a spout as separate pieces.
- Single-hole / single-handle: One handle controls hot/cold and flow.
Common valve styles inside
- Compression (older style): Often two-handle. Uses a stem and washer that presses down to shut water off.
- Cartridge: Very common. A cartridge (or two cartridges) controls flow and mixing.
- Ceramic disc: Smooth operation, durable, but still serviceable with the right parts.
You don’t need to perfectly diagnose the internal valve type before starting, but it helps to know this:
most faucet disassembly starts the same wayremove a decorative cap, remove a screw or set screw, pull the handle, then remove a trim piece
and a retaining nut/bonnet to access the cartridge or stem.
Tools & Supplies
Gather these first. Running to the garage mid-disassembly with wet hands is how tools mysteriously teleport out of existence.
- Flathead screwdriver (small/thin for caps)
- Phillips screwdriver
- Allen/hex keys (common for set screws)
- Adjustable wrench
- Channel-lock or slip-joint pliers (use gently)
- Soft cloth or rag (to protect finishes)
- Small bowl or magnetic tray for parts
- Painter’s tape (label parts “hot/cold” and orientation)
- White vinegar (for mineral buildup)
- Penetrating oil (for stubborn threaded parts)
- Faucet handle puller (optional, but clutch for corroded handles)
- Plumber’s silicone grease (for O-rings during reassembly)
- A phone/camera (take photos as you gofuture you will send you a thank-you note)
Safety Setup (The 5 Minutes That Saves 2 Hours)
-
Turn off the water at the shutoff valves under the sink (hot and cold). Turn them clockwise until they stop.
If you don’t have working shutoffs, turn off the main water supply. - Relieve pressure by turning the faucet on. Let it run until it stops.
- Plug the drain or cover it with a rag. Small screws love dark drains.
- Protect the finish by wrapping a rag around parts you’ll grip with pliers or a wrench.
- Set up a parts station: a tray or bowl, plus labels (hot/cold). Keep everything in order.
How to Disassemble a Two-Handle Bathroom Faucet
Two-handle faucets usually have similar steps on both sides. Work on one handle at a time so you don’t mix parts.
(Hot and cold components can look identical while behaving very differently. Like twins. With plumbing grudges.)
Step 1: Remove the decorative cap
Many handles hide the main screw under a small cap labeled “H” or “C,” or a plain decorative plug.
Use a thin flathead screwdriver to gently pry it off. Work slowly to avoid scratching.
Step 2: Remove the handle screw (or set screw)
If you see a Phillips screw in the center, remove it and lift the handle off.
If there’s no center screw, look for a small set screw on the side or underside of the handle. Loosen it with a hex key.
Step 3: Lift off the handle (use a puller if it’s stuck)
Handles can stick due to corrosion or mineral buildup. If it won’t lift off with gentle wiggles,
a handle puller can remove it without turning your faucet into modern art.
Avoid prying aggressively against the sink or countertop.
Step 4: Remove trim and the retaining hardware
Under the handle you may see a decorative sleeve, a bonnet nut, or a retaining nut.
Unscrew the trim by hand if possible. If it’s tight, wrap it with a rag and use pliers gently.
Once the trim is off, use an adjustable wrench to loosen the nut holding the valve stem or cartridge.
Step 5: Pull out the stem or cartridge
With the retaining nut removed, the stem/cartridge usually pulls straight out.
Note the orientationsome cartridges must align a certain way during reinstallation.
If there’s a rubber O-ring, washer, or seal visible, inspect it for cracking, flattening, or mineral crust.
Step 6: Inspect and decide your next move
- Drip from the spout often points to worn seals, cartridges, or washers.
- Leak near the handle often points to O-rings or packing seals.
- Stiff handle can be mineral buildup, a damaged cartridge, or a dry O-ring.
If you’re replacing parts, bring the old stem/cartridge to a hardware store or match it by brand/model.
If you’re cleaning, soak mineral-crusted pieces in vinegar (not foreverjust long enough to loosen buildup),
rinse, and dry before reassembly.
How to Disassemble a Single-Handle Bathroom Faucet
Single-handle bathroom faucets are usually cartridge-based. The biggest “gotcha” is that the handle often looks seamless,
while a tiny set screw is hiding somewhere like it’s playing hide-and-seek for a championship trophy.
Step 1: Find and loosen the set screw (or remove the cap screw)
Look for a small set screw on the back, side, or underside of the handle.
Loosen it with the correct hex key (don’t “sort of” fit a keystripping it is a special kind of heartbreak).
Some handles use a top cap and a Phillips screw instead.
Step 2: Remove the handle and any decorative sleeve
Once the screw is out/loose, lift the handle off. Remove any decorative sleeve or dome covering the cartridge area.
Many sleeves unscrew by hand; if yours is stuck, use a rag and gentle pressure with pliers.
Step 3: Remove the retaining clip or retaining nut
Cartridges are usually held by either:
- A retaining clip (U-shaped metal clip you pull straight out), or
- A retaining/bonnet nut you unscrew with a wrench.
Step 4: Extract the cartridge
Pull the cartridge straight out. If it’s stubborn, wiggle gently while pulling.
Some brands provide or recommend a cartridge removal tool for stuck cartridges.
Avoid twisting wildly unless the design specifically calls for a twistforcing a cartridge can crack the valve body,
and that’s when “quick repair” turns into “unexpected faucet replacement weekend.”
Step 5: Clean the valve body (quick but helpful)
Before reinstalling a cartridge, wipe out any debris or mineral buildup in the valve body.
A quick flush (briefly opening the shutoffs with the cartridge removed) can help clear gritjust do it carefully and be ready with a towel.
Then shut the water back off before you proceed.
Stuck Parts, Stripped Screws, Mineral Buildup: Fixes That Actually Help
Problem: Set screw won’t budge
- Use vinegar: Wrap a rag soaked in a 50/50 vinegar-and-water mix around the area to help dissolve mineral buildup.
- Use penetrating oil: Apply, wait, then try again with the correct tool.
- Tap lightly: A gentle tap on the handle can break corrosion’s “death grip.”
- Use the right hex key: Many handles use small hex sizes. If it feels loose, stop and switch sizes.
Problem: Handle is fused to the stem
Don’t pry against the sink. Use a handle puller, which applies controlled upward force.
If you don’t have one, try vinegar around the handle base, wait, then wiggle and lift.
Slow and steady beats “rage prying” every time.
Problem: Decorative sleeves are stuck (and you’re afraid to scratch the finish)
Wrap the sleeve with a thick rag or a rubber jar-opener pad, then turn by hand.
If you must use pliers, keep the rag between the tool and the finish.
Problem: You removed everything… and the cartridge still won’t come out
Confirm you removed the retaining clip or nut (easy to miss). Then:
- Apply vinegar around the cartridge base to loosen mineral deposits.
- Use a manufacturer-appropriate removal tool if available (especially for older, stuck cartridges).
- Wiggle while pulling straight out. Avoid side-loading the valve body.
If You’re Removing the Entire Faucet (Not Just the Internals)
Sometimes disassembly is really “I’m done with this faucet; it has emotionally drained me.” If you’re replacing the faucet entirely,
the work moves under the sink:
- Turn off the shutoff valves and relieve pressure at the faucet.
- Disconnect supply lines from the faucet tailpieces using an adjustable wrench.
- Disconnect the pop-up linkage (if present): the lift rod and clevis strap under the sink.
- Remove mounting nuts or a mounting bracket holding the faucet to the sink/counter.
- Lift the faucet out from above. Clean the mounting surface before installing a new faucet.
Pro tip: take a photo of the drain linkage before you remove it. Pop-up assemblies are simple,
but they are also masters of looking “obvious” until you try to put them back together.
Reassembly & Testing
Reassembly is disassembly in reverse, but with two important upgrades:
clean parts and proper sealing.
- Lubricate O-rings lightly with silicone plumber’s grease (not petroleum jelly unless the manufacturer says it’s okay).
- Align cartridges correctly: match tabs, notches, or “hot/cold” orientation.
- Hand-tight first, then snug with a wrench. Over-tightening can crack plastic parts or distort seals.
- Turn water on slowly at the shutoffs and watch for leaks under the sink and around the handle.
- Test function: hot/cold direction, full range of movement, and no dripping after shutoff.
When to Call a Plumber
DIY is greatuntil it stops being DIY and becomes “I’m accidentally renovating my bathroom.”
Consider calling a plumber if:
- The shutoff valves don’t fully stop water (or won’t turn).
- The cartridge is seized and you’re applying scary amounts of force.
- You see cracks in the valve body, faucet casting, or supply connections.
- Leaks persist after replacing the correct parts (could be a damaged seat, body, or misalignment).
- You have older plumbing that feels fragile or corroded.
Real-World Experiences & Lessons Learned (Extra )
Here’s the part that most instructions skip: what people actually run into in real bathrooms, with real mineral buildup,
real cramped under-sink spaces, and real time pressure because guests are coming over and your faucet chose today to start dripping like a sad metronome.
These are common experiences homeowners report when disassembling a bathroom faucetand what usually helps.
1) The “Where is the screw?” moment
One of the most universal experiences is spending 10 minutes staring at a handle that looks like it has no fasteners.
The screw is often hidden under a decorative cap, or it’s a tiny set screw tucked on the back/underside where you can’t see it unless
you crouch like a plumber doing yoga. The best move is to run your finger around the handle base and underside until you feel a small hole.
Once you find it, use a hex key that fits snuglybecause a nearly-correct key is how set screws become forever-screws.
2) Mineral buildup turns “hand-tight” into “my ancestors are holding this on”
In many U.S. homes (especially in hard-water areas), mineral deposits glue threads and cartridges in place.
People often find that a trim sleeve won’t unscrew by hand even though it “should.”
This is where vinegar shines: wrapping a vinegar-soaked rag around the problem area for a short soak can soften crusty buildup.
The lesson: don’t jump straight to brute force. A little chemistry beats a lot of regret.
3) The dropped-screw tax
If you’ve never dropped a faucet screw into the drain, congratulations on your charmed life. For everyone else:
plugging the drain is not an “optional tip,” it’s a financial strategy. Even with the drain plugged, screws can bounce,
roll, and attempt an escape under the vanity like they’re auditioning for a heist movie.
A magnetic tray or a small bowl placed right on the counter dramatically reduces the chaos.
Many DIYers also swear by taking a quick photo after each part comes offbecause the tiny washer you’re sure you’ll remember
is the same tiny washer you’ll question at midnight.
4) The “hot and cold parts are identical… until they’re not” surprise
Another common experience is mixing components between the hot and cold sides on a two-handle faucet.
Sometimes it doesn’t matter; sometimes it absolutely does, especially with cartridges that have directional alignment.
The easy fix is labeling: a piece of painter’s tape that says “H” and “C,” plus keeping parts laid out in order.
Think of it like cooking: mise en place, but with O-rings.
5) The victory lap: reassembly and the slow leak check
People often reassemble quickly, turn the water on, and declare victoryonly to notice a slow seep 15 minutes later.
The more reliable routine is: turn water on slowly, check under the sink, wipe connections dry, then check again after a few minutes.
If there’s a leak, don’t panic. It’s usually a seal not seated correctly, a nut that needs a gentle snug, or a cartridge not aligned.
The lesson here is surprisingly calming: most faucet repairs are not “one-and-done,” they’re “two tries and a snack.”
In the end, disassembling a bathroom faucet is less about strength and more about patience, observation, and organization.
Once you’ve done it once, you’ll recognize the patterns on future faucetsand you’ll spot that hidden set screw much faster.
Your faucet may not respect you, but it will eventually cooperate.