Table of Contents >> Show >> Hide
- Why Skip Painter’s Tape in the First Place?
- The Best Tools for Cutting In Without Tape
- How To Cut In Paint Without Painter’s Tape: Step-by-Step
- Where To Look While You Paint
- How To Cut In Around Specific Areas
- The Most Common Cutting-In Mistakes
- How To Fix Mistakes Without Making Them Worse
- Should Beginners Try Cutting In Without Tape?
- Pro Tips That Make a Big Difference
- Final Thoughts
- Experience Notes: What It Really Feels Like To Cut In Without Tape
- SEO Tags
If painter’s tape feels like a tiny blue tax on every paint project, welcome home. Learning how to cut in paint without painter’s tape is one of those DIY skills that looks suspiciously fancy until you realize it mostly comes down to the right brush, the right amount of paint, and not panicking when you get close to the ceiling. In other words: less wizardry, more muscle memory.
“Cutting in” means painting the edges and corners a roller can’t reach, like where walls meet ceilings, trim, baseboards, windows, and door casings. It’s what gives a room that crisp, intentional look instead of the visual equivalent of “I painted in a hurry and now I live with my choices.” The good news is that you absolutely can get clean lines without tape. In many cases, it’s faster, cleaner, and less frustrating once you know the technique.
This guide breaks down exactly how to cut in paint without painter’s tape, what tools matter most, the mistakes that wreck straight lines, and how to recover if your brush suddenly develops a rebellious streak.
Why Skip Painter’s Tape in the First Place?
Painter’s tape has its place, especially for beginners, sharp color-blocking, and very delicate surfaces. But for standard wall painting, a lot of experienced painters skip it for a few simple reasons.
- It takes time. Taping every edge in a room can add a surprising amount of prep time.
- It is not foolproof. Tape can still allow bleed-through if it is not pressed down perfectly.
- It can create extra touch-up work. If paint bridges over the tape or the tape lifts old paint, your “shortcut” becomes a repair project.
- Freehand cutting can be faster. Once you get the hang of it, you can move around a room more smoothly without stopping to tape and untape everything.
The real secret is that painter’s tape is a tool, not a requirement. A sharp line comes more from brush control than from adhesive optimism.
The Best Tools for Cutting In Without Tape
1. A high-quality angled sash brush
If you buy one thing for this job, make it a good angled sash brush. This is the workhorse for cutting in because the slanted bristles give you better control along edges and corners. For most wall projects, a 2-inch to 2½-inch angled brush is the sweet spot. It is wide enough to carry paint efficiently but still narrow enough to stay precise.
For latex or water-based wall paint, choose a synthetic bristle brush. It holds its shape well and handles modern interior paints beautifully. Cheap brushes tend to flare, shed, and make your edge look like it was painted during an earthquake.
2. A small paint pail or cut bucket
Working directly out of a full gallon can is possible, but a small cut bucket is easier to control and lighter to carry. It also makes it easier to load the brush without turning your wrist into a gym membership.
3. A damp rag
Keep a damp rag nearby for quick wipe-ups on trim, switches, or anywhere your brush gets a little too confident.
4. A putty knife or paint shield
This is optional but incredibly useful. If you are painting next to textured ceilings, window glass, or tricky trim, a wide putty knife can act like a movable guard. It is not painter’s tape; it is more like a bodyguard with excellent timing.
5. A roller ready to go
Do not cut in an entire room and then disappear for lunch. You want to roll the wall while the brushed border is still wet enough to blend. That helps avoid visible differences in sheen or texture.
How To Cut In Paint Without Painter’s Tape: Step-by-Step
Step 1: Prep the room properly
Before the brush ever touches paint, remove outlet covers and switch plates, move furniture, protect floors, and clean the surface. Dust, grease, and cobwebs are not part of the decor. If the wall has dings or rough spots, patch and sand them first.
If you are painting along a textured ceiling, there is one pro-level trick worth knowing: lightly scrape a tiny groove where the wall meets the ceiling using a putty knife. That little channel gives your bristles a place to ride and can help create a crisper line.
Step 2: Slightly dampen the brush
For water-based paint, lightly dampening the bristles before loading can improve control. The brush should be damp, not dripping. You are aiming for “ready to work,” not “just survived a rainstorm.”
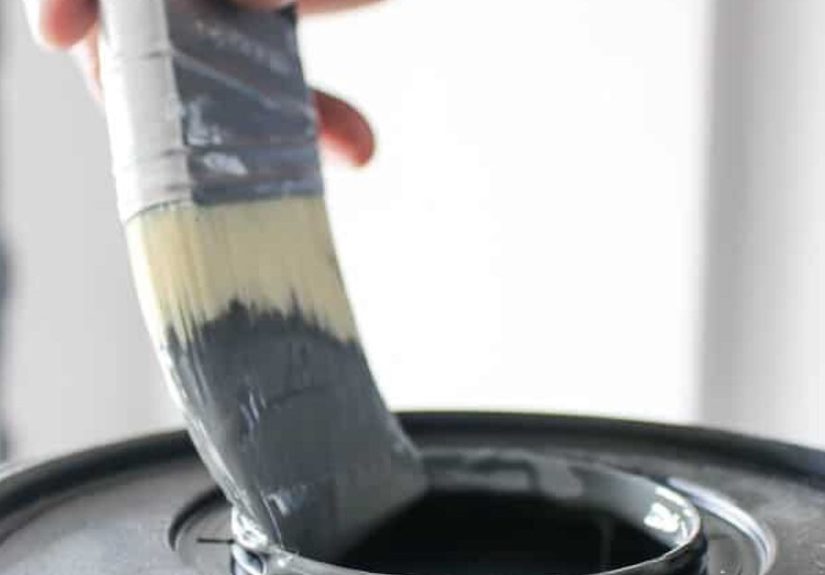
Step 3: Load the brush the smart way
Dip the brush into the paint only about one-third to one-half of the bristle length. Then tap or dab the sides against the inside of the bucket to remove excess. Avoid burying the brush up to the ferrule. That is how you get drips, blobs, and a cleanup session nobody enjoys.
The brush should feel loaded but controlled. If paint is threatening to slide off the bristles, you have gone too far.
Step 4: Start slightly away from the edge
This is the move that changes everything. Instead of trying to land perfectly on the edge immediately, start your stroke about an inch away from the ceiling or trim. Lay down a short line of paint, then gently push the brush toward the edge as you move.
This lets you unload the heaviest paint off the brush first, then use the tapered tip to create the final line. It is easier, cleaner, and much less stressful than charging straight at the boundary like a paint-covered linebacker.
Step 5: Use the narrow edge like a pencil
Turn the brush so the narrow edge guides your line. Hold it with a relaxed pencil-style grip rather than a full fist. You want control, not brute force. Let the bristles flex slightly as you move, but do not mash them flat.
The goal is a steady stroke with gentle pressure. Too much force splays the bristles and makes your line wobble. Too little pressure can leave gaps or a dry, scratchy edge.
Step 6: Move steadily, not slowly
Most people think a perfect line comes from moving at turtle speed. Ironically, going too slow can make a straight line harder because the paint starts to build up and your hand gets tense. Use smooth, confident strokes. Not rushed. Not frozen. Think “deliberate,” not “defusing a bomb.”
Longer strokes often look better than tiny nervous dabs. Aim for sections around 6 to 12 inches when possible, depending on your comfort and the shape of the space.
Step 7: Cut in a band 2 to 3 inches wide
Once you have the clean edge, widen that cut-in strip to about 2 to 3 inches. This gives your roller enough room to overlap the brushed section cleanly without bumping into trim or ceilings.
Step 8: Roll before the edge dries
Work one wall at a time whenever possible. Cut in, then roll the wall while the border is still wet. This helps the brushed and rolled sections blend better and reduces the chance of visible flashing or sheen differences.
If you cut in the entire room first and come back later with a roller, the edges can dry separately and stand out. That is the paint equivalent of mismatched socks: technically functional, visually distracting.
Where To Look While You Paint
One underrated tip: do not stare only at the tip of the brush. Instead, look slightly ahead of where you are going. It is similar to driving a car or cutting wrapping paper in a straight line. Your hand follows your eyes. If you only watch the bristles in panic mode, your line often gets twitchy.
How To Cut In Around Specific Areas
Ceilings
Cut along the ceiling with your angled brush, keeping the longer bristles toward the open wall area. If the ceiling texture is heavy, use that groove trick or hold a clean putty knife as a guide. Wipe the blade frequently so it does not transfer paint where you do not want it.
Baseboards and trim
Many painters find it easier to practice along baseboards first because the line is lower and easier to see. Start just above the trim, unload the paint, then ease down toward the edge. If you get a little wall color on trim that is already painted, wipe it quickly if the trim finish allows, or plan a later touch-up with trim paint.
Windows and door casings
Use shorter strokes and less paint. These areas punish overconfidence immediately. A putty knife or paint shield can be especially helpful on glass or narrow casing profiles.
Textured walls
Texture makes perfect lines harder because the brush rides over bumps and valleys. Use less paint, lighter pressure, and smaller sections. Sometimes a tiny touch-up brush is better than forcing a large brush into a tricky corner.
The Most Common Cutting-In Mistakes
Using a cheap brush
A bargain brush may save a few dollars and cost you your patience. A quality brush keeps its shape, unloads paint more evenly, and helps you make straighter lines with less effort.
Overloading the brush
Too much paint is the fastest route to drips, smears, and that single blob that somehow lands exactly where everyone will notice it forever.
Pressing too hard
If the bristles splay wide like a fan, you are pressing too hard. Lighten up. The brush should flex, not collapse.
Going back over half-dry paint
Once paint starts setting up, stop fussing with it. Rebrushing semi-dry paint can leave marks, streaks, and uneven sheen.
Cutting too far ahead of the roller
Keep a wet edge whenever possible. This matters more than many DIYers realize.
Trying to be perfect on the first pass
Even pros sometimes clean up a line on a second pass. The key is a controlled second pass, not frantic overcorrection.
How To Fix Mistakes Without Making Them Worse
Even with a steady hand, mistakes happen. The goal is not zero mistakes. The goal is calm recovery.
- If paint lands on trim or ceiling, wipe it quickly with a damp rag if the surface and finish allow.
- If the paint has already dried, wait and touch up with the original color using a small angled brush.
- If your line looks wavy, let it dry, then re-cut carefully with the adjacent color.
- If paint builds up on a putty knife or shield, stop and clean it before continuing.
One important mindset shift: fresh mistakes always look bigger from two inches away. Step back before declaring a household emergency.
Should Beginners Try Cutting In Without Tape?
Yes, but start small. Practice behind a door, in a closet, or along a baseboard in a low-stakes room. Your first line may not look like it belongs in a luxury paint ad. That is fine. By the third or fourth section, most people improve dramatically because the motion starts to feel natural.
If you are especially nervous, use painter’s tape only where a mistake would be annoying to fix, and freehand the rest. This hybrid method is practical, not cheating. The paint police will not arrive.
Pro Tips That Make a Big Difference
- Paint trim first if that suits your workflow. Many painters like to finish woodwork first, then cut wall color over it for a sharper final line.
- Use a dedicated cut bucket. It is easier to control than working from a full can.
- Keep your roller and brush in sync. Cut and roll one wall at a time.
- Choose the right roller nap. A 3/8-inch nap is a common all-purpose choice for smooth to lightly textured walls.
- Watch buildup in corners. Paint likes to collect where two surfaces meet, so smooth out heavy spots before they dry.
- Good lighting matters. Raking light from a lamp can help you see your edge better than overhead lighting alone.
Final Thoughts
Learning how to cut in paint without painter’s tape is one of the most useful painting skills a DIYer can pick up. It saves time, reduces dependence on tape, and gives you more control over the finished look of a room. Better yet, it is a skill that improves fast. You do not need a magical hand. You need a quality angled brush, a sensible amount of paint, a steady pace, and enough patience not to overwork the line.
So yes, you can absolutely paint a crisp ceiling line without wrapping half your room in blue tape. After a little practice, you may even prefer it. And that is a beautiful moment in any home project: when the thing that once felt intimidating turns into the part you do on purpose just to show off a little.
Experience Notes: What It Really Feels Like To Cut In Without Tape
The first time I tried cutting in without painter’s tape, I approached the wall like it was a final exam I had not studied for. I had the angled brush, the fresh gallon of paint, and exactly zero confidence. My entire strategy was basically, “Go slow and hope for the best.” That is a charming attitude in life, but it is not always a winning paint technique.
At first, I made the classic beginner mistake of loading too much paint onto the brush. The result was immediate. Instead of a clean line near the ceiling, I got a fat, glossy stripe that seemed to grow in real time as I stared at it. It was not disastrous, but it was humbling. The lesson showed up fast: the brush should carry paint, not smuggle it.
Once I started unloading the brush properly and placing the first stroke slightly away from the edge, everything changed. That one adjustment made the process feel far less dramatic. I was no longer trying to land a perfect line on first contact. I was giving myself room to settle in, shape the stroke, and gently guide the bristles into place. Suddenly the wall stopped feeling like an enemy and started feeling like a surface.
I also learned that body position matters more than people think. If you are stretched too far, leaning awkwardly, or painting above your comfort zone on a ladder rung you do not trust, the line gets worse immediately. The cleaner results came when I slowed down just enough to move the ladder, reset my stance, and keep my arm relaxed. Good cutting in is surprisingly physical. Not exhausting, but physical in the same way handwriting gets sloppy when you twist your wrist too much.
The most satisfying moment came on the second room, not the first. By then, I had enough practice to stop narrating every stroke internally like a sports commentator. The brush started to glide, and the line at the top of the wall looked crisp from across the room. Not perfect under a flashlight from six inches away, but absolutely clean in real-life viewing conditions. That was the moment I understood why experienced painters skip tape. It is not because they are reckless. It is because the brush, once you trust it, is faster.
There were still trouble spots. Corners collected too much paint. Textured areas fought back. One window casing made me reconsider all my life choices. But the fixes were manageable, and the touch-up work was minor compared with the time I used to spend applying, pressing, and peeling painter’s tape.
If you are new to this, expect your first few feet to feel clunky. That is normal. Then expect the next few feet to get smoother. By the end of one wall, you will probably be better than you were ten minutes earlier. That is the encouraging part of learning how to cut in paint without painter’s tape: improvement is not theoretical. You can literally see it happening one stroke at a time.