Table of Contents >> Show >> Hide
- What You’ll Learn
- Before You Start: Quick Prep (So Your Future Self Doesn’t Yell at You)
- Way 1 (Recommended): Create a New Apple ID in Settings
- Way 2: Create a New Apple ID from the App Store
- Troubleshooting: Common Issues (and How to Fix Them)
- After You Create Your Apple ID: 5 Smart Things to Do Next
- Real-World Experiences: What It’s Like to Create a New Apple ID (and What to Expect)
- Conclusion
Creating a new Apple ID (Apple now calls it an Apple Account) is one of those “small” tasks that unlocks
the entire Apple universe: iCloud backups, the App Store, FaceTime, iMessage, Apple Music, Find My, and all the magical syncing
that makes your devices feel like they share a brain (in a good way… most days).
The best part? You can do it in minutesright on your iPhone or iPadusing one of two easy methods:
Settings or the App Store. This guide walks you through both, plus the common hiccups people run into
and how to fix them without tossing your device into a couch cushion abyss.
Before You Start: Quick Prep (So Your Future Self Doesn’t Yell at You)
An Apple ID/Apple Account is more than “a login.” It’s the identity tied to your purchases, subscriptions, iCloud data, and device syncing.
So before you create a new one, take 90 seconds to do this mini-checklist:
1) Make sure you actually need a brand-new Apple ID
If you’re creating a new Apple ID because you forgot your password or can’t access your account,
it’s usually better to recover the existing account instead of starting over (otherwise your old purchases and iCloud data stay with the old account).
New Apple ID = new digital “home address.”
2) Decide what email you want to use
- Use an existing email address you can access long-term (a personal Gmail/Outlook address is common).
- Or create a free iCloud email address during setup, if you prefer everything Apple-branded.
3) Have a phone number ready
Apple typically uses a phone number for verification and account recovery. Use a number you can reliably access.
(Translation: not the temporary SIM you got at the airport five years ago.)
4) Know what happens if you’re already signed in
If your iPhone/iPad is currently signed in to another Apple ID and you want a completely new one, you’ll likely need to sign out first.
Signing out can affect services like iCloud backups, Photos syncing, Find My, and moreso don’t do it mid-chaos.
Way 1 (Recommended): Create a New Apple ID in Settings
If you want your Apple ID to power the full experienceiCloud, backups, Find My, syncing across devicesthis method is the most direct.
It’s also the easiest to follow because Apple gently walks you through each step like a helpful robot concierge.
Step-by-step: Create an Apple ID in Settings
- Open the Settings app.
-
Tap Sign in to your iPhone or Sign in to your iPad at the top.
Already signed in? See the next section on signing out first. - Tap Forgot password or don’t have an account? (wording may vary slightly by iOS/iPadOS version).
- Tap Create Apple ID (or Create a Free Apple Account).
- Enter your birthday and name, then tap Continue.
-
Choose your email option:
- Use an existing email address (recommended for most people).
- Create a free iCloud email address if you don’t have one or want a dedicated Apple login.
-
Create a strong password.
Practical tip: Use a unique password you haven’t used anywhere else. “Password123” belongs in a museum exhibit titled
“Internet Security: The Early Disasters.” -
Set your country/region.
This matters for the App Store, billing options, and content availability. - Add and verify a phone number for verification and recovery.
- Follow the prompts to finish account setup (you may be asked to review terms and enable additional security features).
If you’re signed in already: how to switch cleanly
If your device is currently signed in to another Apple ID and you want to create a brand-new one, plan the switch so you don’t accidentally
lose access to important synced data.
- Back up first: Confirm you have a recent iCloud backup (or a computer backup if you use one).
- Check what’s stored in iCloud: Photos, Notes, Contacts, Messagesanything synced lives with the Apple ID that synced it.
- Sign out carefully: Settings > your name > scroll down > Sign Out. When prompted, you may be able to keep a copy of some data on the device.
Way 2: Create a New Apple ID from the App Store
This method is perfect if your immediate goal is: “I just want to download apps already.”
Apple lets you create an Apple ID directly from the App Store, then you can sign in elsewhere later.
Step-by-step: Create an Apple ID in the App Store
- Open the App Store.
- Tap the account/profile icon (usually top-right).
-
Tap Create New Apple Account.
Don’t see it? You may need to sign out of iCloud first, or you might already be signed in. - Enter your email address, create a password, and choose your country/region.
-
Add a payment method and billing details.
Good news: In many cases you can choose None (especially if you’re not purchasing immediately).
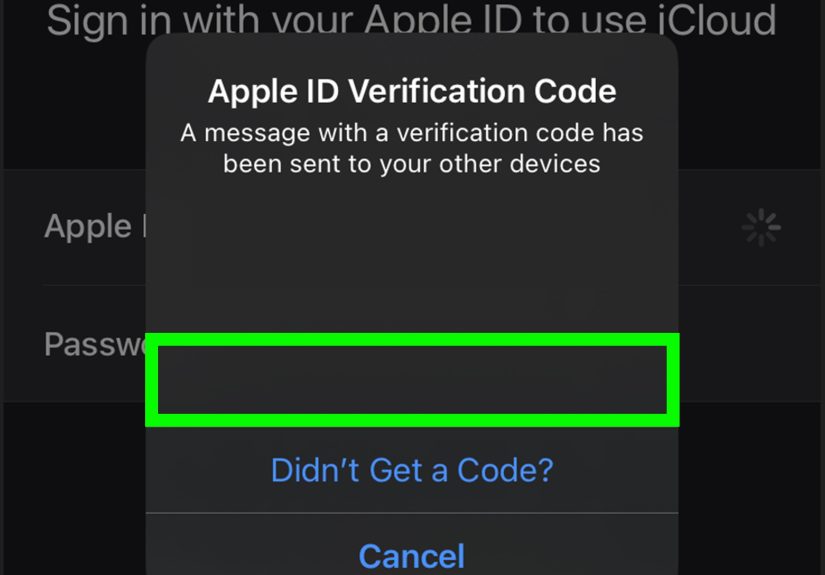
If you don’t see “None,” try creating the account again after starting a free app download, or complete setup and update payment later. - Confirm your phone number and verify your email (Apple will send a verification message).
When this method shines
- You’re setting up an iPad that’s mostly for apps (school, art, games, work tools).
- You’re troubleshooting Settings sign-in issues and want an alternate path.
- You want to confirm the account works for App Store purchases before toggling iCloud syncing.
Troubleshooting: Common Issues (and How to Fix Them)
If account creation fails, it’s usually not because Apple hates you personally. (Probably.) It’s typically one of a few predictable issues.
“Your account cannot be created at this time”
- Try a different creation method (Settings vs App Store).
- Update iOS/iPadOS to the latest available version.
- Switch networks (different Wi-Fi or cellular) and try again later.
- If the issue continues, check whether Apple services are having an outage in your region.
“Email address or phone number is unavailable”
This usually means the email/phone is already tied to an existing Apple ID. Use a different email/numberor recover the existing account
instead of creating a duplicate.
“The maximum number of free accounts have been activated”
Some devices hit an iCloud account creation limit within a time window. If you see this message, try setting up iCloud using your Apple ID on
another Apple device if possible, or use an Apple ID that’s already set up with iCloud.
Apple ID in Settings is grayed out / you can’t sign out
This can happen if Screen Time restrictions are enabled or there’s a Screen Time passcode limiting account changes.
Check Screen Time settings (especially on family devices) or ask the device organizer/parent to adjust restrictions.
“I made a new Apple ID… and now my stuff is missing”
This is the classic surprise: iCloud content and purchases belong to the Apple ID that created them.
Signing in with a different Apple ID can make Photos, Notes, purchases, and subscriptions appear “gone” because they’re associated with the other account.
The fix is simply signing back into the original Apple ID (or using Family Sharing for some purchases where applicable).
After You Create Your Apple ID: 5 Smart Things to Do Next
Once your new Apple ID exists, you’re technically done… but a few small follow-ups make it more secure and less likely to cause you problems later.
1) Verify your email and phone number
Verification isn’t just bureaucracyit’s what keeps you from getting locked out when you change phones, forget a password, or need account recovery.
2) Turn on the iCloud features you actually want
In Settings, you can choose what syncs: Photos, Contacts, Notes, Messages, Drive, backups, and more.
If you’re setting up a shared iPad, consider limiting what syncs to avoid mixing personal data across users.
3) Add a payment method (or confirm “None” is fine)
If you plan to buy apps, pay for subscriptions, or use services like iCloud+, a payment method can help avoid purchase interruptions later.
If you don’t want one now, that’s okayjust expect prompts when you try to buy something.
4) Think about Family Sharing (especially for households)
Family Sharing can help with shared subscriptions, app purchases, and kid accounts. If you’re under 13, a parent/guardian typically needs to create your account via Family Sharing.
5) Write down recovery details somewhere safe
Keep your recovery phone number current. If you switch numbers often, update itfuture-you will be grateful.
Real-World Experiences: What It’s Like to Create a New Apple ID (and What to Expect)
On paper, creating a new Apple ID is a clean, linear checklist: email, password, phone verification, done. In real life, it often comes with
a few “Wait… why is it asking me that?” moments. Here are some common experiences people run intoplus how to handle them like a calm, capable adult
(even if you’re doing this at 1:00 a.m. while your iPad is glaring at you).
Experience #1: The “I just want apps” setup.
A lot of people create a new Apple ID because they just got a hand-me-down iPad or a fresh iPhone and want to download apps immediately.
The App Store method feels perfect for thisopen App Store, tap your profile icon, create the account, and you’re off.
The surprise is that Apple still wants solid verification details, like a phone number and email confirmation. That’s normal.
Think of it as Apple saying, “We’re going to protect this account, even from future-you.”
Experience #2: The “Why can’t I use my email?” moment.
You type in your email, hit Continue, and Apple basically says, “Nice trythis email already belongs to someone.”
Most of the time, that “someone” is… you. Maybe you made an Apple ID years ago to download one app, then forgot about it.
In this situation, creating a second Apple ID can cause long-term messiness (separate purchases, separate iCloud data).
If you suspect you already have an account, recovery is often the cleaner route.
Experience #3: The “I signed out and now everything looks empty” panic.
This is the big one. You sign out of an old Apple ID, sign into a new one, and suddenly Photos, Notes, Contacts, and subscriptions look like they vanished.
They didn’t vanishthey’re just still attached to the previous Apple ID. That’s how Apple keeps accounts separate.
The practical takeaway: before switching accounts, decide what data you want to keep on the device, and verify what’s stored in iCloud versus locally.
If you’re on a shared device, this separation is actually a good thing. On a personal device, it just means you should switch with a plan.
Experience #4: The “maximum number of free accounts” wall.
This typically shows up on devices that have been used for multiple account setups (common with classroom iPads, refurbished devices, or family hand-me-downs).
It feels random, but it’s usually a device-level limitation related to setting up iCloud accounts over time.
The best workaround is creating the Apple ID another way (or using another device to set up iCloud), then signing in once the account is established.
Experience #5: The “teen + family device” situation.
If you’re 13–17, you can generally create your own Apple ID, but in families that use Screen Time or Family Sharing, account changes may be restricted.
That’s not your iPad “being broken”it’s a settings choice. If the Apple ID area is grayed out, the fix is usually in Screen Time restrictions,
and you’ll need the organizer/parent to adjust it.
Bottom line: creating a new Apple ID is easy, but switching accountsor creating multiplecan get complicated fast.
If you’re making a new Apple ID for a truly fresh start, go for it. If you’re doing it because something broke, try recovery first.
Your apps, purchases, and iCloud self will thank you later.