Table of Contents >> Show >> Hide
- What a House HVAC Plan Actually Includes
- Step 1: Start With the House, Not the Equipment
- Step 2: Do the Load Calculation First
- Step 3: Choose the Right HVAC System Type
- Step 4: Design the Ductwork and Airflow
- Step 5: Plan for Ventilation, Filtration, and Humidity
- Step 6: Add Controls, Access, and Efficiency Features
- Step 7: Create a Practical HVAC Planning Workflow
- Common Mistakes to Avoid
- What Real Projects Teach You About HVAC Planning
- Final Thoughts
Designing a house HVAC plan is a bit like planning a road trip for air. You need to know where it starts, where it ends, how fast it should travel, and what happens when it hits traffic, which in this case means bad ductwork, weak returns, stuffy bedrooms, and that one upstairs room that feels like a toaster in July. A smart HVAC plan is not just about picking a furnace or air conditioner. It is about creating a complete system that handles heating, cooling, ventilation, humidity, filtration, and comfort without wasting energy or your money.
If you are building a new house, remodeling, or replacing an old system, this guide will help you create a house HVAC plan that makes sense on paper and in real life. We will cover what belongs in the plan, how to size equipment correctly, how to think about ducts and airflow, and how to avoid the classic mistake of buying a bigger unit and hoping for the best. Spoiler: that usually ends with higher bills and more complaints.
What a House HVAC Plan Actually Includes
A good house HVAC plan is more than a box on a pad and some lines on a blueprint. It should explain how your home will stay comfortable in every season and how air will move through the building. At minimum, the plan should cover:
- The home’s heating and cooling loads
- The type and size of equipment selected
- Supply and return duct layout
- Register and grille locations
- Ventilation strategy
- Humidity and filtration approach
- Thermostat and zoning locations
- Access for maintenance and future service
Think of it as the difference between saying “I need a kitchen” and actually designing where the sink, stove, and outlets go. Technically, both are kitchens. Only one is pleasant to live with.
Step 1: Start With the House, Not the Equipment
The first rule of HVAC planning is simple: do not shop for equipment before you understand the house. The house itself determines the load. Square footage matters, but it is only one piece of the puzzle. Window area, insulation levels, air leakage, ceiling height, orientation to the sun, duct location, occupancy, and even appliances all affect heating and cooling demand.
Gather the Right House Information
Before creating the plan, collect these details:
- Total square footage and room-by-room dimensions
- Number of floors and ceiling heights
- Insulation levels in walls, attic, and floors
- Window sizes, types, and directions they face
- Air sealing quality and known drafts
- Local climate and design temperatures
- Number of occupants
- Heat-producing appliances and lighting
This is where many bad HVAC plans go off the rails. Someone looks at a 2,200-square-foot house, guesses what “usually works,” and suddenly the equipment is oversized, the system short cycles, and humidity control disappears like cookies at a bake sale.
Remember the Whole-House Approach
HVAC planning works best when paired with building-envelope improvements. Better insulation, tighter air sealing, and high-performance windows can lower the load enough to change the equipment you need. That means a smaller system, lower operating costs, quieter performance, and often better comfort. In other words, sometimes the cheapest ton of cooling is the one you never have to buy.
Step 2: Do the Load Calculation First
If you want a serious HVAC plan, begin with a load calculation. In the United States, the standard residential approach is typically based on ACCA Manual J. This calculation estimates how much heating and cooling the house actually needs under design conditions. It is not a wild guess, and it is definitely not a “one ton per 500 square feet” shortcut from the HVAC dark ages.
Why Manual J Matters
A proper load calculation helps prevent two major problems: oversizing and undersizing. Oversized equipment often short cycles, creates temperature swings, and can leave the house cool but clammy in summer. Undersized equipment may run constantly and still struggle to maintain setpoint during extreme weather. Neither option wins any trophies.
Once the load is known, equipment is usually selected using Manual S principles, and the duct system is designed using Manual D principles. This sequence matters. First figure out the load, then pick the equipment, then design the air distribution. Doing it backward is like buying shoes before checking your size and then trying to redesign your feet.
A Simple Example
Imagine a well-insulated 2,000-square-foot home in a mixed climate. A rough guess might push someone toward a 4-ton air conditioner. But a proper load calculation may show that a 2.5- or 3-ton system is more appropriate because the attic is sealed, windows are efficient, and infiltration is low. That smaller unit may run longer, remove more humidity, and cost less to operate. Bigger is not automatically better. It is just bigger.
Step 3: Choose the Right HVAC System Type
Once the load is known, you can choose the type of system that fits the house, budget, and climate. Common options include:
Split System Furnace and Air Conditioner
This is the classic setup in many American homes: a furnace for heat and a central air conditioner for cooling. It works well where winters are cold enough to justify combustion heat and where existing ductwork already makes sense.
Heat Pump System
Heat pumps are becoming a popular choice because they provide both heating and cooling in one system. For many homes, especially where electrification or high efficiency is a priority, a heat pump can be a strong fit. In some climates, dual-fuel systems pair a heat pump with a furnace for added flexibility during very cold weather.
Ductless Mini-Split Systems
Ductless systems work well for additions, retrofits, older homes without ducts, or areas with unique zoning needs. They can also be useful when a house has rooms that are hard to serve with a conventional ducted system.
Zoned Systems
If your home has multiple floors, large glass exposures, bonus rooms, or very different occupancy patterns, zoning may help. But zoning should be designed carefully. Slapping motorized dampers onto an already questionable duct system is not a strategy. It is a future service call.
Step 4: Design the Ductwork and Airflow
Ductwork is where comfort is won or lost. Even excellent equipment will perform poorly with bad ducts. A house HVAC plan should show supply runs, return paths, trunk lines, branch sizes, airflow targets, and register placement.
Focus on Room-by-Room Air Delivery
Each room has its own heating and cooling needs. Bedrooms with west-facing windows, kitchens with cooking loads, and upstairs rooms under the attic usually need different airflow than interior bathrooms or hallways. A solid plan assigns air to each room instead of treating the whole house like one giant box.
Supply and Return Must Be Balanced
Supply air is only half the story. Return air matters just as much. When air is pushed into a room, it needs a path back to the system. Closed bedroom doors, undersized returns, or poor transfer paths can create pressure imbalances that hurt comfort and efficiency. This is why return design is such a big deal in forced-air systems.
Put Ducts in Better Locations
Whenever possible, keep ducts inside conditioned space or in well-sealed, well-insulated chases. Ducts running through brutally hot attics or damp crawlspaces lose energy and can create comfort problems. If ducts must pass through unconditioned areas, sealing and insulating them should be a priority.
Place Registers With Purpose
Register location affects comfort more than many homeowners realize. Supplies are often placed near exterior walls or windows to offset heat gain or loss. Returns are positioned to encourage good circulation. The goal is even air mixing without drafts, whistles, or the famous “one vent trying to cool the entire second floor” trick.
Step 5: Plan for Ventilation, Filtration, and Humidity
Heating and cooling are not the whole story. A good HVAC plan should also address indoor air quality. Modern homes are often tighter than older homes, which is great for efficiency but means ventilation has to be intentional.
Ventilation Is Not Optional in a Tight Home
Your plan should account for fresh-air exchange and local exhaust. Bathrooms need reliable exhaust fans. Kitchens need proper exhaust, especially if cooking produces heat, moisture, or combustion byproducts. In tighter homes, whole-house ventilation systems such as ERVs or HRVs may be worth considering.
Humidity Control Deserves a Seat at the Table
Too much humidity can make a home feel sticky and uncomfortable and may contribute to moisture and mold problems. Too little humidity in winter can make indoor air feel dry and cranky. Depending on climate, your HVAC plan may need a dedicated dehumidifier, humidifier, or a system specifically designed to manage latent loads well.
Choose Filtration That Your System Can Handle
Filtration matters, but more filtration is not automatically better if it chokes airflow. Many homeowners hear “MERV 13” and go shopping with heroic enthusiasm, only to discover the system was not designed for that pressure drop. Your HVAC plan should specify the filter type, size, and cabinet so filtration and airflow stay in balance.
If your household deals with allergies, pets, dust, or poor outdoor air events, it may also be worth considering enhanced filtration or supplemental air cleaning. Just remember that filtration helps reduce particles; it does not replace ventilation or moisture control.
Step 6: Add Controls, Access, and Efficiency Features
An HVAC system is only as user-friendly as its controls and service access. Your plan should include thermostat placement, zoning controls if used, and adequate room around equipment for maintenance. Hiding an air handler in a place that requires yoga, a flashlight, and emotional resilience is not ideal.
Thermostat Location Matters
Do not place the main thermostat near a sunny window, supply register, kitchen, or exterior door. It should read the general living conditions of the house, not the temperature of a heat blast from spaghetti night.
Think About Operating Costs
Efficiency ratings matter, but installation quality matters too. A high-efficiency system with lousy airflow can still disappoint. Plan for sealed ducts, proper refrigerant charge by a qualified contractor, and smart controls that match how the household actually lives. In many homes, programmable or smart thermostat scheduling can help trim heating and cooling costs when used sensibly.
Step 7: Create a Practical HVAC Planning Workflow
If you want a clean process, follow this order:
- Document the house layout, insulation, windows, and climate.
- Complete a room-by-room load calculation.
- Select equipment based on the calculated loads.
- Design ducts and returns for the required airflow.
- Add ventilation, exhaust, filtration, and humidity control.
- Place thermostats, zones, and service access points.
- Review local codes, permits, and contractor requirements.
- Verify the plan before installation begins.
This process keeps the design logical. It also makes it much easier to compare contractor proposals. If one proposal includes load calculations, room-by-room airflow, duct details, and ventilation strategy while another just says “install 4-ton system,” you already know which one is taking your comfort seriously.
Common Mistakes to Avoid
- Choosing equipment based only on square footage
- Oversizing the system “just to be safe”
- Ignoring return air pathways
- Reusing old ductwork without evaluating it
- Forgetting humidity control
- Skipping ventilation in a tight home
- Installing high-resistance filters without checking airflow
- Putting ducts in hostile attic conditions without sealing and insulation
- Placing thermostats in terrible locations
- Failing to plan for maintenance access
What Real Projects Teach You About HVAC Planning
In real homes, HVAC planning rarely stays theoretical for long. The moment walls come down, attic access appears, or a family explains how they actually live in the house, the design starts getting more honest. And honestly, that is a good thing.
One common experience happens during remodels. A homeowner might start out saying, “We just want to replace the old unit.” Then the conversation turns practical. The upstairs bedrooms are always hotter. The back office is freezing in winter. The kitchen gets warm every time the oven is on. Suddenly the problem is not the old equipment alone. It is the whole comfort strategy. That is when a real HVAC plan becomes valuable, because it shifts the discussion from one machine to the entire system.
Another lesson comes from older homes. On paper, reusing existing ducts sounds budget-friendly. In practice, old duct systems often have awkward routing, leaks, undersized returns, or runs that were added over time with all the elegance of a last-minute group project. Homeowners are sometimes surprised that the best upgrade is not the shiny condenser outside, but a redesigned return path, better trunk layout, or improved sealing. It is not glamorous, but neither is sweating through your sheets in August.
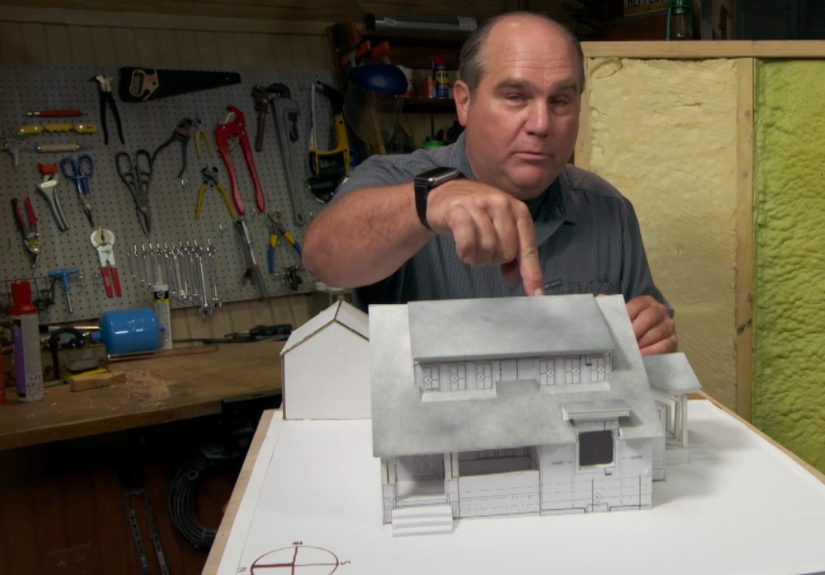
New construction teaches a different lesson: the best time to solve HVAC problems is before drywall. Once framing is open, you can choose better duct paths, reserve mechanical space, and avoid ugly compromises. A builder who coordinates HVAC planning early can keep ducts inside conditioned space, make room for proper returns, and avoid squeezing major components into impossible corners. That kind of planning pays off for years.
Families with different comfort preferences also reveal why controls matter. Maybe one person runs warm, another runs cold, and a third believes 68 degrees is a moral issue. In homes like these, zoning, better airflow balancing, or separate conditioning strategies for additions and bonus rooms can make daily life much easier. The best HVAC plan is not just efficient; it matches the way the house is occupied from morning to night.
There is also the humidity lesson, which tends to arrive uninvited. Many homeowners think a stronger air conditioner will fix summer comfort, but oversized cooling can leave a house damp and sticky because it satisfies temperature too quickly without running long enough to remove enough moisture. People often describe this as “the house feels cold, but not comfortable.” That complaint is a giant neon sign pointing back to system sizing and moisture control.
And then there is service access, the forgotten hero of good design. Equipment tucked into impossible spaces may look fine on a drawing, but it can make maintenance harder, more expensive, and less likely to happen. Good HVAC plans respect the technician who will have to clean, test, and repair the system later. Future you will appreciate that.
The biggest real-world lesson is simple: comfort problems usually have system causes, not one-part causes. A smart house HVAC plan looks at the building, the equipment, the ducts, the ventilation, and the people who live there. When all of those pieces line up, the home feels steady, clean, quiet, and comfortable. That is the goal. Not the biggest unit. Not the flashiest brochure. Just a house that feels right when you walk in the door.
Final Thoughts
Creating a house HVAC plan is really about making smart decisions in the right order. Start with the home. Run the load calculations. Choose equipment that matches the actual demand. Design ducts and returns that move air properly. Add ventilation, filtration, and humidity control. Then make sure the controls and layout work for everyday life.
Done well, an HVAC plan can improve comfort, efficiency, air quality, and even the lifespan of the equipment. Done poorly, it can turn your house into a collection of tiny climate complaints. So yes, the plan matters. Quite a lot, actually.
If you are hiring a contractor, ask for the design logic behind the proposal. Ask whether the system was sized using real calculations. Ask how returns, filtration, and ventilation are being handled. A good HVAC plan should be able to answer those questions clearly. If it cannot, that is your sign to keep shopping.