Table of Contents >> Show >> Hide
- Before You Start (30-Second Reality Check)
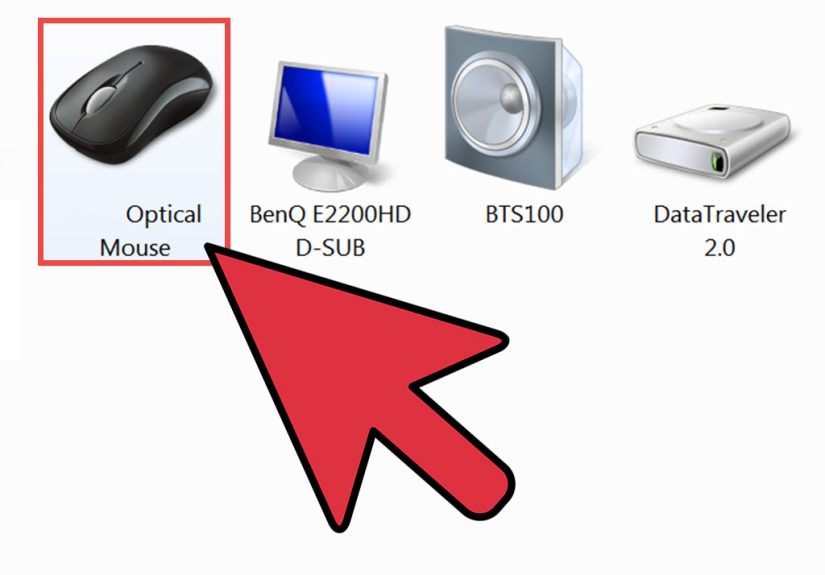
- Step 1: Identify Your Connection Type (USB Receiver vs. Bluetooth)
- Step 2: Install the Batteries and Power On (Yes, Polarity Matters)
- Step 3: Plug In the USB Nano Transceiver and Let Windows/macOS Do Its Thing
- Step 4: Sync the Mouse and Receiver (Only If Needed)
- Step 5: Install Microsoft Mouse & Keyboard Center (Optional, but Nice)
- Step 6: Test the Connection and Improve Reliability (A.K.A. Defeat Lag)
- Troubleshooting: When It Still Won’t Connect (Don’t Throw It Yet)
- FAQ: The Stuff People Ask Five Minutes After It’s Working
- Conclusion
- Real-World Experiences: What Actually Happens Outside Perfect Lab Conditions (Extra ~)
Your Microsoft Wireless Laser Mouse 5000 is supposed to be the kind of device you plug in once and then forget existslike a good smoke alarm or that one friend
who always brings extra chargers. But when it won’t connect, suddenly you’re doing the “trackpad crab-walk” across your laptop like it’s 2006.
Let’s fix it. Below are six clean, reliable steps to connect your Mouse 5000 (plus the practical troubleshooting that actually works when real life
gets involvedUSB hubs, interference, and that mysterious drawer where the tiny receiver goes to hide).
Before You Start (30-Second Reality Check)
- Confirm which “5000” you have: most “Wireless Mouse 5000” models use a USB nano transceiver (2.4 GHz), not Bluetooth.
- Find the USB receiver: it’s often stored in a slot under the mouse. If you don’t have it, connection gets… complicated (we’ll talk about that).
- Grab fresh batteries: many Mouse 5000 versions use two AA batteries.
- Pick a good USB port: if you have both USB 2.0 and USB 3.x, start with a “plain” port (more on why later).
Step 1: Identify Your Connection Type (USB Receiver vs. Bluetooth)
Microsoft has used the “5000” name on different products over the years, so first we need to identify your mouse’s “language.”
Here’s the quick test:
If your mouse came with a tiny USB receiver
You’re using a 2.4 GHz wireless USB nano transceiver. This is the most common setup for the Wireless Mouse 5000 family. The receiver often
snaps into the underside of the mouse for travel, and some designs even cut power when the receiver is stowed to save battery.
If you do NOT have a receiver and your mouse has a pairing button + a Bluetooth icon
You likely have a Bluetooth model (different setup steps inside Step 4). The title of this article focuses on the typical
USB-receiver Wireless Laser/Wireless Mouse 5000, but I’ll cover the Bluetooth path toobecause nobody likes being left behind.
Once you know which type you have, the rest becomes way less mysterious and way more “two minutes and done.”
Step 2: Install the Batteries and Power On (Yes, Polarity Matters)
Flip the mouse over and open the battery compartment. Insert the batteries exactly as shown inside the compartment
(the little + / − symbols are not decorative).
If your Mouse 5000 uses two AA batteries, this is also the moment to avoid the classic mistake:
mixing one new battery and one “I think it’s still good?” battery. Wireless mice can be surprisingly dramatic about uneven power.
Look for signs of life
- A power switch (some models have one).
- A battery indicator light (often two-color) that flashes or glows briefly.
- A laser/optical sensor glow (not always visible depending on the sensor type).
No lights at all? Try a fresh set of batteries. If it still shows nothing, skip ahead to the troubleshooting sectionthere are a couple of sneaky fixes.
Step 3: Plug In the USB Nano Transceiver and Let Windows/macOS Do Its Thing
Take the USB receiver and plug it directly into your computer (avoid a hub for nowhubs can work, but they add variables).
Your system should automatically detect it and install basic drivers.
What you should see
- Windows: a quick “Setting up device…” moment, then it’s usable.
- macOS: typically plug-and-play for basic mouse movement and clicking (advanced customization may be limited).
Give it a full 30–60 seconds on older PCs. If you’re on a work machine with strict policies, driver installation can be slower
(or quietly blocked), which is a whole separate adventure.
Once installed, try moving the mouse. If the cursor moves, congratulationsyou’re basically done and can jump to Step 5 for optional customization.
If it doesn’t move, Step 4 is where the magic happens.
Step 4: Sync the Mouse and Receiver (Only If Needed)
Many Microsoft wireless mouse + receiver pairs are effectively “introduced” at the factory and reconnect automatically.
But if the mouse isn’t responding, you may need to re-sync (pair) the link.
For USB receiver (2.4 GHz) models
-
Press and hold the Connect button on the USB receiver (if your receiver has one) for about 5 seconds.
Some setups launch a connection wizard or trigger a blinking indicator. - Press the Connect button on the mouse (usually on the bottom) once or hold briefly, depending on the model.
- Wait a few seconds. When the connection locks in, the cursor should start moving normally.
Don’t see a connect button anywhere? Then your model may be factory-paired with no manual pairing.
In that case, your best bet is troubleshooting: batteries, port changes, and interference fixes (we’ll cover those).
For Bluetooth “5000” models (if yours is Bluetooth instead)
- Put the mouse into pairing mode (usually by holding the pairing button until the LED blinks).
- On Windows: go to Settings → Bluetooth & devices → Add device → Bluetooth.
- Select the mouse when it appears, then finish pairing.
If you’re not sure which type you have, remember: Bluetooth mice don’t need a dedicated USB receiver.
If the only way it could connect is through that tiny dongle, it’s the USB wireless version.
Step 5: Install Microsoft Mouse & Keyboard Center (Optional, but Nice)
If you want more than basic left-click/right-click (custom buttons, scrolling behavior, app-specific shortcuts),
Microsoft’s Mouse and Keyboard Center is the official configuration tool for many Microsoft mice.
What it’s good for
- Reassigning side buttons
- Adjusting scrolling speed/behavior
- Creating shortcuts for specific apps
- Managing special features (model-dependent)
Practical note: Microsoft’s download page has historically listed support for certain Windows versions (commonly Windows 7 through Windows 10).
If you’re on Windows 11, the mouse should still work as a standard HID device, but the software experience can vary.
If installation fails, don’t panicyour mouse can still function perfectly without it.
Also worth mentioning: older Microsoft mouse software sometimes appears under names like IntelliPoint in legacy contexts.
The modern “Mouse and Keyboard Center” is the one most people want today.
Step 6: Test the Connection and Improve Reliability (A.K.A. Defeat Lag)
At this stage, your cursor should move smoothly. But if you’re getting stutters, dropouts, or “my mouse froze mid-email and now I look unprofessional,”
do these quick reliability upgrades.
Keep it close (at least during setup)
Start with the mouse within a couple feet of the receiver. Yes, some models advertise long range (often up to around 30 feet in ideal conditions),
but distance plus interference is where wireless starts to act moody.
Avoid USB 3.x interference (this one is real)
USB 3.0/3.1/3.2 ports and cables can create radio-frequency noise that interferes with 2.4 GHz receiversthe same neighborhood your mouse lives in.
If your receiver is plugged next to a busy USB 3.x device (like an external SSD), your mouse signal can get bullied.
- Try a USB 2.0 port if you have one.
- Use a USB extension cable to move the receiver away from the computer chassis and other cables.
- Keep the receiver away from Wi-Fi antennas, docking stations, and thick metal obstructions.
Confirm it’s working where you’ll actually use it
Test on your normal desk setup: laptop on a stand, dock plugged in, phone charging, maybe a mechanical keyboard that could double as a percussion instrument.
If it works there, you’re set.
Troubleshooting: When It Still Won’t Connect (Don’t Throw It Yet)
Problem: The mouse has power, but the cursor won’t move
- Change USB ports (preferably directly on the computer, not through a hub).
- Unplug the receiver, wait 10 seconds, plug it back in.
- Restart the computer (the oldest advice is sometimes the best advice).
- If your model supports it, try the Connect button re-sync process againreceiver first, then mouse.
Problem: The receiver isn’t recognized (or appears as an “unknown USB device”)
- Try a different USB port.
- Try the receiver on another computer to confirm whether the receiver itself is functional.
-
On Windows, open Device Manager and look under “Universal Serial Bus controllers” and “Mice and other pointing devices.”
If you see warnings, uninstall the problematic device and reboot so Windows reinstalls it.
Problem: It connects… but it lags or drops out randomly
- Move the receiver away from USB 3.x ports/cables and high-speed external drives.
- Use a short USB extension cable to reposition the receiver closer to the mouse.
- Reduce nearby 2.4 GHz noise sources (some Wi-Fi setups, crowded wireless environments, etc.).
- Replace batteries even if the light “seems fine.” Wireless devices can be liars when voltage dips.
Problem: It worked yesterday, stopped today, then magically works later
You’re not imagining it. USB device initialization can glitch, wireless environments can change, and Windows can occasionally “take a minute” to recover
input-device stability. The practical fix is usually: fresh batteries + receiver reseat + reboot + different USB port.
FAQ: The Stuff People Ask Five Minutes After It’s Working
Can I connect my Microsoft Mouse 5000 to a different receiver?
Sometimes. Some Microsoft wireless devices support a pairing process with a “Connect” wizard and a receiver button, while others are effectively
matched to their original transceiver. If your receiver and mouse both support pairing buttons, you have a better chance. If neither has a pairing option,
it’s often factory-paired and not designed for receiver swapping.
Do I need Microsoft Mouse & Keyboard Center?
No for basic use. Yes if you want customization (button mapping, special features). If the software won’t install on your system,
don’t stressyour mouse can still behave like a normal mouse and do mouse things reliably.
Why does the mouse feel fine on my desktop but terrible on my laptop dock?
Docks can add both USB complexity and interference. The fix is usually positioning: plug the receiver into a different port (often away from USB 3.x),
or use a short extension cable so the receiver sits closer to the mouse and farther from the dock’s electronics.
Conclusion
Connecting the Microsoft Wireless Laser Mouse 5000 is usually a quick win: batteries in, receiver plugged in, and you’re rolling.
When it’s not quick, the fix is almost always practicalre-sync if your model supports it, swap USB ports, and reduce interference.
The most overlooked upgrade is also the cheapest: move the receiver away from USB 3.x noise using a basic USB extension cable.
Do those six steps in order and you’ll go from “trackpad struggle” to “wireless freedom” fastwithout sacrificing your sanity or blaming your cat.
(Even if your cat is guilty.)
Real-World Experiences: What Actually Happens Outside Perfect Lab Conditions (Extra ~)
I’ve connected more wireless mice than I’d like to admit, and the Microsoft Mouse 5000 has a very specific personality: it’s usually polite,
occasionally stubborn, and extremely sensitive to one thingwhere that little receiver is sitting.
The most common “It was working and now it’s not” story goes like this: someone plugs an external SSD into a shiny new USB 3.x port,
then moves the mouse receiver to the port right next to it because “it’s convenient.” Ten minutes later the cursor starts skipping like a scratched CD.
The user assumes the mouse is dying. In reality, the receiver is sitting in a tiny storm of electrical noise. The fix is hilariously simple:
move the receiver one port over, or put it on a short extension cable. Suddenly the mouse behaves like it’s been to therapy.
Another real-life scenario: laptop + dock + standing desk. Docks are fantastic until they become a “USB everything bagel”:
webcam, microphone, Ethernet, monitor, and three mystery devices you don’t remember buying. The mouse receiver is often the smallest thing plugged in,
and it ends up jammed between thick cables, metal brackets, and a monitor stand that could survive re-entry from space. The mouse still connects,
but every so often it stuttersright when you’re dragging a file into the wrong folder. The fix? Put the receiver on the front of the desk,
closer to the mouse, with clear line-of-sight. It feels silly until it works instantly and permanently.
Coffee-shop setups are their own sport. You’re surrounded by a dozen laptops, everyone’s Wi-Fi is blasting, and at least one person is on a video call
with noise-canceling headphones that look like aircraft equipment. The Mouse 5000 often still works, but if you’re on the edge of range, you’ll notice
occasional lag. In those cases, I’ve had the best luck keeping the receiver directly in the laptop (not a hub), and keeping the mouse within
a couple feet. It’s not that the mouse is weakit’s that the airwaves are crowded and your signal needs a clean lane.
And then there’s the “missing receiver” problem, which is basically a rite of passage. People swear the dongle was in the box,
then later discover it snapped into the bottom of the mouse all alonglike the mouse was quietly protecting it from you. If the receiver is truly gone,
your options depend on the model. Some setups can re-pair to a compatible receiver, but many are effectively married to their original transceiver.
If you’re buying used gear, this is the one detail that matters as much as the mouse itself: no receiver, no reliable connection.
The good news: once you understand the three big leverspower, pairing, and placementthe Mouse 5000 becomes
boringly dependable. And boring is exactly what you want from a mouse. Save the drama for group chats.