Table of Contents >> Show >> Hide
- What Pliers Actually Do (and Why That Matters)
- The Core Types of Pliers (The Ones You’ll Reach for Constantly)
- Slip-joint pliers (the classic “household” pliers)
- Tongue-and-groove pliers (aka groove-joint / “water-pump” style)
- Needle-nose pliers (precision in tight spaces)
- Lineman’s pliers (strong grip + serious cutting power)
- Diagonal cutting pliers (side cutters / “dikes”)
- End-cutting nippers (end cutters)
- Locking pliers (Vise-Grip style)
- Specialty pliers (when “general purpose” isn’t enough)
- A Quick “Which Pliers Do I Need?” Cheat Sheet
- How to Choose Pliers (So You Don’t Buy a Drawer of Regret)
- 1) Match the jaw shape to the job
- 2) Choose the right size for control and leverage
- 3) Pay attention to the joint (it’s the tool’s “knee”)
- 4) Consider cutting edge quality (if you’ll be cutting)
- 5) Handle comfort isn’t “soft”it’s practical
- 6) If you work near electricity, use properly rated insulated tools
- How to Use Pliers Correctly (Without Slipping, Stripping, or Swearing)
- Grip smarter: keep the work deep in the jaws
- Pull, don’t pry (unless the tool is designed for it)
- Cutting wire safely: control the “snap”
- Using tongue-and-groove pliers without chewing things up
- Locking pliers: set the clamp pressure, don’t “gorilla it”
- Twisting wire with lineman’s pliers: keep it neat
- Common Mistakes (That Everyone Makes Once)
- Care and Maintenance (Make Pliers Last)
- Workshop Stories and Hard-Won Lessons (Experience Section)
- Conclusion
Pliers are the unsung heroes of the toolbox: they grip, twist, pull, pinch, bend, and sometimes (when nobody’s watching)
open a stubborn jar lid. The problem is that “pliers” isn’t one toolit’s a whole family of hand tools with different jaws,
different joints, and wildly different personalities. Pick the wrong pair and you’ll either (a) scar up your work, (b) round off
whatever you’re trying to grab, or (c) donate a little skin to the project.
This guide will help you choose the right pliers for the job, use them correctly, and keep them working smoothly for years.
You’ll also learn the common mistakes people make (so you can avoid them) and a few real-world lessons that only show up after
you’ve used pliers in the wildon plumbing, wiring, automotive clips, craft projects, and “why is this bolt even here?”
situations.
What Pliers Actually Do (and Why That Matters)
Most pliers fall into three big “jobs”:
- Grip and hold (clamping, turning, stabilizing parts)
- Bend and shape (wire forming, small metal bending, pulling and straightening)
- Cut (wire, small fasteners, zip tiessometimes the wrong thing, by accident)
When you’re choosing pliers, focus on which of those jobs you need most. A tool that grips beautifully might cut poorly.
A tool that cuts cleanly might be terrible at turning a rounded plumbing nut. Matching the design to the job saves time, reduces
damage, and keeps your knuckles from meeting sharp edges at high speed.
The Core Types of Pliers (The Ones You’ll Reach for Constantly)
Slip-joint pliers (the classic “household” pliers)
Slip-joint pliers have an adjustable pivot with two (sometimes more) jaw positions. They’re great for light gripping and general
tasks: holding small parts, bending wire, and grabbing fasteners. They’re not the best at heavy torque because they can slip if
you push too hardespecially on smooth or oily surfaces.
Best for: everyday grab-and-hold work, light turning, quick fixes.
Tongue-and-groove pliers (aka groove-joint / “water-pump” style)
These are the adjustable heavy hitters. The “tongue-and-groove” joint gives you multiple jaw positions and usually longer handles,
which means more leverage. They shine on plumbing fittings, large nuts, and irregular shapes. The jaws are typically angled and
aggressively serrated so they bite instead of skate.
Best for: plumbing repairs, turning larger fasteners, gripping odd shapes.
Needle-nose pliers (precision in tight spaces)
Long, tapered jaws let you reach into tight spaceselectrical boxes, small mechanical assemblies, hobby projects, and anywhere your
fingers simply can’t fit. Many needle-nose pliers also include cutters near the pivot for light wire cutting.
Best for: bending and positioning wire, retrieving small parts, precision gripping.
Lineman’s pliers (strong grip + serious cutting power)
Lineman’s pliers are built for heavy gripping, twisting wire, pulling, and cutting. They’re a favorite for electrical and general
construction work because they combine strength and durability in a do-it-now package.
Best for: twisting wire, cutting thicker wire, pulling staples, tough grip tasks.
Diagonal cutting pliers (side cutters / “dikes”)
If your main goal is cutting, start here. Diagonal cutters are designed to snip wire cleanly and efficiently. They’re not meant
for gripping and twisting like combination pliersusing them that way is how cutting edges get chipped and hearts get broken.
Best for: cutting electrical wire, zip ties, small nails (if rated for it), soft fasteners.
End-cutting nippers (end cutters)
End cutters cut at the tip rather than the side. They’re great for pulling small nails and staples, clipping wire flush, and
working close to a surface. If you’ve ever tried to remove a tiny brad without chewing up trim, you understand their charm.
Best for: pulling nails/staples, flush-ish cuts, trim and finish work.
Locking pliers (Vise-Grip style)
Locking pliers clamp down and stay clamped until you release them. They’re perfect when you need a third hand (or when your first
two hands are busy regretting earlier decisions). They’re also useful for turning stubborn fasteners, holding parts for filing, or
clamping oddly shaped items.
Best for: clamping, stubborn fasteners, holding parts while you work.
Specialty pliers (when “general purpose” isn’t enough)
Specialty pliers solve specific problems faster and safer than improvising:
- Snap-ring (circlip) pliers for installing/removing retaining rings.
- Crimping pliers for terminals and connectors.
- Hose clamp pliers for automotive and small engine clamps.
- Round-nose pliers for loops in craft wire and jewelry work.
A Quick “Which Pliers Do I Need?” Cheat Sheet
| Task | Best Choice | Why |
|---|---|---|
| Grab a small part in a tight spot | Needle-nose | Long jaws reach where fingers can’t |
| Turn a plumbing fitting or large nut | Tongue-and-groove | Adjustable jaw + leverage + bite |
| Cut wire cleanly | Diagonal cutters | Designed for cutting efficiency |
| Twist and cut thicker wire | Lineman’s pliers | Strong jaws and robust cutters |
| Clamp and hold something “hands-free” | Locking pliers | Locks onto the work until released |
| Pull small nails or staples | End-cutting nippers | Cut/pull close to surfaces |
How to Choose Pliers (So You Don’t Buy a Drawer of Regret)
1) Match the jaw shape to the job
Jaw shape is the “business end” that determines what the tool can do well:
- Wide, square-ish jaws = better for gripping and twisting (great for heavier work).
- Long, tapered jaws = better reach and precision.
- Aggressive serrations = more bite, but also more likely to mar surfaces.
- Smooth jaws (or padded jaws) = better for finished surfaces and delicate materials.
If you regularly work with chrome plumbing fixtures, polished hardware, or painted parts, consider having a “non-marring” option:
either dedicated smooth-jaw pliers or removable jaw covers. Your future self will thank you.
2) Choose the right size for control and leverage
Pliers commonly come in lengths like 6″, 8″, 10″, and 12″. Bigger pliers generally offer more leverage, but they can be clumsy in
tight spaces. For many home toolboxes, a practical starting mix is:
- 8″ slip-joint (general tasks)
- 10″ tongue-and-groove (plumbing and larger fasteners)
- 6″ or 8″ needle-nose (tight spaces and wire work)
- 7″ diagonal cutters (clean wire cuts)
- 7″ locking pliers (clamping and stubborn fasteners)
3) Pay attention to the joint (it’s the tool’s “knee”)
The joint is where precision and durability live. A solid-feeling pivot with minimal wobble helps the jaws meet properly and grip
consistently. Sloppy joints lead to slipping, twisting, and jaw misalignmentbasically, tool drama.
Look for smooth operation without grinding, and jaws that line up evenly when closed. If you close the tool and see daylight
where there shouldn’t be daylight, keep shopping.
4) Consider cutting edge quality (if you’ll be cutting)
For cutters (diagonal cutters, lineman’s pliers, some needle-nose), edge hardness and geometry matter. Higher-quality tools often
have hardened cutting edges designed to cut wire more cleanly and stay sharp longer. The key is using the right cutter for the
material: cutting hardened items with a tool meant for soft wire is a fast track to chipped edges.
5) Handle comfort isn’t “soft”it’s practical
Ergonomic grips reduce hand fatigue, especially when you’re squeezing repeatedly (cutting wire, crimping, clamping). A comfortable
grip also improves control, which reduces accidental slips. If you’re buying pliers you’ll use often, comfort is not a luxuryit’s
performance.
6) If you work near electricity, use properly rated insulated tools
If your work may involve contact with energized components, choose pliers made and tested for that environment. These tools are
typically marked with a recognized high-voltage rating (often 1000V) and are designed to reduce the risk of accidental contact.
Important: insulated tools help reduce risk, but they are not permission slips to work unsafely. De-energize circuits whenever
possible, verify with appropriate testing, and use proper protective equipment.
How to Use Pliers Correctly (Without Slipping, Stripping, or Swearing)
Grip smarter: keep the work deep in the jaws
For most gripping tasks, you want the object seated deeper in the jawscloser to the pivotbecause that area provides better
mechanical advantage. Holding something with just the jaw tips is like carrying groceries with two fingers: technically possible,
emotionally risky.
Pull, don’t pry (unless the tool is designed for it)
Pliers excel at pulling and gripping. They’re not ideal for prying like a pry bar or screwdriver. Twisting the tool sideways under
load can misalign the jaws and stress the pivot.
Cutting wire safely: control the “snap”
Wire can flick when it’s cut, and small pieces can launch like tiny metal mosquitoes. When cutting:
- Wear eye protection.
- Position the wire squarely in the cutting edges.
- Keep the cut end controlled (use your free hand safely, or angle the cut into a box or rag).
- Use cutters appropriate for the wire type and thickness.
Using tongue-and-groove pliers without chewing things up
The most common mistake is using the wrong jaw setting. If the jaws are too open, the teeth contact poorly and the pliers slip.
Adjust the joint so the jaws fit the part with maximum tooth engagement. Then squeeze and turn with controlled force.
For delicate finishes, consider wrapping the workpiece with a protective layer (like a thin cloth) or use a non-marring jaw cover.
Otherwise, your “quick adjustment” becomes a “quick scratch.”
Locking pliers: set the clamp pressure, don’t “gorilla it”
Locking pliers work best when you adjust the screw so the tool locks firmly without requiring a heroic squeeze. Too loose and it
slips; too tight and you can damage the partor struggle to release it. Practice on scrap material: you’ll quickly learn the
sweet spot where the jaws clamp securely and release cleanly.
Twisting wire with lineman’s pliers: keep it neat
For twisting wire (common in electrical work), grip the wire firmly and twist with controlled rotations. Let the tool do the work:
steady, consistent turns create a tighter, cleaner twist than frantic wrist gymnastics.
Common Mistakes (That Everyone Makes Once)
- Using pliers as a wrench: you can, but you may round fasteners and slip. Use the right wrench when possible.
- Gripping at the tips: less control, more slipping, more new words invented.
- Cutting hardened materials with standard cutters: chipped edges are forever (or at least until you replace the tool).
- Over-squeezing locking pliers: crushed threads, marred surfaces, and hard releases.
- Ignoring safety: especially eye protection during cutting.
Care and Maintenance (Make Pliers Last)
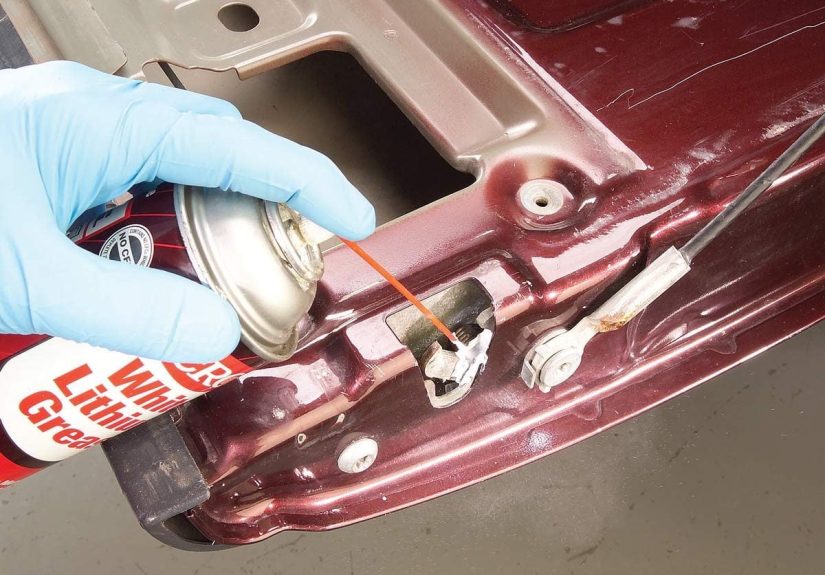
Clean and oil the pivot
Dust, grit, and moisture are the enemies of smooth action. Wipe pliers clean after dirty jobs and add a drop of light oil at the
pivot occasionally. Open and close the tool to work the oil in, then wipe off excess to avoid attracting grime.
Keep the jaws honest
If your pliers start slipping more than usual, check for worn serrations, misalignment, or pivot looseness. Some wear is normal,
but heavily worn jaws can turn a secure grip into a surprise release.
Store them dry
A toolbox or bag is fine, but avoid long-term damp storage. Rust on the joint makes the tool stiff and shortens its life. If you
work in humid environments, a little preventative oil goes a long way.
Workshop Stories and Hard-Won Lessons (Experience Section)
Here’s the truth about pliers: you don’t really “learn” them until you’ve used them on a job that’s inconvenient, awkward, and
timed precisely for maximum annoyance. The good news is that a few common experiences can save you from repeating the classics.
One of the most common rites of passage is the “rounded fastener incident.” Someone tries to turn a nut with general-purpose
pliers because the wrench is across the room (which might as well be across the country). The jaws bite, slip, bite again, slip
again, and suddenly the nut is smoother than a skipped stone. The lesson: if turning a nut matters, use a wrenchor at least use
a tool designed to clamp without camming off. Pliers can be incredible at gripping, but they’re not magic, and smooth fasteners
are basically designed to escape.
Another classic is the “mystery scratch” on a finished surface. Aggressive serrations are fantastic for grabbing metal pipe, but
they don’t care if you’re holding a polished fixture, a painted bracket, or the one part you promised you wouldn’t mark up. Many
people learn the simplest fix: keep a “clean” pair of pliers (smooth jaws or jaw covers) for finished work. It feels a little
extrauntil you don’t have to explain the tooth marks.
Then there’s the “zip tie launch.” You snip a zip tie, the tail flies, and it vanishes into another dimension. This is why a lot
of experienced folks cut zip ties with control: angle the cutters so the tail can’t rocket away, or trap it with a finger placed
safely out of the cutting path. It’s a small habit that prevents tiny plastic shrapnel and even tinier missing pieces.
Locking pliers come with their own learning curve. Early on, people tend to over-tighten the adjustment screw because it feels
satisfyinglike you’re winning. But too much clamp force can crush thin parts, distort edges, or make the tool stubborn to
release. The “experienced” move is dialing in just enough pressure to hold securely, then letting the locking mechanism do the
rest. If you can lock it with a comfortable squeeze and it releases without a wrestling match, you nailed it.
In tight spaces, needle-nose pliers often become the herobut only if you respect their limits. They’re great for positioning and
bending wire, but they’re not built for heavy twisting torque. When someone tries to use needle-nose like a mini pry bar, the jaws
can flex and the grip gets unreliable. The better approach is using needle-nose for placement and switching to a sturdier tool
(or a wrench) for turning force.
Finally, there’s the “two-pliers problem-solving moment.” Sometimes a part won’t turn because it’s spinning from the other side,
or a connector needs to be held while another piece is rotated. Two pliersone to hold, one to turncan transform a frustrating
job into a controlled one. It’s not fancy. It’s not glamorous. But it’s the kind of practical trick that makes you feel like you
leveled up, even if you’re still wearing yesterday’s sawdust.
The big takeaway from all these experiences is simple: pliers are most powerful when you treat them as purpose-built tools, not
universal substitutes. When you match the jaw shape, joint style, and size to the task, the work gets easierand your projects
end up looking like you meant to do that.
Conclusion
Choosing and using pliers well is mostly about three things: picking the right type for the job, using the tool with proper grip
and control, and maintaining it so it stays smooth and aligned. Start with a few core pliersslip-joint, tongue-and-groove,
needle-nose, cutters, and locking pliersand add specialty tools only when your projects demand them.
Do that, and you’ll spend less time fighting hardware and more time finishing projects. Also, your knuckles will remain
blissfully unacquainted with sharp sheet metal edges, which is a win no matter how you measure it.