Table of Contents >> Show >> Hide
- Why an Egg Door Decoration Works So Well
- My Game Plan: Simple Shape, High-Impact Details
- Materials and Tools I Used
- Step-by-Step: How I Made My Egg Door Decoration
- Step 1: Prep the Surface (The Boring Part That Makes the Pretty Part Possible)
- Step 2: Paint the Base Color
- Step 3: Add Pattern Without Losing Your Mind
- Step 4: Make the 3D Egg Cluster (The “Wow” Part)
- Step 5: Tie the Bow (And Negotiate With It)
- Step 6: Add Hanging Hardware That Won’t Betray You
- Step 7: Seal It for Outdoor Durability
- Design Tips I Wish Someone Had Told Me Earlier
- Budget Breakdown: What This Cost Me
- Common Problems (And How I Fixed Them)
- Three Easy Variations If You Want a Different Egg Vibe
- How to Hang It Without Wrecking Your Door
- Care, Storage, and How to Make It Last
- Extra : The Real-Life Experience of Making an Egg Door Decoration
- Conclusion
I didn’t plan to become “the neighbor who does seasonal door decor.” It happened the way most life-changing events do:
I walked past the craft aisle for “just toothpaste,” blinked, and suddenly I was holding ribbon like it was a serious responsibility.
One impulsive decision later, I decided my front door needed an Easter upgradespecifically, an egg door decoration that was cheerful,
slightly dramatic, and sturdy enough to survive wind, sun, and the occasional delivery person who rings the doorbell like they’re trying to summon thunder.
This is the exact process I used to make my own DIY egg door decorationa lightweight, egg-shaped door hanger with painted patterns,
a bow that behaves (mostly), and a floral/egg cluster that says “spring!” without yelling it in glitter.
I’ll also share what I’d do differently next time, how to weatherproof it, and a few alternate styles if you want your egg to be more “sweet cottage”
than “pastel parade.”
Why an Egg Door Decoration Works So Well
Eggs are basically the unofficial logo of spring: fresh, simple, and weirdly versatile. From a design standpoint, an egg shape is also a gift.
It’s symmetrical enough to look intentional, but forgiving enough to hide small “creative choices” (read: wobbly paint lines).
Plus, an egg door hanger can look:
- Classic (soft pastels, minimal florals)
- Playful (bold stripes, polka dots, layered faux eggs)
- Farmhouse (neutral base, greenery, twine bow)
- Modern (two-tone color blocking, clean lines)
My Game Plan: Simple Shape, High-Impact Details
Before I touched paint, I made two decisions that saved me from chaos:
- Pick one main “hero” element. Mine was a cluster of faux eggs and flowers at the bottom-right (more on why placement matters later).
-
Limit the palette. I used three main colors (a warm white base, a soft blue, and a muted coral) plus greenery as the “neutral.”
This kept it from looking like a candy aisle exploded on my porch.
Choosing the Base
I went with a wood egg blank because it feels substantial, paints beautifully, and can be reused for years.
If you don’t want to cut wood, you can buy a pre-cut egg door hanger blank online or at craft stores.
If you do want to cut it yourself, a simple egg template + jigsaw gets it done.
Materials and Tools I Used
Here’s what I used for my Easter egg door hanger. I’m listing “must-haves” and “nice-to-haves” so you can budget your energy.
Must-Haves
- Egg-shaped wood blank (or plywood you cut into an egg shape)
- Sandpaper (medium + fine grit)
- Primer (optional but helpful if your wood is thirsty)
- Acrylic craft paint + paint brushes
- Painters tape or vinyl tape (for stripes/clean edges)
- Hot glue gun + glue sticks
- Ribbon (for a bow and/or hanger)
- Sealer (spray clear coat or brush-on protective finish)
- Hanging hardware (D-ring hanger, sawtooth hanger, or sturdy wire)
Nice-to-Haves (But Very Fun)
- Faux flowers and greenery (one “statement” bloom + filler greens)
- Plastic eggs (for 3D detail) or small wooden eggs
- Decoupage medium + paper napkins (for patterned eggs)
- Foam dots (to add dimension under eggs/flowers)
- Paint pen (for crisp details and doodles)
Step-by-Step: How I Made My Egg Door Decoration
Step 1: Prep the Surface (The Boring Part That Makes the Pretty Part Possible)
I lightly sanded the front and edges of the wood blank. This knocks down rough fibers and helps paint go on smoothly.
Then I wiped off the dust with a dry cloth. If your wood feels extra porous or blotchy, a quick coat of primer helps your paint look more even.
Step 2: Paint the Base Color
I did two thin coats of warm white acrylic paint, letting the first coat dry before adding the second.
Thin coats beat thick coats every day of the weekbecause thick paint dries like it’s mad at you and shows brush strokes forever.
Step 3: Add Pattern Without Losing Your Mind
I used painters tape to create a simple pattern: wide diagonal stripes across the egg.
The trick is to press tape edges down firmly, especially along the wood grain.
Then I painted the stripe color (soft blue) in two light coats.
After the second coat was almost dry (not wet, not fully curedthis is the “Goldilocks moment”), I peeled the tape back slowly at an angle.
Clean lines. Big satisfaction.
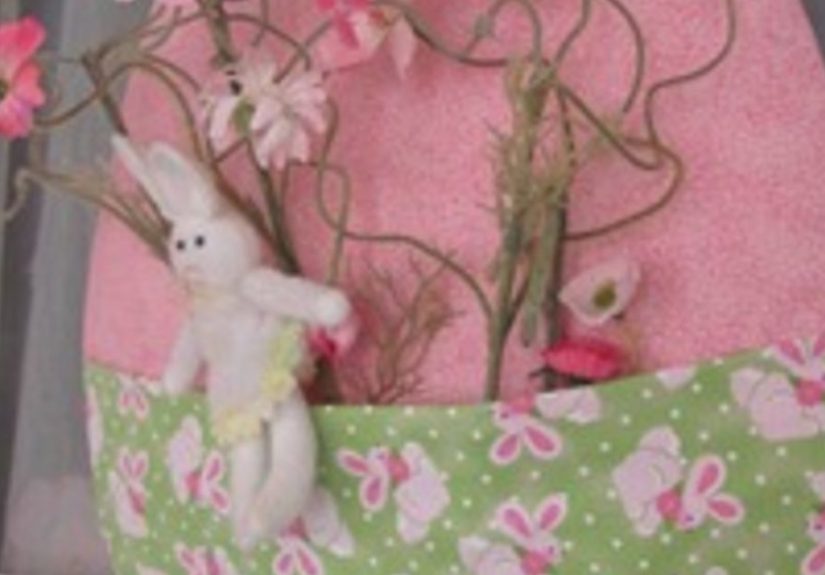
Step 4: Make the 3D Egg Cluster (The “Wow” Part)
This is where my egg door hanger stopped being “cute” and became “oh, she has a glue gun and she’s not afraid to use it.”
I created a small cluster using plastic eggs, faux flowers, and greenery.
- Pick a placement. I chose the bottom-right because it feels balanced and naturally draws the eye upward.
- Start with greenery. I glued a couple of greenery pieces first to create a base and hide glue seams later.
- Add your focal flower. One larger bloom makes everything look intentional, even if you panicked five minutes earlier.
- Layer in eggs. I glued 3–5 eggs in a loose triangle shape. A triangle composition reads “designed,” not “stuff fell here.”
- Fill gaps with small details. Tiny blossoms or sprigs hide awkward spaces and soften edges.
Step 5: Tie the Bow (And Negotiate With It)
I used wired ribbon for one reason: it listens. I made a medium bow (not hugemy door doesn’t need a bow that files taxes),
then trimmed the tails into clean angles. If you want a fuller look, layer two ribbons: one solid + one patterned.
I attached the bow near the top of the egg, slightly off-center, so it visually “talks” to the cluster below.
(Yes, decor can be conversational. Mine mostly says, “Hi, please bring chocolate.”)
Step 6: Add Hanging Hardware That Won’t Betray You
On the back, I attached a D-ring hanger. If your decoration is lightweight, a strong adhesive hook on the door can work;
if it’s heavier (wood + eggs + florals adds up), a wreath hanger or over-the-door hook is usually more secure.
The goal: your egg should stay on the door, not attempt an escape during the first gust of wind.
Step 7: Seal It for Outdoor Durability
This step is what makes your front door Easter decor last beyond one polite afternoon.
I used a clear protective topcoat, applying thin, even layers. If you’re spraying, do it outdoors or in a well-ventilated area,
and follow the product directions for drying time between coats.
Pro tip: seal the edges especially well. Edges are where moisture sneaks in and starts causing paint to lift.
Design Tips I Wish Someone Had Told Me Earlier
1) The “Three Textures” Rule
My decoration looked best once I had at least three textures:
smooth paint (base), soft ribbon (bow), and organic shapes (flowers/greenery).
Texture keeps the piece from looking flateven if your pattern is simple.
2) Use Contrast on Purpose
Pastels are pretty, but too many pale shades can blur together from the sidewalk.
I added contrast by using greenery and a slightly deeper accent color in the floral cluster.
This makes the egg door decoration readable from a distance (and yes, your door decor should be legible).
3) Keep the Focal Area “Busy,” Keep the Rest Calm
If the whole egg is covered in details, your eye doesn’t know where to land.
I kept the patterned paint clean and used the cluster + bow as the “statement.”
The result feels polished instead of cluttered.
Budget Breakdown: What This Cost Me
Prices vary by store and season, but here’s a realistic range:
- Wood egg blank: $8–$20 (or cheaper if you cut your own)
- Paint + tape (if you don’t already have it): $8–$15
- Ribbon: $3–$10
- Faux flowers/greenery: $8–$25 (depending on how fancy you get)
- Plastic eggs: $2–$8
- Sealer: $6–$15
My total was in the “I could’ve bought a pre-made wreath, but then who would I brag to?” rangeroughly $25–$45,
with leftover supplies for future projects.
Common Problems (And How I Fixed Them)
Paint bled under the tape
I touched up edges with a small flat brush and the base color. Next time, I’ll press tape down harder and use lighter paint coats along the edge.
Hot glue strings everywhere
I embraced my role as a human lint roller. Then I used a quick blast of warm air (hair dryer on low) and gently pulled strings away.
Also: fewer glue “spiderwebs” happen when you lift the glue gun straight up instead of dragging it away.
The bow looked limp
Wired ribbon solved it. If you only have unwired ribbon, double it up or use a zip tie behind the bow to keep loops perky.
Three Easy Variations If You Want a Different Egg Vibe
1) Plastic Egg Wreath Style
Attach decorated plastic eggs to a wreath form for a fuller, rounder look. If you like patterns, decoupage napkins onto eggs
and seal them before attaching.
2) Minimal Modern Egg
Two-tone color blocking, no florals, one crisp bow. This looks especially good on darker front doors (navy, black, or stained wood).
3) Egg Carton Flower Wreath-Inspired Egg
Cut and paint egg carton “cups” into flower shapes and cluster them on the egg base like a floral spray. It’s inexpensive, lightweight,
and surprisingly charming.
How to Hang It Without Wrecking Your Door
The best hanging method depends on your door material and your decoration’s weight:
- Lightweight: outdoor-rated adhesive hook (great for renters if your door surface allows it)
- Medium to heavy: over-the-door wreath hanger or adjustable hook
- Extra heavy: a secure hanger on a wreath stand or porch post (especially if wind is intense)
If you’re using adhesives, clean the surface first and follow the hook’s instructions. Also: test-hang over something soft the first time.
Nothing ruins spring joy like your egg performing a surprise swan dive onto the porch.
Care, Storage, and How to Make It Last
- Bring it in during extreme rain or high winds if possible.
- Store flat in a large bin or wreath bag so flowers don’t get crushed.
- Spot clean with a dry cloth. Avoid soaking anything with ribbon or faux florals.
- Touch up chips with paint and reseal small areas as needed.
Extra : The Real-Life Experience of Making an Egg Door Decoration
Let me be honest: the first version of my egg door decoration was not the calm, aesthetic masterpiece I imagined in my head.
My “quick afternoon craft” turned into a full-blown episode of Project Runway: Front Porch Edition, where the challenge was
“Make it cute, make it sturdy, and don’t glue your fingers together.”
The first lesson I learned was about scale. I originally picked a smaller egg blank because I thought,
“Subtle is classy.” Then I held it up to my front door and realized it looked like the door was wearing a dainty pendant.
Not a statement. More like: “Hello, I am a door who owns one piece of jewelry.” So I sized up, and instantly the design felt intentional.
If your front door is standard size, a taller egg shape reads better from the curbespecially if you want people to notice it before they’re
already on your welcome mat.
The second lesson was about patience with paint, which is hard for me because once I start crafting,
I develop the emotional maturity of a toddler who just learned the word “now.” I tried to tape and paint stripes too soon,
peeled the tape, and took half the base coat with it. I stared at the damage like a detective at a crime scene and immediately blamed the tape,
the humidity, and possibly the concept of time. The fix was simple: let the paint cure longer, use lighter coats, and peel tape slowly.
My redo looked cleaner, and the only casualty was my ego.
Third lesson: wind is an active participant in outdoor decorating. I test-hung the decoration before sealing it,
and a gust caught the bow like a sail. The egg spun, the ribbon tails slapped the door, and I realized I’d accidentally created
a percussion instrument. After that, I trimmed the ribbon tails shorter and secured them with a tiny dot of glue behind the bow.
If your porch is exposed, design for movement: keep long elements controlled, and distribute heavier pieces lower on the decoration
so it hangs straight.
My favorite partunexpectedlywas building the cluster. Arranging faux flowers is basically a low-stakes puzzle,
and once I started layering greenery behind the eggs, everything looked more “store-bought” (in a good way) and less “I panicked in aisle seven.”
I also learned that you don’t need a lot of flowers; you need the right flowers. One focal bloom, a couple of smaller supporting blossoms,
and greenery to fill gaps did more than an entire bouquet would have. Overbuying just gave me extra stems to store and feel guilty about later.
The final lesson was emotional: I didn’t expect door decor to make me this happy. But every time I came home,
that silly egg made the entrance feel friendlylike my house was in on the joke. My neighbors smiled, one person asked how I made it,
and a kid walking by said, “That egg is cool!” (which is basically the highest honor a craft can receive).
Now I get why people rotate seasonal decorations. It’s not just decorit’s a tiny ritual that says,
“Yep, we’re still here. And today we’re choosing cheerful.”
Conclusion
Making an egg door decoration is one of those projects that looks impressive but is totally doable with basic supplies and a little planning.
Start with a clean egg shape, add a simple pattern, build one bold cluster, and seal it so it can handle real life outside.
Keep it playful, keep it sturdy, and remember: if your bow starts acting up, you’re allowed to negotiate with it.