Table of Contents >> Show >> Hide
There are two kinds of people in this world: those who think scrambled eggs are “good enough,” and those who know they can be downright life-changing. If your eggs are usually a little dense, a little rubbery, or just kind of… meh, there’s a simple upgrade that feels almost like cheating:
use a blender.
Professional chefs and recipe developers agree that the key to fluffy scrambled eggs is all about how you beat them, how you heat them, and when you stop cooking. Many classic recipes tell you to whisk aggressively, use a nonstick skillet, and keep the heat low and gentle. But a growing number of cooks have discovered that using a regular or immersion blender can do that vigorous whisking (and aerating) for you in just a few seconds, producing eggs that are unbelievably light, tender, and evenly golden.
In this guide, we’ll walk through why a blender makes such a difference, how to actually do it (without over-blending), what you should add to your eggs for maximum fluff, and how to cook them so they stay dreamy and softnot dry and squeaky. We’ll also share some real-world experiences and tweaks to help you dial in your perfect scrambled eggs at home.
Why a Blender Makes Scrambled Eggs So Fluffy
Aeration: Tiny Bubbles, Big Payoff
When you crack eggs into a bowl and just swirl them with a fork, you’ll almost always have streaks of white that haven’t fully mixed into the yolk. That’s why your cooked eggs sometimes have rubbery white bits running through them. A whisk helps, but a blender takes it to another level by:
- Fully combining whites and yolks so you get a uniform golden mixture.
- Incorporating air into the eggs, creating tiny bubbles that puff up when they hit the heat.
- Smoothing the texture so curds form evenly and stay tender instead of patchy.
Many cooking sites and chefs recommend beating the eggs until they’re completely uniform and foamy for extra fluff. A blender does exactly that in just 3–5 seconds on low power. Any more and you risk over-aerating (or warming) the eggs, so think “short burst,” not smoothie mode.
Consistency: No More Streaky Scramble
One big advantage of the blender method is consistency. Because the mixture is perfectly smooth:
- Your eggs cook at the same rate across the pan.
- You avoid chalky chunks of egg white that toughen faster than the rest.
- The final dish looks more like a soft, golden cloud than a bowl of yellow-and-white confetti.
This is the same idea behind running whisked eggs through a fine-mesh sieve for ultra-silky results, but using a blender gets you there much faster and with less effort. You get restaurant-quality texture without needing restaurant-level patience.
Convenience: A Tiny Extra Step with a Big Reward
Yes, you are dirtying one more piece of equipmentbut in exchange, you get:
- Eggs that are fluffier with almost no extra work.
- A reliable method that’s easy to repeat every morning.
- A trick that works whether you’re cooking for one, two, or a hungry brunch crowd.
You can use a standard countertop blender or an immersion (stick) blender. The stick blender is especially convenient since it’s easy to rinse and takes up very little space, and you can blend the eggs right in the cup you’ll pour from.
How to Make Blender Scrambled Eggs Step by Step
1. Gather Your Ingredients
For two servings (about 4 large eggs), you’ll need:
- 4 large eggs
- 1–2 tablespoons of dairy (optional but recommended):
- Whole milk, half-and-half, or heavy cream for richness
- Or a teaspoon of mayonnaise per egg for ultra-creamy texture
- Salt (start with a small pinch per egg)
- Freshly ground black pepper, to finish
- 1–2 teaspoons butter (or ghee) for the pan
You can absolutely make fluffy scrambled eggs without dairy, but a little fat in the mix makes them taste luxurious and helps protect against overcooking.
2. Blend the EggsBut Not for Too Long
Crack the eggs into a blender cup or a tall container if you’re using an immersion blender. Add your pinch of salt and any dairy you’re using.
Then:
- Blend on low power for about 3–5 seconds.
- Stop as soon as the mixture looks uniform and a bit frothy on top.
You’re aiming for silky and well-mixed, not a giant foam party. Over-blending can make the eggs oddly spongy and can incorporate too much air, causing them to puff dramatically and then collapse into a dry texture. Short bursts are your friend.
3. Preheat Your Pan the Right Way
For fluffy scrambled eggs, your best friend is a nonstick skillet and moderately low heat.
- Place a nonstick pan on the stove over low to medium-low heat.
- Add the butter and let it melt gently until it’s just foamy, not browned or smoking.
- Swirl to coat the pan evenly.
If the pan is screaming hot, your eggs will seize and toughen the second they hit the surface, undoing all that careful blending work. Think gentle and patient, not “let’s cook this in 30 seconds and regret it.”
4. Cook Low and Slow, Stirring Gently
Pour the blended eggs into the pan and immediately grab a silicone spatula. From here, the game plan is:
- Stir slowly and continuously, sweeping the spatula along the bottom of the pan.
- Push the eggs from the edges toward the center, forming soft curds.
- Keep the heat on the low side; if things are setting too quickly, dial it back or briefly lift the pan off the burner.
The eggs should move in soft folds, not dry up into tiny grains. Depending on your stove and pan, this can take anywhere from 2–5 minutes. The payoff is a soft, pillowy texture with medium-sized curds that feel velvety instead of rubbery.
5. Stop Before They Look Fully Done
This is the part most people get wrong: if your scrambled eggs look perfectly done in the pan, they’re already overcooked.
Turn off the heat and pull the pan from the burner when:
- The eggs are mostly set but still a little glossy and loose in places.
- You see soft, creamy folds rather than dry, crumbly bits.
The residual heat in the pan (and in the eggs themselves) will finish cooking them in the next minute or so as you plate and serve. You can also add a small extra pat of butter or a spoonful of cream cheese at this point to cool things down and add richness.
6. Finish with Simple Flavor Boosts
Right before serving, add:
- A pinch more salt or pepper, to taste
- Fresh herbs like chives, dill, or parsley
- Grated cheese (cheddar, Parmesan, Gruyère, or goat cheese all work beautifully)
If you want to keep the texture ultra-smooth, add cheese that melts easily and fold it in at the very end so it turns creamy instead of clumpy.
Common Questions and Mistakes with Blender Scrambled Eggs
Do I Have to Add Milk or Cream?
Nobut it can help. Many modern scrambled egg recipes point out that you can make tender, fluffy eggs with no liquid at all if you control the heat and don’t overcook them. Milk or cream is optional, but:
- A splash of whole milk will add lightness and a mild creaminess.
- Half-and-half or heavy cream makes eggs rich, almost custard-like.
- A teaspoon or so of mayonnaise per egg can create a surprisingly velvety texture, as the emulsified fat protects the proteins as they cook.
If you prefer a lighter breakfast, skip the dairy and let the blender and gentle heat do the heavy lifting for fluff.
How Long Should I Blend the Eggs?
For most home blenders, 3–5 seconds on low is enough:
- The mixture should look uniform in color.
- You should see a thin layer of foam on top.
- There should be no visible streaks of egg white.
If your blender is powerful, keep the pulse very short. You want aeration, not a meringue. Overdoing it can make the finished eggs oddly bouncy.
What’s the Best Pan for Fluffy Scrambled Eggs?
A nonstick skillet is the easiest choice for soft, fluffy eggs that don’t stick, tear, or scorch. Stainless steel and cast iron can work if you’re skilled, but they’re less forgiving, especially at lower heat. Whatever pan you use, make sure:
- It’s preheated gently and evenly.
- There’s enough butter or oil to lightly coat the surface.
- You use a flexible spatula that can glide along the bottom without scratching.
Is Using a Blender Really Worth It?
If you already love your scrambled eggs, think of this as a fun experiment. Many people who switch to the blender method notice:
- Their eggs look more like something from a hotel breakfast bar or brunch restaurant.
- The texture is more consistent from batch to batch.
- They can whip up eggs for 3–4 people in one go without their arm getting tired from whisking.
Once you taste that fluffy, cloud-like scramble, going back to a lazy fork mix is tough.
Any Safety or Cleanup Concerns?
As with any raw egg preparation, make sure to:
- Wash the blender parts in hot, soapy water right after use.
- Avoid letting raw egg residue dry on the blades or in the container.
- Cook eggs until they’re just set, especially if serving young kids, pregnant people, or anyone with a weakened immune system.
Most modern blenders and stick blender attachments are dishwasher-safe, which makes cleanup almost as easy as rinsing a whisk.
Flavor Upgrades for Blender Scrambled Eggs
Cheesy, Herby, or High-Protein Twists
Once you’ve nailed the basic blender method, you can start customizing:
- Cheesy scramble: Fold in shredded cheddar, Monterey Jack, or Gruyère at the very end.
- Fresh herb scramble: Add chopped chives, tarragon, basil, or dill after cooking for bright flavor.
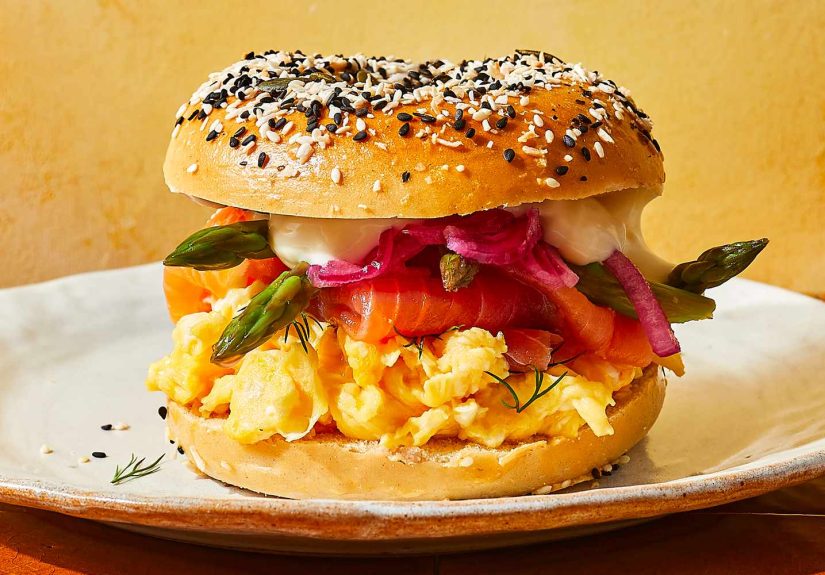
- Protein boost: Top with smoked salmon, crumbled bacon, or sautéed mushrooms and spinach.
- Breakfast taco style: Scoop your fluffy eggs into warm tortillas with salsa, avocado, and a sprinkle of cheese.
To keep the texture light, avoid loading the eggs with too many heavy mix-ins while they’re still in the pan. Use toppings and gentle folds instead of packing everything into the blender cup.
Real-Life Experiences with Blender Scrambled Eggs
So what actually happens when you switch from whisked eggs to blender eggs in everyday life? Here’s what many home cooks (and, let’s be honest, egg-obsessed people) tend to notice over a series of breakfasts.
Week 1: “Okay, These Are Different”
The first time you try blender scrambled eggs, the difference is immediate. The eggs pour into the pan like a smooth, pale-yellow batter instead of streaky yolk-and-white swirls. You might even panic for a seconddid I over-blend them? Is this too foamy?
Then, as you stir gently over low heat, the mixture thickens into soft, fluffy ribbons instead of chunky curds. When you plate the eggs, they look almost like a light mousse that happens to be warm. The first bite usually gets some kind of reaction: “Whoa,” “Okay, that’s good,” or “Why didn’t I do this before?”
Week 2: Dialing In Your Favorite Ratio
After a few tries, most people start tweaking:
- Some realize they prefer no extra liquid when using a blender because the aeration provides enough fluff on its own.
- Others fall in love with a tiny amount of heavy cream or half-and-half for a more custardy texture.
- Some experiment with adding a teaspoon of mayonnaise or a small spoonful of sour cream directly into the blender, discovering it creates ultra-smooth, restaurant-style eggs.
You also get more confident about stopping the cooking early. Once you trust that residual heat will finish the eggs, you pull them off the burner while they’re still a little glossyand your breakfasts instantly get better.
Week 3 and Beyond: The Blender Becomes Part of the Routine
By now, the blender probably just lives on your counter, and using it for eggs starts to feel as normal as using it for smoothies. The “extra step” doesn’t feel extra anymore; it feels like the way scrambled eggs are supposed to be made.
The side effects are all positive:
- Weekend brunch at home suddenly feels more special because you can serve eggs that rival what you’d get at a café.
- Picky eaters who hated rubbery eggs often warm up to the softer, creamier texture.
- Meal prep becomes easier because the eggs reheat more gently when they start fluffy instead of hard and dry.
You might even notice that other breakfast dishes improve. Once you see how much aeration and gentle heat matter for scrambled eggs, you start applying the same mindset to pancakes, omelets, and even French toast.
The Bottom Line: A Small Change with Big Results
Using a blender to scramble your eggs won’t turn breakfast into a three-hour project. It adds maybe 30 seconds to your routine, plus a quick rinse of the blender cup. In return, you get:
- Fluffier, more tender scrambled eggs.
- A smoother, more even textureno rubbery white bits.
- More control over richness, from light and airy to silky and custardy.
If scrambled eggs are already part of your regular breakfast rotation, this is one of the easiest upgrades you can make. Try it once, then try it a second time with your own tweaks. You may discover that your “throw-together” breakfast just became your favorite comfort food.
Conclusion
The path to the fluffiest scrambled eggs ever isn’t a secret restaurant machine or a complicated trick. It’s simply using a blender to do what your whisk has been trying to do all alongfully mixing and lightly aerating the eggscombined with the basics of low heat, a nonstick pan, and the discipline to stop cooking before they dry out.
Whether you’re cooking for yourself, feeding a family, or hosting brunch, blender scrambled eggs deliver that soft, cloud-like texture that feels like a little luxury on a weekday morning. Once you taste the difference, you’ll understand why so many home cooks and food writers swear by this simple method.