Table of Contents >> Show >> Hide
- First: what “USB” actually means for monitors (because words are hard)
- Know your MacBook Air’s display limits (so you don’t argue with physics)
- Method 1: Connect to a USB-C monitor with one cable (the cleanest setup)
- Method 2: USB-C to HDMI (most common, most compatible)
- Method 3: USB-C to DisplayPort (often best for high refresh and “real monitor” setups)
- Method 4: Use a USB-C hub or dock (when you need ports and peace)
- Method 5: “USB graphics” / DisplayLink adapters (the workaround for extra monitors)
- macOS display setup: make it look right (and not like a fuzzy billboard)
- Troubleshooting: when the monitor says “No Signal” and you say “Excuse me?”
- Quick “pick the right gear” decision guide
- Experiences and lessons learned (the 500-word “I learned this the hard way” section)
- Conclusion
You’ve got a MacBook Air. You’ve got a monitor. You’ve got “a USB.”
And yet the screen is still dark, the monitor is still smug, and your cable is acting like it only exists to charge things and ruin your confidence.
Let’s fix that.
This guide walks you through the simplest, most reliable ways to connect a MacBook Air to an external monitor using USB-based connections
(usually USB-C / Thunderbolt, sometimes USB-A with special adapters). We’ll cover the “plug it in and it works” options, the “buy one small adapter”
options, and the “why are my two monitors mirroring like a haunted twin movie?” options.
First: what “USB” actually means for monitors (because words are hard)
USB-C / Thunderbolt (the good kind)
Most modern MacBook Air models use USB-C-shaped ports that are also Thunderbolt/USB4 (still USB-C physically).
These ports can carry video in two common ways:
- DisplayPort Alt Mode: your Mac sends video directly over a USB-C cable (native performance).
- Thunderbolt: also supports high-bandwidth video and docks (native performance, usually pricier gear).
If your monitor has a USB-C input that supports video, you may be one cable away from happiness.
If your monitor only has HDMI or DisplayPort, you’ll use a USB-C adapter/cable to translate.
USB-A (the “wait, this is still here?” kind)
A regular rectangular USB-A port/cable does not carry standard video signals by itself.
If someone says “USB to HDMI,” it only works if the adapter is an active USB graphics adapter
(most commonly using DisplayLink) that turns USB data into a video output with software.
Know your MacBook Air’s display limits (so you don’t argue with physics)
Before you buy a second monitor “for productivity” and then stare at mirrored screens like you accidentally summoned a tech poltergeist,
check what your MacBook Air can do natively.
-
MacBook Air with M1 or M2: typically supports one external display natively.
(You can add more with DisplayLink-style docks/adapters, covered later.) -
MacBook Air with M3: can drive two external displays in a specific setup:
usually when using clamshell mode (lid closed) with the right macOS version and an external keyboard/mouse. - MacBook Air with M4: supports two external displays and is generally the easiest Air for multi-monitor setups.
Translation: your connection method matters, but your model matters first. Choose the approach that matches your MacBook Air’s capabilities
(or choose DisplayLink if you want to bend the rules a bit).
Method 1: Connect to a USB-C monitor with one cable (the cleanest setup)
If your monitor has a USB-C port that supports video input (often labeled USB-C, Thunderbolt, or “DP Alt Mode” in the manual),
you can connect MacBook Air → monitor with a single USB-C cable. Many USB-C monitors also deliver power back to your MacBook Air,
so you get display + charging in one shot. That’s the dream.
Quick steps
- Use a “full-featured” USB-C cable. Some USB-C cables are charge-only and will betray you quietly.
- Plug USB-C into your MacBook Air (Thunderbolt/USB-C port).
- Plug the other end into the monitor’s USB-C input (the one that supports video).
- Select the correct input on the monitor’s on-screen menu (USB-C or Type-C).
-
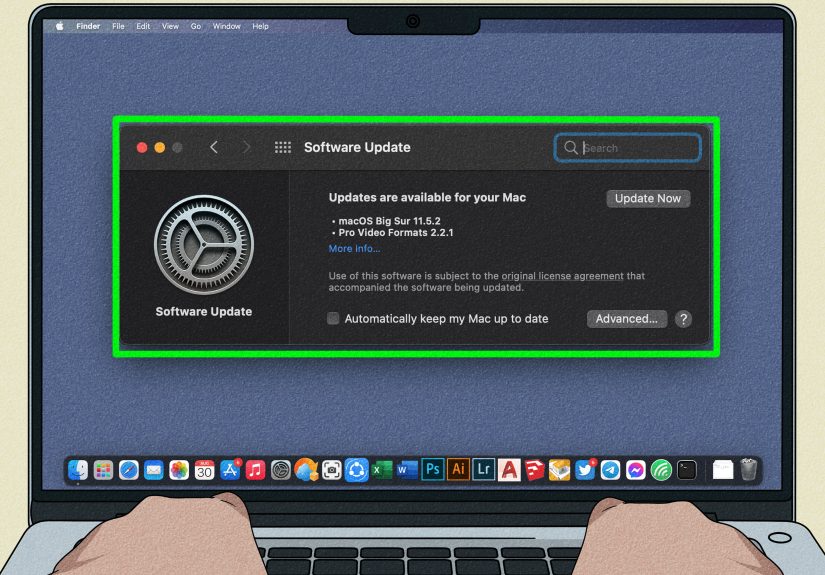
On your Mac: go to System Settings → Displays and confirm it’s detected.
Arrange screens, choose scaling, and set refresh rate if needed.
Best for
- USB-C monitors used for work-from-home desks
- Minimal cable clutter
- People who want to feel like they have their life together (even if it’s just the cable)
Method 2: USB-C to HDMI (most common, most compatible)
If your monitor has HDMI (and most do), you’ll use a USB-C to HDMI adapter or a USB-C to HDMI cable.
This is the go-to for older monitors, TVs, hotel room screens, classroom projectors, and that one office conference room display that always defaults to the wrong input.
Quick steps
- Connect the USB-C end of the adapter/cable to your MacBook Air.
- Connect an HDMI cable from the adapter to the monitor (or use an all-in-one USB-C→HDMI cable).
- Set the monitor input to HDMI.
- On your Mac, open System Settings → Displays to adjust resolution, scaling, and refresh rate.
Pro tips for 4K and smooth motion
-
If you want 4K at 60Hz, make sure your adapter and HDMI cable support it.
Many cheap adapters top out at 4K/30Hz (translation: your cursor will feel like it drank syrup). -
If your monitor is 144Hz/165Hz, HDMI may or may not get you there depending on monitor ports, adapter specs, and cable rating.
DisplayPort (next method) is often easier for high refresh.
Method 3: USB-C to DisplayPort (often best for high refresh and “real monitor” setups)
DisplayPort is common on productivity and gaming monitors and can be an excellent match for a MacBook Air.
A USB-C to DisplayPort cable (or adapter + DP cable) usually provides a stable connection
for 4K monitors and higher refresh ratesassuming the monitor supports those modes.
Quick steps
- Plug USB-C into your MacBook Air.
- Plug DisplayPort into the monitor.
- Select DisplayPort as the input on the monitor.
- Adjust settings in System Settings → Displays.
If you’re using a monitor where HDMI feels limited (refresh rate, color depth, odd flicker),
DisplayPort is frequently the “why didn’t I do this sooner?” option.
Method 4: Use a USB-C hub or dock (when you need ports and peace)
A hub or dock is basically a translator plus a port buffet. You plug one USB-C cable into your MacBook Air,
and the hub gives you HDMI/DisplayPort plus extra USB ports, SD card reader, Ethernet, and sometimes charging.
Great for desks. Also great for people who are tired of living the “two ports, infinite problems” lifestyle.
What to look for in a hub/dock
- Video type: “Supports DisplayPort Alt Mode” (native video) or “DisplayLink” (USB graphics, needs software).
- Power Delivery (PD): if you want the hub to charge your MacBook Air while connected.
- Resolution/refresh specs: look for the exact combo you want (example: 4K/60Hz).
Important gotcha: two monitor ports doesn’t always mean two independent monitors on macOS
Many dual-HDMI USB-C hubs rely on a technology called MST (Multi-Stream Transport) to run two displays over one connection.
Windows loves MST. macOS… does not. On many MST-based hubs, a Mac will show two external screens as mirrored instead of extended.
That’s not you messing up settings. That’s the hub using an approach macOS won’t use for separate desktops.
If you want two external monitors on a MacBook Air, you generally need one of these:
- Native support from your MacBook Air model (M3/M4 setups), using appropriate ports/cables, or
- A Thunderbolt dock designed for Macs, or
- A DisplayLink dock/adapter (covered next) if you want extra displays beyond native limits.
Method 5: “USB graphics” / DisplayLink adapters (the workaround for extra monitors)
If you have an M1 or M2 MacBook Air and you want more than one external monitor, or you have an MST hub that mirrors screens on macOS,
DisplayLink-based docks and adapters are the common workaround.
Here’s what’s happening: instead of sending a native video signal over USB-C, DisplayLink compresses your display output and sends it as data,
then the dock/adapter reconstructs it as HDMI/DisplayPort. It’s clever. It’s also a little like streaming your desktop to your own monitor.
Why people love it
- Lets many MacBook Air models run additional monitors beyond native limits
- Works through USB-C (and sometimes USB-A) because it’s “USB data,” not native video
- Great for productivity (documents, email, spreadsheets, dashboards)
Tradeoffs (read this before you rage-buy a dock)
- Requires software: you typically install a DisplayLink Manager app and grant permissions.
- Not ideal for fast gaming or color-critical motion work: compression can add latency or artifacts.
-
Streaming DRM limitations: protected video playback may be blocked on DisplayLink-connected screens
(some streaming apps/sites can show a black screen).
Basic setup steps
- Connect the DisplayLink dock/adapter to your MacBook Air via USB-C (or USB-A if the adapter supports it).
- Connect your monitor(s) to the dock via HDMI/DisplayPort.
- Install the required DisplayLink software if prompted.
- Open System Settings → Displays to arrange and configure screens.
macOS display setup: make it look right (and not like a fuzzy billboard)
Once your monitor is connected, the last 10% is in macOS settingsand that 10% is often where “this looks weird” gets solved.
Where to change things
- System Settings → Displays for resolution, scaling, refresh rate, and color profile.
- Arrangement (usually inside Displays) to drag screens so your cursor moves naturally between them.
Fix common “why does this look wrong?” problems
- Text too small: choose a larger scaling option (often “Larger Text”).
- Text blurry on a 4K monitor: try a different scaled mode; some monitors look best with “Default for display” or a common HiDPI-like scaling choice.
- Choppy motion: check refresh rate (60Hz vs 30Hz) and confirm your adapter/cable supports your target mode.
Troubleshooting: when the monitor says “No Signal” and you say “Excuse me?”
If nothing shows up, don’t panic-buy three more cables yet. Run this quick checklist first.
Fast checklist
- Check the monitor input: HDMI vs DisplayPort vs USB-C. This is the #1 culprit.
- Swap the cable: especially if it’s USB-C. Some cables charge only and do not carry video.
- Try a different port: use the other USB-C/Thunderbolt port on the MacBook Air.
- Unplug and replug: yes, it’s cliché. It’s also effective.
- Restart the Mac: especially after installing DisplayLink software or first-time dock setup.
- Open Displays settings: see if the monitor is detected; if so, adjust resolution/refresh.
- Confirm adapter type: a “USB to HDMI” dongle without DisplayLink (or similar tech) won’t magically output video from USB-A.
If you have two external monitors and they mirror each other
- If you’re using a dual-HDMI USB-C hub, it may be using MST. On macOS, MST hubs commonly mirror external displays rather than extend them.
- Solutions: use a Mac-friendly Thunderbolt dock, connect one monitor directly and one via a different native port/cable, or use DisplayLink for the extra display.
Quick “pick the right gear” decision guide
- Your monitor has USB-C (video): use a full-featured USB-C cable (best simplicity).
- Your monitor has HDMI only: use USB-C → HDMI adapter/cable (most common).
- Your monitor has DisplayPort: use USB-C → DisplayPort (often best for high refresh).
- You need extra ports at a desk: choose a hub/dock that supports DP Alt Mode and Power Delivery.
- You need more external monitors than your Air supports natively: consider DisplayLink (understanding the tradeoffs).
Experiences and lessons learned (the 500-word “I learned this the hard way” section)
People tend to discover MacBook Air + monitor reality in the exact same way: everything looks like it should work, and then it doesn’t.
And the funniest part is that the failure usually isn’t dramatic. No sparks. No warning. Just a totally calm monitor that refuses to acknowledge your existence.
The most common “experience” story starts with a USB-C cable that charges perfectly. Your MacBook Air lights up. Your battery icon smiles.
You think you’re doneuntil the monitor stays blank. That’s the classic charge-only cable trap. A lot of USB-C cables are built for power first
(and data second, or not at all), so they’ll happily charge a laptop but won’t carry the video signal your monitor needs. The fix feels ridiculous:
you swap the cable, and suddenly everything works like magic. It’s not magic. It’s just that cables have secret lives.
Another very real desk moment: you buy a shiny hub that advertises “dual HDMI.” You plug in two monitors.
Your MacBook Air detects two… and then mirrors them. The monitors become identical twins, showing the same desktop,
like they’re auditioning for a matching-outfit sitcom. That’s usually because the hub is using MST behind the scenes.
Windows systems often extend two displays over MST without breaking a sweat, but macOS often treats those outputs as a mirrored pair.
People typically learn this after rearranging settings for 30 minutes and whispering, “But I told you to extend” at the screen.
The solution is choosing a dock designed around Mac-friendly approaches (often Thunderbolt) or using DisplayLink when you truly need more displays.
Conference rooms add their own chaos. The HDMI cable on the table looks innocentuntil you realize it’s connected to a wall plate
that routes to a switcher that routes to a projector that was last updated during the era of flip phones. Here, the simplest approach is often best:
USB-C to HDMI, plug directly into the known-good cable, then manually pick the correct input on the display.
People who present a lot eventually start carrying a tiny “oh no” kit: a short HDMI cable, a USB-C to HDMI adapter, and (if they’re truly wise)
a backup adapter because adapters love to disappear at the worst moment.
DisplayLink setups bring a different kind of lesson: they can be fantastic for productivity, but they teach you to separate “work screens”
from “streaming screens.” It’s not unusual for someone to connect multiple monitors through DisplayLink and then discover that certain protected
streaming content won’t play correctly on those displays. The workaround experience is usually practical: keep one monitor connected natively
(USB-C Alt Mode or HDMI via adapter) for video playback, and use DisplayLink-driven screens for documents, messaging, and research.
Once you set expectations, DisplayLink stops feeling “fussy” and starts feeling like a purposeful tool.
Finally, clamshell mode (lid closed) is a surprisingly common “aha” moment for MacBook Air owners who want two displays on certain models.
People expect “two displays” to mean “two displays, anytime, any way.” In reality, some setups require the lid closed plus an external keyboard/mouse
and the right macOS version. Once configured, clamshell mode can feel like turning your MacBook Air into a tiny desktop brain.
The laptop becomes the computer, the monitors become the stage, and your desk suddenly looks like you know what you’re doing.
(Even if you’re still just trying to find the right cable.)
Conclusion
Connecting a MacBook Air to a monitor “with a USB” is easy once you match the method to the hardware.
If your monitor supports USB-C video, one cable can handle display and charging.
If it’s HDMI-only, a USB-C to HDMI adapter is the simplest path.
If you want high refresh on a serious monitor, USB-C to DisplayPort often wins.
And if you’re pushing beyond your Air’s native monitor limit, DisplayLink can helpjust go in knowing it’s a productivity superpower with a few quirks.