Table of Contents >> Show >> Hide
- What “Slumped Bottles” Actually Means (and Why It Makes a Great Backsplash)
- Reality Check: Is This a Weekend Project?
- Tools and Materials You’ll Want (Before You’re Mid-Project and Improvising)
- Step 1: Pick Bottles With a Plan (Not Just Vibes)
- Step 2: Slump the Bottles (The “Hot Yoga” Phase for Glass)
- Step 3: Turn Slumped Bottles Into Backsplash Pieces
- Step 4: Install Like You Want It to Last (Because You Do)
- Step 5: Grout, Caulk, and Clean (The Glow-Up Phase)
- Design Tips So It Looks Custom, Not “Craft Store Accident”
- Maintenance and Durability
- Quick FAQ
- Conclusion
- of Experience (So You Don’t Learn Everything the Hard Way)
Somewhere between “I should recycle these bottles” and “I should really stop buying grout at 9 p.m.” lives one of the
coolest kitchen upgrades you can do: turning ordinary glass bottles into kiln-slumped pieces and installing them as a
backsplash. It’s upcycling with sparkle. It’s functional art. It’s also a project that rewards patience… and punishes
anyone who thinks glass behaves like obedient little ceramic tiles. (Spoiler: it does not.)
In this guide, you’ll learn how to pick bottles, prep them, slump them safely, turn them into backsplash-ready pieces,
and install everything so it looks intentionalnot like your recycling bin staged a tiny coup behind the stove.
We’ll keep it practical, detailed, and lightly comedic, because if you can’t laugh at dried thinset on your elbow,
what can you laugh at?
What “Slumped Bottles” Actually Means (and Why It Makes a Great Backsplash)
Bottle slumping is kilnforming: you heat a glass bottle until it softens and relaxes into a flatter shape (often on a
prepared kiln shelf or a mold). You’re not melting it into a puddle; you’re coaxing it into a new silhouette. The
result is a flattened, glossy slab of bottle glassusually thicker in some areas, thinner in others, with natural
ripples and color depth that store-bought tile can only pretend to have.
As a backsplash material, slumped bottle glass shines (literally) because it’s easy to wipe clean, reflects light
beautifully, and can create a one-of-a-kind pattern. A kitchen backsplash is also a sweet spot: visually prominent,
relatively low structural demand, and small enough that you don’t need an industrial kiln the size of a minivan to
make a statement.
Reality Check: Is This a Weekend Project?
If you already have kiln access, basic tile tools, and a healthy respect for sharp edges, you can absolutely make
solid progress in a weekend. But the full timeline usually looks more like this:
- Prep & de-labeling: 1–2 sessions (soaking + scrubbing + “why is this glue immortal?”)
- Slumping: multiple kiln cycles, depending on batch size
- Cutting & smoothing: a slow, careful day (or two)
- Install + grout + cure: typically spread over 2–3 days
Translation: you can’t rush glass, mortar, or grout. They all hold grudges.
Tools and Materials You’ll Want (Before You’re Mid-Project and Improvising)
For slumping
- Glass-capable kiln (or studio access / maker space membership)
- Kiln shelf + shelf primer / kiln wash or kiln paper (rated for slumping)
- Heat-resistant gloves and eye protection
- Respirator for dusty shelf prep (seriouslykiln wash dust is no joke)
- Bottle slumping molds (optional, depending on the look you want)
For turning slumped bottles into “tiles”
- Wet saw with a diamond blade (best for clean, controlled cuts)
- Diamond hand pads or wet/dry sandpaper (for edge smoothing)
- Painter’s tape and a wax pencil/marker for cut lines
- Optional: tile nippers for tiny adjustments (not for major cuts)
For installation
- High-quality thinset mortar suitable for glass tile (often white)
- Notched trowel (size depends on thickness/flatness of your pieces)
- Tile spacers (or wedges) for consistent grout joints
- Unsanded grout (or a grout specifically safe for glass surfaces)
- 100% silicone sealant for change-of-plane “soft joints”
- Grout float, sponges, microfiber cloth
- Level, straightedge, measuring tape, and your favorite playlist
Step 1: Pick Bottles With a Plan (Not Just Vibes)
Color, thickness, and the “mystery glass” factor
Not all bottles behave the same. Some slump smoothly. Some devitrify (get a cloudy, scummy surface) if fired poorly
or contaminated. Some have thick bases that refuse to flatten evenly unless you adjust your schedule or orientation.
The safest approach: choose bottles that are similar in size and type for each firing batch and test one bottle
before you commit to a whole rainbow.
Design tip: collect a “palette” like you’d select paint swatchesgreens together, ambers together, clears together.
A backsplash looks more intentional when it has a clear rhythm, even if every piece is handmade.
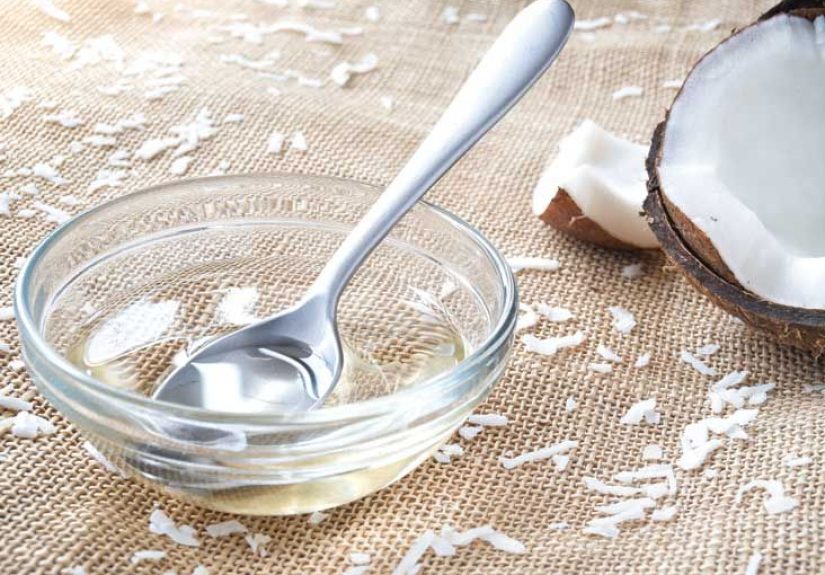
De-labeling without losing your will to live
Your two best friends are hot water and time. Soak bottles to loosen paper labels,
then remove sticky residue with either a commercial adhesive remover or a household method (oil-based rubs can work
well, followed by soap and water). The key: remove as much adhesive as possible before the bottle goes anywhere near a
kiln. Burning glue smells terrible and can cause surface issues.
Pro move: scrape with a plastic tool (old gift card energy) instead of metal. Metal loves to scratch, and scratched
glass loves to remind you it was scratchedforever.
Clean like you’re preparing glass for a fancy science experiment
Wash bottles thoroughly after label removal. Any residueglue, oil, fingerprintscan increase the chances of surface
haze. A final wipe-down before firing is worth the extra five minutes.
Step 2: Slump the Bottles (The “Hot Yoga” Phase for Glass)
Prep the kiln shelf so the bottle doesn’t become a permanent roommate
Slumping requires a release layer: shelf primer/kiln wash or kiln paper rated for the temperatures you’ll hit.
Without it, glass can stick to the shelf like it’s auditioning for a long-term lease. Apply shelf primer according to
directions, let it dry fully, and keep your shelf surface smooth and clean.
A practical starter firing approach (test and adjust for your kiln)
Kilns vary. Bottle glass varies. Controllers vary. So instead of pretending there’s one magical schedule, use this as
a starting point and do small tests:
- Ramp up gradually to remove thermal shock risk.
- Bring the bottle to a slumping range until it flattens to your liking.
- Anneal (hold at an annealing temperature) to reduce internal stress.
- Cool down slowly through the strain point, then continue to room temp.
Many kilnforming guides recommend slumping in the low-to-mid 1200°F range for typical slumping jobs, while bottle
flattening often pushes higher depending on bottle thickness and desired flatness. The most important lesson: do not
skip controlled cooling. A piece can look perfect coming outthen “ping” and crack later if stress wasn’t handled.
Common slumping problems (and how to avoid them)
-
Cloudy surface (devitrification): often linked to contamination, firing too hot/too long, or poor
shelf prep. Clean glass and avoid unnecessary high soaks. -
Uneven flattening: thick bases and bottle shapes can create “high spots.” Test orientation or plan
your layout so thicker ends become intentional accents. - Sticking: inadequate shelf primer/kiln wash application. Don’t be stingy here.
- Cracking after cooling: anneal and cool slowly. Glass remembers stress.
Step 3: Turn Slumped Bottles Into Backsplash Pieces
Choose a layout that flatters handmade glass
Slumped bottle glass looks best when you lean into its organic nature. Some layout ideas:
- Brick pattern: forgiving, classic, and hides slight size variations.
- Vertical “planks”: modern, clean, and makes ceilings feel taller.
- Mixed-material mosaic: pair slumped pieces with simple field tile (like white subway) to create a featured band.
- Gradient (ombre): transition from deep greens to pale clears for a designer look.
Cutting: go slow, keep it wet, respect the blade
A wet saw with a diamond blade is your best bet for consistent cuts. Tape your cut line (painter’s tape helps reduce
chipping), mark clearly, and feed the glass slowly. If you force it, the glass may chipor the blade will scream at
you in the ancient language of “stop doing that.”
Aim for consistent joint widths. Handmade pieces can vary slightly, but grout lines are the visual “framework” that
makes the final surface feel intentional.
Smoothing edges: the step people skip… and then regret
Even if your cuts are clean, edges can be sharp enough to qualify as “tiny danger.” Smooth cut edges with diamond
hand pads or wet/dry sandpaper (wet sanding helps control dust). Your future selfreaching for a sponge near the
backsplashwill thank you.
Step 4: Install Like You Want It to Last (Because You Do)
Prep the wall and layout lines
Protect countertops, remove outlet covers, shut off power where needed, and make sure the wall is clean and sound.
Mark level reference lines. Pre-lay pieces on the countertop to plan your pattern and avoid awkward slivers near
corners or cabinets.
Adhesive choice: thinset, not shortcuts
Glass tile installations typically call for a quality thinset mortar (often white to avoid color-shift behind
translucent glass). Many pro installers advise avoiding mastic for glass tile because mortar choice affects bond and
appearance. In plain English: use the right stuff, or you’ll be redoing the right stuff.
Trowel technique: collapse the ridges for better coverage
Apply thinset in small sections and comb with a notched trowel. Press pieces in firmly and use a slight rocking
motion to help collapse ridges and improve coverage. With glass, coverage mattersvoids can show through and weaken
the bond.
Spacing and movement: leave room for real life
Glass expands and contracts with temperature changes, so plan for movement at changes of plane (where the backsplash
meets countertop, cabinets, or adjacent walls). Use a flexible silicone sealant in those joints rather than grout.
This “soft joint” helps prevent cracking over time.
Step 5: Grout, Caulk, and Clean (The Glow-Up Phase)
Pick grout that won’t scratch your hard-earned shine
Glass surfaces can scratch with sanded grout. For narrow joints, unsanded grout is commonly recommended, and many
glass tile install guides echo that advice. If you want extra stain resistance, consider a high-performance grout
designed for kitchensjust confirm it’s safe for glass and do a small scratch test first.
Grouting technique that avoids the “washed-out joint” tragedy
Work diagonally with the float, pack joints fully, then wipe gently with a damp sponge. Too much water can weaken
grout and pull it from joints, especially on vertical surfaces. After it hazes, buff with a microfiber cloth until
the glass looks crisp again.
Seal where needed, then caulk the soft joints
Follow your grout manufacturer’s recommendations about sealing. Then apply silicone caulk at the countertop seam and
corners (changes of plane). This is the boring step that prevents future heartbreak. Boring is beautiful.
Design Tips So It Looks Custom, Not “Craft Store Accident”
- Use repetition: repeat bottle colors in a pattern rather than scattering randomly.
- Frame the handmade glass: pair it with simple tile so it reads as an intentional feature.
- Light it up: under-cabinet lighting makes bottle glass look like it’s glowing from within.
- Mind the edges: use a clean edge trim or end on a natural stopping point (like a cabinet side).
Maintenance and Durability
Once installed and cured, a slumped-bottle backsplash is generally easy to maintain. Use non-abrasive cleaners and a
soft cloth. Avoid harsh scouring pads (they can dull shine over time). If your grout is sealed (or inherently
stain-resistant), cleanup is even easierespecially behind the coffee station, where splatters are basically a daily
ritual.
Quick FAQ
Can I slump bottles in my kitchen oven?
No. Slumping requires kiln-level temperatures and controlled cooling. Ovens aren’t designed for this and can create
dangerous results.
Do I have to anneal?
It’s strongly recommended. Annealing reduces internal stress so pieces are less likely to crack laterespecially
after cutting or during seasonal temperature swings.
Can I put this behind a stove?
Often yes, but heat and cleaning needs vary by kitchen setup. Follow local building code, maintain safe clearances,
and use appropriate materials (proper mortar, grout, and sealant) for heat-prone areas.
Conclusion
A slumped-bottle backsplash is one of those rare DIY upgrades that’s equal parts sustainable, artistic, and genuinely
useful. The process asks for more patience than a typical tile project, but it pays you back with a surface nobody
else hasbecause nobody else had your exact bottle collection, firing quirks, and perfectly human choices along the
way.
Take your time. Test your kiln schedule. Smooth your edges. Use the right mortar. And when someone compliments your
backsplash, you can casually say, “Oh, that? Just some bottles I flattened with fire.” (Then pause for dramatic
effect.)
of Experience (So You Don’t Learn Everything the Hard Way)
Let’s talk about the stuff that doesn’t always show up in neat project lists: the “real life” momentswhen you’re
holding a gorgeous slumped bottle piece that looks like sea glass from a fancy boutique… and then you realize the
back edge is sharp enough to slice a bagel and your thumb at the same time.
First lesson: label glue is the enemy of pretty glass. I once thought, “It’s just a little sticky
patch. The kiln will burn it off.” Technically true. Spiritually catastrophic. The smell alone made me question every
decision I’d made since middle school. Worse, the fired surface looked slightly hazy where residue baked on. If you
want that clean, jewel-like finish, remove adhesive thoroughly and wash the bottle like it’s going into a museum
display.
Second lesson: not all “flat” is created equal. Bottles love to slump in their own peculiar way,
and thicker bases may stay proud. The fix isn’t always “fire hotter,” because hotter can also mean devitrification or
distortion. The better approach is to design around it. Use thicker ends as a deliberate rhythmlike a repeating
accentrather than fighting physics. If you’re mixing colors, keep thickness consistent within each row so the
surface reads intentional, not bumpy.
Third lesson: cutting glass is a slow conversation, not a debate. The wet saw will do the work, but
only if you let it. Pushing the glass faster doesn’t save time; it just buys you chips. Painter’s tape over the cut
line genuinely helps, and supporting the piece matters more than you thinkespecially when the cut passes through a
curved section that wants to vibrate.
Fourth lesson: thinset coverage is your secret superpower. With translucent glass, poor coverage can
show up as shadowy lines or weird color shifts behind the piece. I learned to work smaller sections, press pieces in
firmly, and check coverage early. It’s annoying to pull a piece off the wall, but it’s less annoying than staring at
a “mystery stripe” every morning while you make coffee.
Fifth lesson: grout is a mood. If you wipe too aggressively or too soon, you can wash grout right out
of the joints. If you wait too long, haze becomes a gym membership. The sweet spot is real, and it changes by product
and humidity. I now keep two buckets: one for rinse water and one for “final wipe,” and I change water often. It’s a
small discipline that makes the final surface look crisp instead of cloudy.
Finally: soft joints are not optional if you want longevity. The temptation is to grout everything
because grout looks “finished.” But corners and countertop seams move. Silicone there isn’t a compromise; it’s
intelligent design. The best compliment you can get is years later, when nothing has crackedand you’ve forgotten how
many times you said, “I’m never doing this again,” while also secretly planning the next wall.