Table of Contents >> Show >> Hide
- Why Paint an Outdoor Rug Instead of Buying One?
- Choose Your Base: Where Will Your DIY Painted Rug Live?
- Supplies You’ll Need for a Painted Outdoor Rug
- Step-by-Step: How to Paint an Outdoor Rug
- Design Ideas Inspired by Hometalk & Other DIYers
- How Long Will a DIY Painted Outdoor Rug Last?
- Safety & Maintenance Tips
- Troubleshooting: Common DIY Painted Rug Problems
- Experiences & Real-Life Lessons with DIY Painted Outdoor Rugs
If your patio feels a little “meh” and your budget is loudly clearing its throat every time you browse outdoor rugs, this project is for you. A DIY painted outdoor rug lets you get a custom look, flex your creativity, and save serious cashall without wrestling a heavy, oversized rug through your sliding door.
Inspired by the clever, budget-friendly projects you see on Hometalk, this guide walks you through exactly how to paint an outdoor rug step by step. Whether you’re painting directly on concrete, refreshing an old outdoor rug, or turning a drop cloth into a faux floorcloth, you’ll learn what works, what doesn’t, and how to help your design survive the weather.
Why Paint an Outdoor Rug Instead of Buying One?
Before we dive into tape and paint, let’s answer the obvious question: why not just buy a rug and call it a day?
- Huge savings: Large outdoor rugs can be pricey, especially those trendy patterned ones. With a drop cloth or basic rug and some paint, you can often come in at a fraction of the cost.
- Custom design: Love Moroccan tiles? Bold stripes? Kilim-inspired triangles? Want your house number on the “rug”? When you paint it yourself, the pattern, colors, and size are entirely up to you.
- Perfect sizing: If you’ve ever tried to find a rug that’s “just right” for a weirdly sized balcony or deck, you know the struggle. With paint and tape, you can simply tape out the size you need.
- Low risk, high impact: If you get tired of the design later, you can repaint, touch up, or start over far more easily than buying yet another rug.
Of course, painted surfaces outdoors are not indestructible. The better your prep, paint, and sealer, the longer your rug will lastbut expect some touch-ups over time, especially in harsh climates.
Choose Your Base: Where Will Your DIY Painted Rug Live?
“Outdoor rug” can mean a few different things in DIY land. Your exact process depends on what you’re painting:
1. Concrete or patio “faux rug”
You tape off a rug shape directly on your porch, patio, or balcony floor and paint the “rug” right onto the concrete or wood. This is ideal when:
- You don’t want an actual rug that can trap moisture or blow away.
- You have a small or awkwardly shaped space (like a balcony or tiny stoop).
- You’re okay with a more permanent, painted-on design.
2. Existing outdoor rug or basic flat-woven rug
This route works well with inexpensive flat-woven rugs or mats (think budget-friendly rugs from big-box stores). You tape off your pattern and use outdoor paint or spray paint to add stripes, geometric patterns, or stenciled motifs.
3. Drop cloth or canvas floorcloth
A painter’s drop cloth or heavy canvas can transform into a flexible, removable floorcloth. You:
- Hem or tape the edges,
- Prime and paint your design, then
- Seal well so it can handle foot traffic and light moisture.
This is great when you want to roll your rug up seasonally or move it around the house.
Supplies You’ll Need for a Painted Outdoor Rug
Your exact supply list will vary, but most DIY painted rugs use some version of the following:
- Base surface: Concrete patio, deck, drop cloth, vinyl remnant, or existing rug.
- Cleaner: Concrete cleaner/etcher for patios, or mild soap and water for drop cloths and rugs.
- Primer: Concrete or multi-surface primer if painting on concrete, wood, or vinyl.
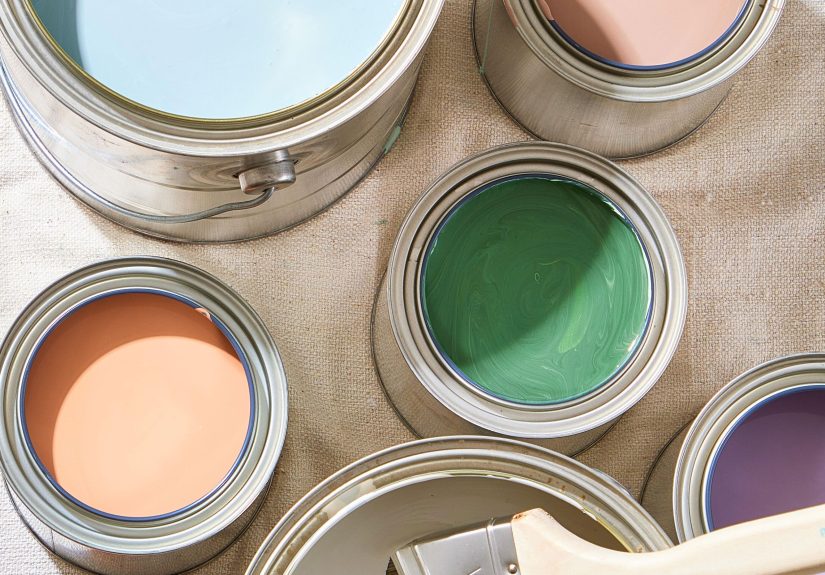
- Outdoor paint: Exterior porch and floor paint, masonry paint, or outdoor fabric paint depending on your surface.
- Painter’s tape: Different widths help you create borders and patterns.
- Stencil (optional): Reusable mylar stencils, or DIY stencils cut from cardstock or craft plastic.
- Brushes and rollers: Small angled brushes for edges and details, foam rollers for large areas.
- Sealer: Clear outdoor polyurethane or concrete sealer, non-yellowing and suitable for foot traffic.
- Measuring tape and chalk or pencil: To mark your “rug” outline and keep patterns symmetrical.
- Drop cloths & gloves: To protect your surroundings and your hands.
Tip: Always check that your primer, paint, and sealer are compatible and rated for the exact surface you’re painting (concrete, wood, vinyl, or fabric).
Step-by-Step: How to Paint an Outdoor Rug
Step 1: Prep the surface like it owes you money
Prep isn’t glamorous, but it’s the reason some DIY painted rugs last several seasons while others start peeling before the first cookout.
- Concrete or patio: Sweep, then scrub or pressure wash. Use a concrete cleaner or etcher if the surface is grimy or previously sealed. Let it dry completelylike, “no dark patches” completely.
- Drop cloth or canvas: Wash and dry to remove sizing and shrink it before painting. Iron or smooth out wrinkles so your lines turn out crisp.
- Existing rug: Vacuum thoroughly and spot-clean any stains. Make sure it’s fully dry before taping.
Step 2: Map out your “rug” and design
Use a tape measure and painter’s tape to mark the outline of your rug area. For a concrete rug, this is where you literally decide how big your rug will be on the floor. For a drop cloth or actual rug, you can tape off borders and pattern areas.
Decide on a design before you start pouring paint. Some easy, high-impact options:
- Wide stripes (horizontal or vertical)
- Buffalo check or plaid
- Diamond or chevron patterns
- Centered medallion with a simple border
- Stenciled “tile” look (great for patios and balconies)
Step 3: Prime the surface (if needed)
If you’re painting concrete, wood, or vinyl, a bonding primer can make a massive difference in durability. Roll on a thin, even coat inside your taped rug area and let it dry according to the can. For canvas or drop cloth, some DIYers also like to prime to prevent paint from soaking through and to give a smoother finish.
Step 4: Paint the base color
Roll on your main rug color (often a neutral like cream, gray, or tan). Two thin coats are better than one thick one. Thick paint can crack or peel more easily outdoors. Let each coat dry fully before adding the next.
If you’re working on a fabric rug or drop cloth, work the paint into the fibers, but don’t saturate so heavily that it becomes stiff like cardboard. For a softer hand, you can mix some outdoor fabric medium if recommended by the paint manufacturer.
Step 5: Add borders, stripes, or stenciled pattern
Once the base coat is dry, you get to do the fun part: pattern!
- For stripes or geometric shapes: Use painter’s tape to lay out your lines. Press the tape edges firmly to prevent bleed. You can even paint a thin line of the base color along the tape edges first to seal them before adding your accent color.
- For stenciled designs: Start stenciling in the center and work outwards. Use a small, almost “dry” brush or rollertoo much paint equals smudgy edges. Dab or roll gently, then lift the stencil straight up.
- For borders: Tape a frame a few inches in from the edge of your rug area and paint a contrasting border color.
Work in sections, letting each portion dry before you move tape or reposition stencils. Patience is your best friend here.
Step 6: Seal your painted outdoor rug
After your design is completely dry, add a clear sealer suitable for your surface:
- Concrete & patios: Use a clear concrete or masonry sealer made for outdoor traffic.
- Canvas, vinyl, or drop cloth rugs: Use a non-yellowing, water-based polyurethane designed for floors or exterior use.
Apply thin, even coats with a brush or roller, letting each coat dry fully. Two to three coats usually provide decent protection for light to moderate traffic.
Step 7: Let it cure before you party
This is the hardest part: you need to wait. Even if it feels dry to the touch, most paints and sealers need extra time to fully cure and harden. Follow the product instructions, but giving your rug a couple of days before heavy use is a good rule of thumb. Keep furniture, pets, and full-on dancing off the surface until then.
Design Ideas Inspired by Hometalk & Other DIYers
Need a little pattern inspiration before you break out the tape and stencils? Borrow from what works well outdoors:
- Classic stripe rug: Wide stripes in two colors (for example, navy and white) instantly make a patio feel coastal and clean. Perfect for decks with simple furniture.
- Tile-inspired pattern: Use a repeating tile stencil in one or two colors for a “cement tile” look. This works especially well on concrete patios or balcony floors.
- Kilim or tribal motifs: Combine triangles, diamonds, and small stripes in warm, earthy colors (terracotta, mustard, charcoal) to mimic handwoven rugs.
- Border-focused designs: Keep the center of the rug solid and use a detailed pattern just in the bordermuch faster than covering the entire rug with tiny designs.
- Statement text: On smaller doormats or entry rugs, stencil a short phrase like “Welcome,” house numbers, or a fun seasonal quote.
If you’re nervous about committing to a busy pattern, keep your first rug simplemaybe a neutral base with a bold border. You can always layer a smaller store-bought rug on top later for extra texture.
How Long Will a DIY Painted Outdoor Rug Last?
Let’s be honest: a painted outdoor rug is more “high-impact decor experiment” than heirloom investment. But with good prep and realistic expectations, you can get a season or more out of it, especially in milder climates.
Factors that affect durability include:
- Sun exposure: Harsh, direct sunlight can fade colors over time.
- Moisture: Constant rain, snow, or standing water will wear away paint faster.
- Foot traffic: High-traffic areas (like right in front of a door) will show wear sooner than decorative corners.
- Prep quality: Surfaces that were thoroughly cleaned, properly primed, and fully dried before painting hold up much better.
Plan for occasional touch-ups or a full refresh every year or two. The good news? Repainting is part of the funand a great excuse to try a new color palette.
Safety & Maintenance Tips
- Prevent slipping: If you’re using a painted drop cloth or movable rug, add a non-slip pad or backing, especially on smooth surfaces.
- Watch thickness: Go for multiple thin coats of paint rather than one goopy layer. Thick paint can crack and become a tripping hazard or peel in big chunks.
- Clean gently: Sweep or gently vacuum. Spot-clean with mild soap and water. Avoid harsh scrubbing that can scratch sealer and paint.
- Store seasonally: If you live somewhere with snowy winters or super heavy rains, roll up portable rugs in the off-season to prolong their life.
Troubleshooting: Common DIY Painted Rug Problems
Paint is peeling or flaking off
This usually comes down to poor adhesion or moisture. For concrete, make sure the surface was truly clean and dry and that you used a compatible primer and floor paint. For fabric or drop cloth, avoid super thick, rubbery layers that can crack when the rug flexes.
Lines are fuzzy instead of crisp
Paint seeped under the tape or stencil. Next time, press tape edges firmly, use good-quality painter’s tape, and consider sealing the edge with a light coat of the base color before adding your accent color.
Rug feels stiff and crunchy
You may have used too much paint or a very thick formula on fabric. Try mixing with a fabric medium if recommended, or using thinner coats. Over time, walking on the rug can soften it somewhat, but if it’s uncomfortably stiff, reserve it for lower-traffic areas.
Experiences & Real-Life Lessons with DIY Painted Outdoor Rugs
By this point, the basic “how-to” sounds pretty straightforward: clean, tape, paint, seal, done. In real life, though, a few extra lessons reveal themselves only after you’ve actually lived with a painted rug for a while.
First, most people underestimate drying and curing time. It’s so tempting to start arranging furniture as soon as the surface feels dry. But if you put heavy chair legs on semi-cured paint or sealer, you can end up with permanent dents, stuck spots, or peeled circles where the finish lifts off. A good habit is to plan this project for a weekend when you can paint on day one, seal on day two, and then give it at least another full day before dragging furniture back.
Second, weather timing matters more than you think. Many DIYers paint on the first warm day of spring, only to be surprised by an overnight rain shower or a sudden blast of humidity. Moisture can sneak into concrete from below or condense on cool surfaces at night, even when you painted in full sunshine. If you can, pick a stretch of mild, dry weather, and always check the can’s recommended temperature range. Your future selfsitting on a non-peeling patiowill thank you.
Another lesson: bold patterns are very forgiving. If you’re nervous about your brush skills or stencil technique, lean into stripes or large geometric shapes instead of delicate, intricate motifs. A chunky stripe or large-scale diamond hides tiny mistakes far better than a detailed “tile” pattern where every wobble stands out. When in doubt, keep your palette limited to two or three colors so the design looks intentional and cohesive rather than chaotic.
People who’ve lived with painted outdoor rugs for a season or two often say they wish they’d gone slightly darker with the base color. Bright white looks incredible at first but shows every footprint, dog paw, and potting soil spill. Soft gray, warm greige, or sandy beige still feel light and airy, but they’re much more forgiving day to day. If you crave brightness, use white or bold colors in the pattern instead of the whole background.
Maintenance-wise, a quick sweep every few days can dramatically extend the life of your rug. Grit and tiny stones act like sandpaper under shoes and chair legs. A small outdoor broom or even a soft brush attachment on a vacuum (if your rug isn’t permanently painted on concrete) helps keep the surface smoother and the paint intact.
Finally, give yourself permission to treat your DIY painted outdoor rug as seasonal art, not a forever commitment. One of the best things about this project is that it’s reversible in spirit: when the design starts to fade, peel, or simply feels tired, you can sand or scrub the worst spots, add a new base coat, and design something totally different. Many DIYers actually look forward to refreshing their “rug” each year to match new decor, new cushions, or a different color scheme.
If you approach the project with a playful mindsetaccepting that outdoor paint projects naturally evolve over timeyou’ll enjoy the creativity more and stress less about every little scuff. Think of your Hometalk-style DIY painted outdoor rug as an ongoing experiment in color and pattern that just happens to make your patio look fantastic along the way.