Table of Contents >> Show >> Hide
- Why Open Shelves Look Expensive (Even When They Aren’t)
- Before You Touch a Drill: The Open-Shelf Reality Check
- Choose Your Shelf Style (Budget vs. “Whoa, That Looks Custom”)
- Budget Materials That Still Look High-End
- Tools & Supplies Checklist
- Step-by-Step: Install Dramatic Kitchen Shelves (Without the “Oops”)
- Step 1: Decide What Lives on the Shelves
- Step 2: Mark a Straight Guide Line
- Step 3: Find Studs (And Don’t Treat Your Wall Like a Mystery Novel)
- Step 4: Choose the Right Fastening Strategy
- Step 5: Install Brackets or the Floating Rail
- Step 6: Prep the Shelf Boards Like You Mean It
- Step 7: Mount the Shelves
- How to Make Cheap Shelves Look Custom
- Styling Open Shelves So They Look Intentional (Not Like a Garage Sale)
- Maintenance & Upkeep (Because Kitchens Are Real Life)
- Common Mistakes (And How to Avoid Them)
- Budget Breakdown: What “On a Dime” Can Actually Mean
- Conclusion: The Cheapest Kitchen Upgrade That Actually Feels Big
- Real-World Experiences: What I Learned After Multiple “Dramatic Shelf” Projects
You know that fancy kitchen look where everything feels airy, curated, and like nobody in the house owns a junk drawer?
That vibe is often powered by one deceptively simple upgrade: open shelves.
Not “I spent my kid’s college fund on custom millwork” shelvesmore like “I spent a Saturday, a little elbow grease, and the cost of two takeout orders” shelves.
This guide walks you through how to build dramatic kitchen shelves on a dimethe kind that make your backsplash pop, your everyday dishes feel intentional,
and your kitchen look bigger (even if it’s basically a hallway with a sink).
Why Open Shelves Look Expensive (Even When They Aren’t)
Open shelving works because it changes the “visual weight” of a kitchen. Upper cabinets can feel boxy and heavy. Shelves, by contrast, create negative space.
That negative space is design-speak for: your kitchen can finally breathe.
Bonus: shelves can be a budget-friendly alternative to new upper cabinets. You’re not buying doors, hinges, frames, or a cabinet installer’s vacation fundjust boards,
brackets (or a hidden mounting system), and a finish.
Before You Touch a Drill: The Open-Shelf Reality Check
Open shelves are gorgeous, but they are also brutally honest. They will display your cute mugs and your questionable collection of mismatched plastic lids with equal enthusiasm.
Do this quick reality check before committing:
- If you hate dust: plan to store everyday items you use often (so they get washed regularly), and keep “display-only” decor minimal.
- If you cook a lot: prioritize strong ventilation and place shelves away from the heaviest grease zones when possible.
- If you love clutter: keep at least some closed storage. A mix of open + closed usually looks best and lives easiest.
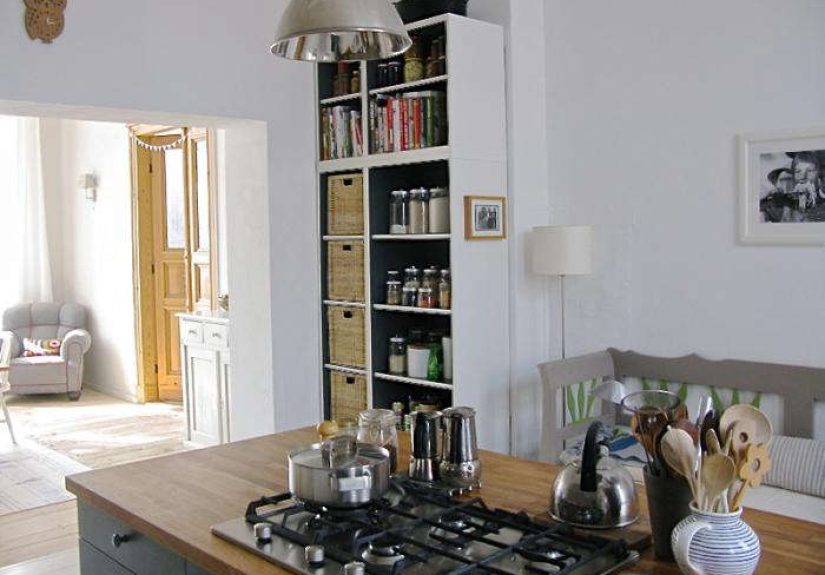
Choose Your Shelf Style (Budget vs. “Whoa, That Looks Custom”)
Option A: Bracketed Shelves (Cheapest, Strongest, Fastest)
Brackets are the budget MVP. They’re easy to install, easy to level, and easy to trust with real-life kitchen weight (plates, bowls, that one Dutch oven you treat like a pet).
The trick is choosing brackets that look intentionalthink simple black metal, warm brass, or chunky wood corbels depending on your kitchen style.
Best for: rentals you can modify, busy households, heavier loads, farmhouse/industrial/classic kitchens.
Option B: “Floating” Shelves (Cleanest Look, Slightly More Planning)
Floating shelves hide the hardware, which is why they look so high-end. The mounting system matters here: a good bracket that hits studs is your best friend,
because gravity is extremely loyal to physics.
Best for: modern kitchens, minimalist vibes, “I want it to look like a magazine” people.
Budget Materials That Still Look High-End
You don’t need exotic hardwood to get a dramatic result. What you need is a plan and a finish that makes cheap lumber behave.
Here are budget-friendly options that photograph beautifully:
- Pre-primed pine or common boards: paint them and they’ll look custom from five feet away (and even closer if you sand well).
- Stair treads: often thicker and nicer-looking than basic boardsgreat for a “substantial” shelf without custom milling.
- Butcher block offcuts: small sections can become gorgeous shelves with minimal finishing.
- Reclaimed wood: dramatic grain and instant characterjust clean, de-nail, and seal thoroughly.
What Depth Should You Choose?
For most kitchens, shelves in the 10–12 inch depth range feel practical without looking bulky.
Shallower can work for spices and mugs. Deeper can start to feel like you installed a runway over your countertop.
Tools & Supplies Checklist
Most of this is beginner-friendly. Here’s what you’ll typically need:
- Stud finder
- Level (longer is betteryour eyes are liars)
- Drill/driver + bits
- Tape measure, pencil, painter’s tape
- Brackets or floating shelf hardware
- Wood screws (long enough to bite into studs)
- Drywall anchors (only where appropriate)
- Sanding block or sander + sandpaper
- Paint or stain + protective topcoat (kitchen = wipeable surfaces)
Step-by-Step: Install Dramatic Kitchen Shelves (Without the “Oops”)
Step 1: Decide What Lives on the Shelves
This is not just stylingit determines spacing and strength requirements. If you’re storing plates and bowls, plan for sturdier hardware and comfortable reach.
If you’re displaying a few cookbooks and a plant you promise you’ll water, your shelf spacing can be tighter and lighter.
Pro tip: Keep everyday items on the lower shelves. Reserve the high shelf for occasional-use pieces or decor.
Step 2: Mark a Straight Guide Line
Use painter’s tape to create a long visual guide where the shelf will sit. It’s easier to adjust tape than erase pencil lines for the next six weeks.
Then confirm with a levelbecause “close enough” turns into “why does my kitchen look slightly seasick?”
Step 3: Find Studs (And Don’t Treat Your Wall Like a Mystery Novel)
Locate studs with a stud finder and mark their centers. Whenever possible, anchor at least one screw into a stud for each bracket or mounting rail.
Many install guides recommend studs as the best support, and they also warn to be mindful of what might be behind the wallespecially near outlets, switches, plumbing, or vents.
Step 4: Choose the Right Fastening Strategy
The best-case scenario is mounting into studs. If your ideal shelf placement doesn’t line up perfectly, you may need anchors for some holes.
Use anchors rated for the load and wall type. Avoid “cute” shortcuts like adhesive hooks for shelvesthey’re not built for that kind of responsibility.
- Into studs: use appropriate-length wood screws, often 2.5–3 inches depending on hardware and wall thickness.
- Not into studs: use heavy-duty drywall anchors or toggle-style anchors rated for shelving loads (and follow the manufacturer’s instructions).
Step 5: Install Brackets or the Floating Rail
Hold the bracket/rail to the wall, confirm it’s level, drill pilot holes, then drive screws.
Check level again before fully tightening everythingbecause walls can be weird and brackets can drift.
Step 6: Prep the Shelf Boards Like You Mean It
A budget shelf looks expensive when the finish is clean. Do this:
- Sand (especially edges and corners). Even painted shelves benefit from a smooth base.
- Fill knots or imperfections if painting (wood filler is your friend).
- Paint or stain in thin coats.
- Seal with a durable topcoat. Kitchens are humid, greasy, and occasionally chaotic.
If you want extra drama on the cheap, consider a high-contrast move:
dark shelves on light walls or light shelves on darker paint.
Small change, big “wow.”
Step 7: Mount the Shelves
For bracketed shelves: set the board on the brackets and screw it down from underneath (most brackets are designed for this).
For floating shelves: slide the shelf onto the mounting hardware and secure it per the system instructions (often with set screws underneath).
Final check: Confirm level. Step back. Admire. Then stop touching it “just a little” or you’ll accidentally create modern art.
How to Make Cheap Shelves Look Custom
1) Make Them Look Thicker (Without Paying for Thick Wood)
If you want that chunky, high-end shelf look, you can:
- Use stair treads (naturally thicker).
- Build a hollow “box” shelf (lightweight, thick look).
- Add a front face board to a standard shelf to create a beefier profile.
2) Match a Finish in Your Kitchen
Easiest pro move: match shelves to an existing finishfloors, hardware, or countertops.
If your hardware is matte black, black brackets can tie everything together instantly.
3) Add Lighting for Maximum Drama
Under-shelf LED strips (warm tone) make shelves look custom and help task lighting on countertops.
It’s the cheapest “luxury” upgrade you can do without plumbing.
Styling Open Shelves So They Look Intentional (Not Like a Garage Sale)
The best-looking shelves balance function and style. A few principles that help:
- Edit ruthlessly: open shelves look best when not overstuffed.
- Use everyday items: dishes you use often won’t sit long enough to get dusty.
- Decant pantry goods: matching jars instantly make shelves feel “designed.”
- Avoid visual chaos items: bulky appliances, random papers, and excessive knickknacks can make shelves feel cluttered.
A Sample Shelf “Formula” That Works
Try this easy mix:
- 60% functional (plates, bowls, mugs)
- 30% containers (matching canisters, jars, a tray)
- 10% decor (a small plant, a framed recipe, a cutting board)
Maintenance & Upkeep (Because Kitchens Are Real Life)
Open shelving requires a little upkeep, but you can make it painless:
- Wipe weekly (a quick microfiber pass is usually enough).
- Keep shelves away from the worst grease zone if possible, and run your range hood when cooking.
- Store glassware thoughtfullyespecially if you live somewhere with vibrations or earthquakes. Safer items down low is a smart habit.
Common Mistakes (And How to Avoid Them)
Mistake 1: Installing Without a Stud Plan
If you don’t hit studs where it matters, you’re trusting drywall with your dinner plates. Drywall is many things, but it is not a structural beam.
Whenever possible, anchor shelving into studs and use anchors only where appropriate.
Mistake 2: Shelves Too High (Hello, Ladder Life)
If you need a step stool for your daily mug, your shelf becomes a decor-only museum. Keep daily-use items within comfortable reach.
Mistake 3: No Protective Finish
Unsealed wood in a kitchen can stain, warp, and absorb grime. Seal shelves so you can wipe them clean without panic.
Budget Breakdown: What “On a Dime” Can Actually Mean
Costs vary by region and materials, but here are realistic budget ranges for a two-shelf setup:
- Ultra-budget bracket shelves: $40–$120 (common boards + basic brackets + paint)
- Mid-budget upgraded look: $120–$250 (stair treads or nicer lumber + statement brackets)
- Floating shelf look: $150–$350 (hardware + thicker shelf build + finish)
You can save money by using leftover paint, sourcing reclaimed wood, buying brackets during sales, or repurposing offcuts.
The biggest “look expensive” factor is finish quality and thoughtful stylingnot the price tag.
Conclusion: The Cheapest Kitchen Upgrade That Actually Feels Big
Dramatic kitchen shelves don’t require a massive budgetjust smart choices.
Pick a shelf style that fits your life (brackets for strength, floating for sleek vibes), mount safely (studs are your best friends),
finish like a pro (seal it!), and style with intention (edit, mix textures, keep it functional).
Do it right, and your kitchen will look brighter, bigger, and more “designer”…
even if you still keep the cereal in a cabinet like a normal person.
Real-World Experiences: What I Learned After Multiple “Dramatic Shelf” Projects
After a few rounds of installing and living with open shelves (in everything from a tiny galley kitchen to a “why are there three corners here?” rental),
I learned that the difference between “Pinterest perfect” and “why did I do this?” is rarely the shelf itself. It’s the small decisions around it.
First lesson: your wall will humble you. I’ve met walls that were slightly bowed, studs that were not exactly where logic said they’d be,
and corners that were somehow not 90 degrees even though geometry begged them to be. The fix is simple: don’t fight reality. Scribe the shelf if you need to,
use painter’s tape guides, and check level often. I used to think leveling once was enoughthen I met the bracket that “walked” a quarter inch while I tightened screws.
Second lesson: cheap lumber can look great, but it needs prep. The first time I painted common boards without sanding,
the result looked like I wrapped a shelf in orange peel. Now I sand, wipe, prime if needed, and use thin coats. Also: kitchen lighting is unforgiving.
Evening light + glossy paint will reveal every brushstroke like it’s auditioning for a crime documentary.
Third lesson: open shelves are a lifestyle choice. For a while, I tried to store everything up thereextra mugs, random bowls, that novelty glass
shaped like a pineapple. The shelves looked cluttered fast, and cleaning took longer because there were too many small items to move around.
When I switched to mostly everyday dishes (plus a couple of matching canisters), the shelves stayed clean-looking and were easier to wipe down.
I also stopped pretending I wanted decorative objects that I never touch. If I don’t use it, it either goes somewhere closed or it goes away.
Fourth lesson: grease is sneaky. If shelves are near the stove and you cook often, you will eventually meet the sticky film of reality.
Running the range hood more consistently helps, and placing shelves a bit farther from the heavy cooking zone can reduce the mess dramatically.
In one kitchen, I kept the nearest shelf for less-sensitive items (sealed jars, wipeable containers) and saved the pretty stacks of plates for the shelf farther away.
Fifth lesson: the “dramatic” part comes from contrast and spacing. When shelves are too close together, everything looks cramped.
When they’re too far apart, the wall can look empty and awkward. My sweet spot has been planning shelf height around the tallest items I actually use:
a pitcher, a stack of dinner plates, a cereal container. And visually, I love one bold movedark brackets, a thick shelf, or a standout backsplash behind them.
It’s like eyeliner for your kitchen: small, strategic, and surprisingly powerful.
Final lesson: build for your future self. The goal is not just to install shelvesit’s to enjoy them.
If you hate dusting, don’t overload them. If you love cooking, don’t put your most delicate glassware where it can fall.
And if you’re tempted to rush the install, remember: you’ll look at these shelves every day. Take the extra 20 minutes to measure, level, and mount them right.
Your future self will thank you… probably while sipping coffee from a mug you can finally reach without doing a deep knee bend.