Table of Contents >> Show >> Hide
- Why Bucket Planters Are a Genius Idea
- Choosing the Right Bucket for Your Planter
- Step-by-Step: Classic 5-Gallon Bucket Planter
- Hometalk-Inspired Design Ideas for Bucket Planters
- What to Grow in Bucket Planters
- Caring for Your Bucket Planter
- Troubleshooting Common Bucket Planter Problems
- Real-Life Bucket Planter Experiences and Tips
- Conclusion
If you’ve ever stared at a lonely plastic bucket and thought, “You could be so much more,”
this guide is for you. Bucket planters are the unofficial mascot of thrifty gardeners:
they’re cheap, sturdy, easy to customize, and right at home in the scrappy, creative
spirit you see all over Hometalk projects. With a drill, some potting mix, and a little
imagination, you can turn almost any bucket into a hardworking, good-looking planter.
In this article, we’ll walk through everything you need to know about bucket planters:
how to choose the right bucket, the best way to add drainage, smart soil and plant choices,
and a bunch of Hometalk-style design ideas that go way beyond “orange hardware-store
bucket on the porch.” We’ll finish with real-life experience tips so you can skip the
rookie mistakes and jump straight to brag-worthy results.
Why Bucket Planters Are a Genius Idea
Budget-friendly and eco-friendly
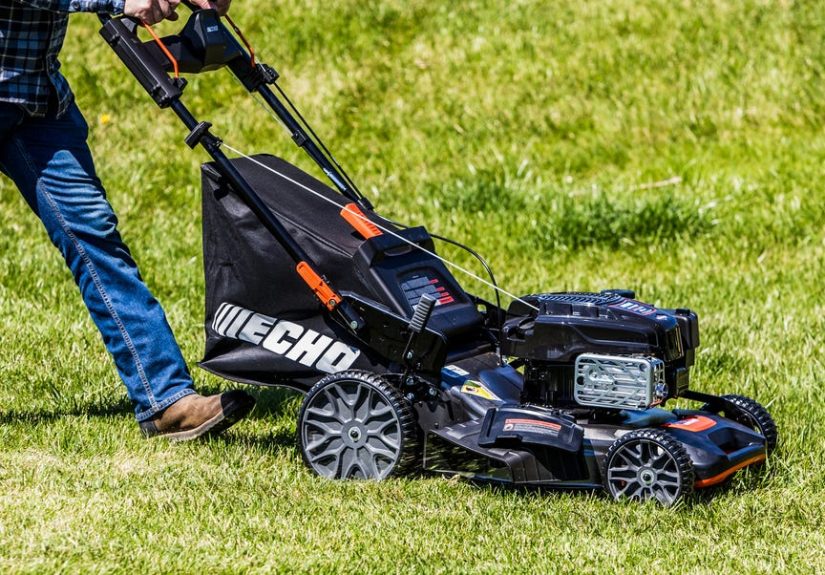
Brand-new planters can be expensive, especially large ones. Five-gallon plastic buckets
or metal pails, on the other hand, are everywhere: hardware stores, farm supply shops,
bakeries, restaurants, even your own garage. Many garden experts recommend reusing
food-grade buckets for container growing because they’re tough, lightweight, and sized
perfectly for vegetables and flowers that need deeper roots.
Upcycling old buckets into planters keeps plastic out of the landfill and lets you put
your money into the good stuffquality potting mix and plantsrather than pricey pots.
Perfect for small spaces and renters
Bucket planters are basically “portable garden beds.” Live in an apartment? Line them up
on a balcony. Renting a house? Tuck them along a fence and take them with you when you
move. Even gardeners with big yards love buckets for experimenting with new varieties
or keeping aggressive plantslike mint or some ornamental grassesfrom taking over the
whole bed.
Easy on your back and your schedule
Buckets are surprisingly ergonomic. You can set them on stands, steps, or cinder blocks
to bring plants up to a comfortable height so you’re not bending over raised beds or
kneeling in the lawn. They also simplify watering and fertilizing because each container
is its own little ecosystemyou can tailor care to tomatoes in one bucket and flowers in
another, instead of treating a whole bed the same way.
Choosing the Right Bucket for Your Planter
Plastic vs. metal vs. decorative options
Most bucket planters fall into three camps:
-
Plastic buckets (often 5-gallon): Lightweight, durable, and cheap.
They don’t crack easily and hold moisture well, so they’re great for thirsty plants
like tomatoes, peppers, and bush beans. -
Galvanized metal buckets: These have that classic farmhouse look.
Modern galvanized containers are generally considered safe for planting because the
zinc coating is very slow to break down in typical garden soil. They can, however,
heat up faster in full sun, so they’re best with a little mulch on top and maybe
morning sun rather than all-day blazing heat. -
Decorative sleeves and wraps: A plain bucket can disappear inside a
pretty outer pot, a wood crate, or a burlap and lace wrap. This is a favorite trick
on Hometalkhide the plastic, keep the practicality.
Bucket size and plant depth
Depth matters more than width for many plants. A standard 5-gallon bucket is about
14–15 inches tall, which is perfect for:
- Tomatoes (one plant per bucket)
- Bell or hot peppers (one to two per bucket, depending on variety)
- Eggplant, bush beans, dwarf cucumbers
- Annual flowers with deeper roots, like geraniums or petunias
Smaller metal pails or 2-gallon buckets work well for lettuces, herbs, pansies, and
shallow-rooted flowers. The main rule: if the mature plant normally needs at least
10–12 inches of soil in the garden, a 5-gallon bucket is a safe bet.
Drainage is non-negotiable
No matter which bucket you choose, you must add drainage holes. Without them, rain or
hose water just pools at the bottom, turning roots into a swamp and inviting rot and
fungus. Most DIY bucket planter tutorials recommend drilling several holes in the
bottom and a few up the lower sides so water has multiple escape routes.
A good rule of thumb: drill 1/4- to 1/2-inch holes every few inches across the bottom
of the bucket and a ring of holes an inch or two up the sides. It’s better to have
several small holes than a few giant ones that let soil wash out.
Step-by-Step: Classic 5-Gallon Bucket Planter
Ready to build your own “Hometalk-worthy” bucket planter? Here’s a simple version you
can customize as much as you like.
Materials
- One clean 5-gallon bucket (plastic or metal)
- Drill with 1/4- to 1/2-inch bit (or hammer and large nail)
- Optional: safety glasses and work gloves
- A few small rocks, twigs, or broken terra-cotta for bulk and drainage
- High-quality potting mix (not heavy garden soil)
- Slow-release granular fertilizer or organic compost
- Your chosen plants or seeds
- Mulch (shredded bark, straw, or even grass clippings that haven’t been treated
with herbicides)
Instructions
-
Clean the bucket.
Wash out any residue, especially if the bucket held chemicals, paint, or concrete.
Food-grade buckets that once held pickles, frosting, or bulk ingredients are ideal. -
Add drainage holes.
Flip the bucket over and drill multiple holes across the bottom, then add a ring of
holes near the lower sides. If you don’t own a drill, you can tap holes with a nail
and hammer, but a drill makes a cleaner job. Don’t skip this step; good drainage is
the difference between “lush container garden” and “sad swamp.” -
Add a drainage layer (optional but helpful).
Toss in a few sticks, pinecones, or small rocks. This saves potting mix, keeps the
bucket from becoming too heavy, and helps water flow through the bottom instead of
puddling. -
Fill with potting mix.
Use a lightweight, peat- or coco-based potting mix rather than soil dug from the
yard. Garden soil compacts in containers and can smother roots. Stop filling when
you’re about 2 inches from the rim; this “headspace” makes watering easier. -
Mix in fertilizer.
If your potting mix doesn’t already contain fertilizer, blend in a slow-release
granular product or well-finished compost according to package directions. Bucket
planters hold a limited amount of nutrients, so starting with a boosted mix helps
plants stay productive all season. -
Plant.
Make a hole large enough for your plant’s root ball, set the plant in, and backfill
gently. For seeds, follow spacing directions on the packet and remember you can
always thin seedlings later. Water thoroughly until you see moisture dripping out
of the drainage holes. -
Mulch and place.
Add a thin layer of mulch on top of the soil to reduce evaporation and keep roots
cooler, especially in metal buckets. Set your planter where it will get the correct
amount of lightfull sun for most vegetables, part shade for lettuces and some
flowers.
Best soil mix and feeding schedule
A simple, dependable recipe is:
- 2 parts high-quality potting mix
- 1 part compost
- Optional: a scoop of perlite for extra drainage
For heavy feeders like tomatoes and peppers, feed every two to four weeks with a
balanced liquid fertilizer once they start flowering. Herbs and leafy greens in buckets
usually need lessevery month is often plenty. Always water before applying liquid
fertilizer so you don’t burn the roots.
Hometalk-Inspired Design Ideas for Bucket Planters
Once you’ve mastered the basics, it’s time to make your bucket planter look like it
belongs in a Hometalk feedcreative, fun, and totally personal.
Rustic farmhouse bucket planter
Use galvanized metal buckets or turn plastic ones into “faux galvanized” versions with
metallic spray paint. Add jute rope or nautical cord around the top rim, or glue on
wood beads for texture. A quick light sanding over painted edges gives that
perfectly-distressed farmhouse vibe that looks great on porches and by front doors.
Fill these with soft, silvery plants like lamb’s ear, white petunias, or lavender, and
you have instant cottage charm for very little money.
Burlap and lace wrapped buckets
If your bucket’s neon color isn’t the look you’re going for, wrap it in burlap and a
band of lace or ribbon. Secure the fabric at the back with hot glue or a staple gun.
This trick instantly transforms a plain plastic bucket into a planter that looks right
at home on a balcony, wedding patio, or farmhouse porch.
Cascading and tiered bucket planters
For serious drama, try stacking buckets vertically. You can slide buckets down a metal
rod anchored in the ground, tilting each one slightly to create a “waterfall” of
flowers. Plant trailing bloomslike calibrachoa, sweet potato vine, or ivyto spill
over the edges. It’s the kind of project that makes neighbors ask, “Wait, those are
just buckets?”
Bucket planter stands and mini “bucket farms”
Many DIYers build wooden stands that hold multiple buckets in rows, almost like a
bookshelf for plants. This setup:
- Maximizes vertical space for small yards
- Improves air flow around plants
- Brings the soil surface to a comfortable working height
Load the top row with sun-hungry plants like tomatoes and peppers, and reserve the lower
shelves for herbs and shade-tolerant flowers.
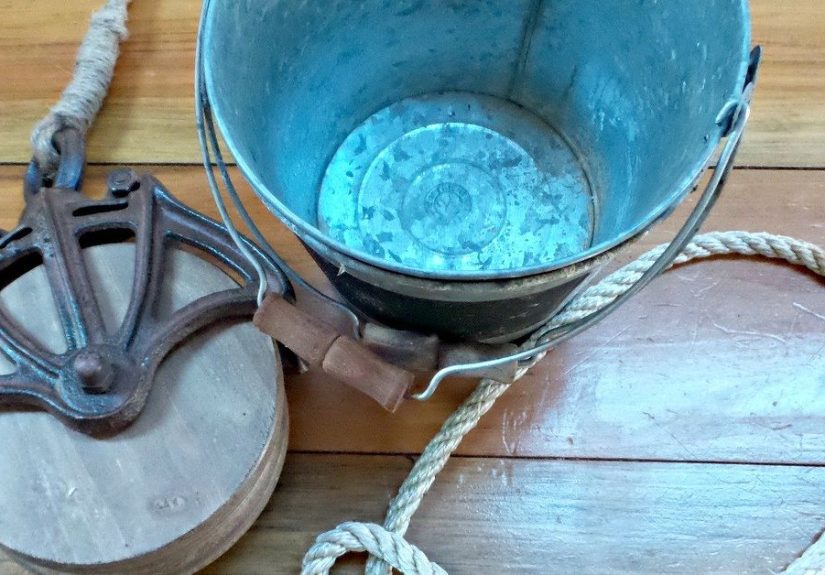
Hanging and pulley bucket planters
Smaller buckets make fantastic hanging planters. Drill drainage holes, thread sturdy
rope or chain through additional side holes near the rim, and hang them from hooks,
pergolas, or even a decorative pulley system. Plant trailing flowers, strawberries, or
herbs for a living curtain of green.
What to Grow in Bucket Planters
Vegetables that thrive in buckets
Bucket planters are stars for warm-season crops. Try:
-
Tomatoes: One indeterminate or bush tomato per 5-gallon bucket with a
cage or stake. They love the deep soil and warm roots. -
Peppers: Bell, banana, jalapeño, and many specialty peppers do very
well in buckets with consistent water and regular feeding. -
Eggplant: Similar needs to pepperswarm roots and a steady supply of
moisture. -
Bush beans and peas: Choose compact varieties, add a small trellis or
stakes, and you’ll have a tidy bucket full of pods.
Herbs, greens, and flowers
Two- and three-gallon buckets are perfect for:
- Lettuce and salad mixes
- Spinach and arugula
- Basil, parsley, cilantro, chives, and dill
- Pansies, violas, marigolds, and nasturtiums
If you plant mint in a bucket, congratulationsyou’ve made exactly the right choice.
Mint is a delicious bully in the garden; it will take over in the ground, but it behaves
beautifully when confined to its own container.
Caring for Your Bucket Planter
Watering wisely
Buckets dry out differently than in-ground beds. Plastic buckets lose moisture mainly
from the top surface, so plants might need watering once a day in hot, windy weather,
especially if they’re large and productive. Metal buckets can heat up faster, which
also increases water needsbut mulch helps regulate temperature.
A simple test: stick your finger into the soil up to your first knuckle. If it feels
dry at that depth, it’s time to water. When you do water, go slow and steady until you
see it trickling from the drainage holes.
Fertilizing and pruning
Because buckets hold a limited amount of soil, nutrients get used up faster. Plan on
adding a diluted liquid fertilizer every couple of weeks for fruiting vegetables and
monthly for herbs and flowers, unless your potting mix is heavily pre-fertilized.
Don’t forget routine pruning: pinch basil to keep it bushy, remove yellowing leaves
from tomatoes and peppers, and deadhead flowers to encourage more blooms.
Winter and off-season storage
In cold climates, plastic buckets can usually be left outside, but it’s a good idea to
empty them, let them dry, and stack them in a shed or garage. Metal buckets last longer
if they’re stored out of constant moisture. If you garden year-round in a mild climate,
simply rotate cropscool-season greens in fall and winter, warm-season veggies in
spring and summer.
Troubleshooting Common Bucket Planter Problems
Yellowing leaves and sad plants
If leaves are yellowing from the bottom up, your plant might be waterlogged or lacking
nitrogen. Check drainage first: make sure holes aren’t blocked and the bucket isn’t
sitting in a tray of standing water. If drainage is fine, consider a balanced fertilizer
or top-dressing with compost.
Wilting even when the soil feels wet
This can signal root rot from poor drainage, or extreme heat stressing the plant. Move
metal buckets to a slightly shadier spot during the hottest hours or use light-colored
wraps to reduce heat absorption. In the future, add more drainage holes and a generous
layer of mulch.
Soil shrinking away from bucket sides
Over time, potting mix can dry out and pull away from the bucket’s edges, causing water
to run down the sides and out the holes instead of soaking in. Gently poke holes through
the soil with a chopstick, water slowly, and consider adding a bit of fresh mix to
refresh the container.
Real-Life Bucket Planter Experiences and Tips
Bucket planters look simple, but the more you use them, the more clever little tricks
you discover. Here are some extended, real-world lessons from passionate bucket
gardeners that can save you time, money, and a few tomato plants.
The weekend warrior’s mini farm
Imagine this: you work full-time, your yard is more “patchy grass” than “garden oasis,”
and you’re determined to grow real food anyway. A row of bucket planters along the back
fence can become a surprisingly productive mini farm. Divide your buckets roughly by
categorytwo tomatoes, two peppers, one herb mix, one salad mixand you’ve got a
focused little system that takes less than 15 minutes a day to maintain once it’s set
up.
Many gardeners who start this way report that the biggest surprise isn’t the harvest,
but how easy it is to control problems. If one tomato gets a disease, it doesn’t jump
to the peppers because they’re physically separated. If one bucket’s soil mix turns out
too heavy, you fix that bucket instead of reworking an entire bed.
Balcony gardeners: buckets as multipurpose furniture
On balconies and patios, bucket planters can double as decor and even “furniture.”
Place a sturdy wood round or tray on top of an unused or off-duty bucket planter and
you’ve created a tiny side table. Wrap the bucket in burlap or paint it to match your
outdoor cushions, and it stops looking like a bucket and starts looking like a design
choice.
One smart move on balconies is to group buckets in threes. Three planters at slightly
different heightsa tall tomato, a mid-height pepper, and a trailing flowercreate a
little vignette instead of a marching line of containers. It’s a simple styling trick
that makes your DIY setup look professionally planned.
Teaching kids with bucket experiments
Bucket planters are fantastic teaching tools for kids. Because each bucket is its own
little lab, you can let children design experiments without risking your whole garden.
Try:
- One bucket with compost added and one without
- Different varieties of cherry tomatoes in separate buckets
- Herbs grown in sun vs. partial shade
Kids can measure growth, taste the results, and actually see how soil, sunlight, and
water affect plants. And if one experiment goes sideways (looking at you, “What if we
water with soda?”), it won’t ruin everything else.
Self-watering bucket setups
Gardeners in hot climates often upgrade to self-watering bucket systems. These usually
involve a second bucket or an insert that creates a water reservoir underneath the
soil, plus a vertical pipe to pour water directly into that lower space. Wicking holes
or a soil column carry moisture up to the roots as the plant needs it.
This setup is especially helpful if:
- You travel on weekends and can’t water daily in summer
- Your area has watering restrictions
- You’re growing thirsty plants like tomatoes or cucumbers
You don’t have to build a fancy system right away. Start with regular bucket planters,
and if you find yourself constantly chasing dry soil, upgrade a couple of buckets to
self-watering versions as a test.
Common mistakes beginners make (and how to avoid them)
-
Overcrowding: Stuffing three tomato plants into one bucket seems
efficient until they’re all fighting for nutrients and airflow. Stick to one large
plant per 5-gallon bucket or multiple smaller plants like lettuce and herbs. -
Using heavy garden soil: It saves money up front but often leads to
poor drainage and compaction. If budget is tight, mix a smaller bag of potting mix
with screened garden soil and compost to lighten things up. -
Forgetting to elevate buckets: Setting buckets directly on grass or
soil can block drainage holes. A couple of bricks, pavers, or scrap boards under the
bucket keep water flowing freely. -
No plan for growth: Tiny seedlings in early spring look harmless,
but by midsummer your buckets may be a jungle. Install stakes or cages at planting
time, not after your tomatoes have turned into a vine octopus.
After a season or two, most gardeners find bucket planters strangely addictive. They’re
flexible, forgiving, and easy to re-style every year. One season you’re all about
farmhouse galvanized chic; the next, you’re spray-painting buckets in bold colors to
match your patio rug. Either way, you end up with more plants, more harvest, and a lot
more fun experimentingvery much in the DIY spirit that makes Hometalk projects so
popular.
Conclusion
Bucket planters prove that you don’t need fancy pots, perfect soil, or a huge yard to
grow something beautiful and useful. With a humble bucket, a drill, and a bit of
creativity, you can build planters that fit balconies, backyards, patios, and porches
of every size. From rustic farmhouse designs and cascading flower towers to efficient
mini vegetable farms, bucket planters punch far above their weight.
Start with one bucket, learn how it behaves, and then add more as your confidenceand
your plant obsessiongrows. Before long, you’ll have your own Hometalk-style collection
of clever, colorful bucket planters, and you’ll be the one sharing “before and after”
photos and answering questions from friends who can’t believe they’re just buckets.