Table of Contents >> Show >> Hide
- Start With the Basement’s Two Big Boss Fights: Water and Air
- Define Your “Movie Room Type” Before You Buy Anything
- Layout That Feels Cinematic: Screen, Seats, and Sightlines
- Sound That Makes Movies Feel Real (Without Starting a Household Cold War)
- Soundproofing: How to Reduce “Upstairs Complaints” Without Building a Fortress
- Lighting: Make It Feel Like a Theater (Not a Big Dark Basement)
- Tech Planning: Hide the Wires, Keep the Options
- Comfort Matters More Than Spec Sheets: Seating, Temperature, and Snacks
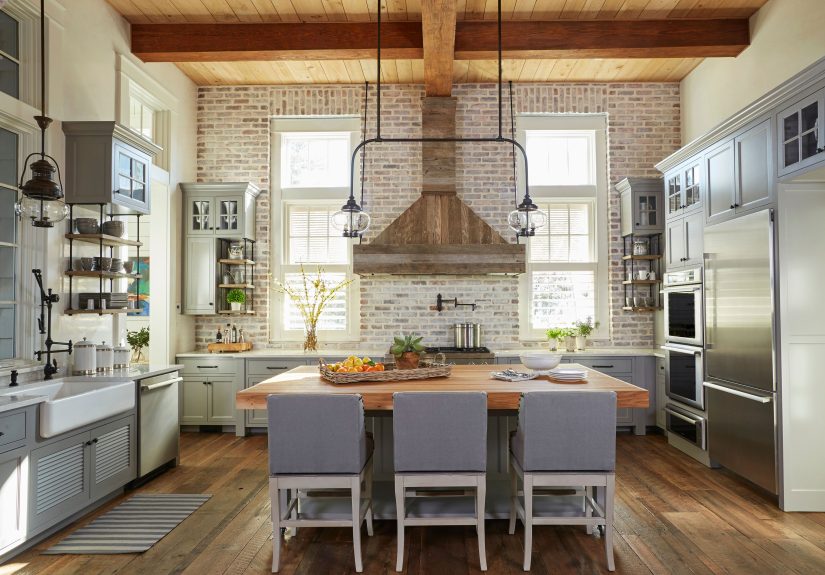
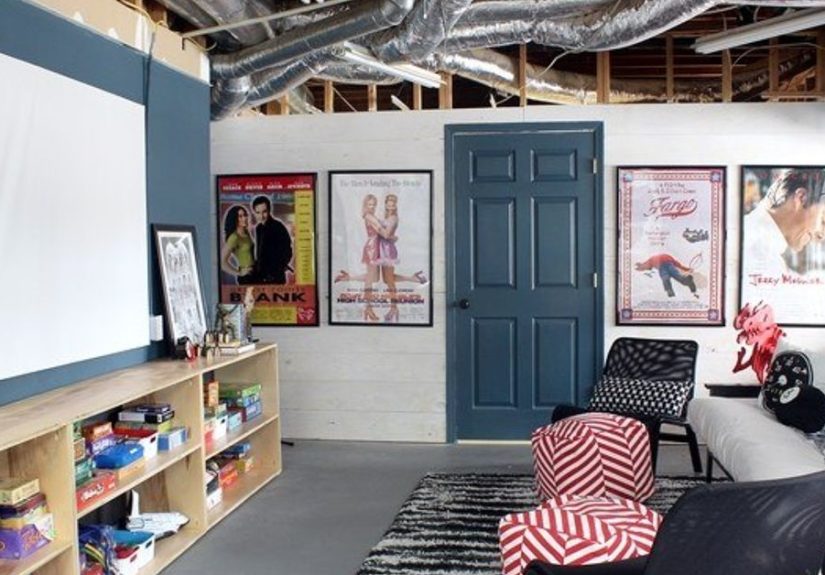
- Three Example Makeovers (So You Can Picture the Finish Line)
- Common Mistakes (So You Don’t Learn Them the Expensive Way)
- Conclusion: Your Best Basement Movie Room Is Built on the Boring Stuff
- Real-World Experiences People Have With Basement Movie Room Makeovers (The “Wish I’d Known” Section)
A basement movie room makeover is basically a magic trick: you take a space that once stored
holiday decorations, mystery cords, and that treadmill everyone swore they’d use… and you turn it into
the best seat in the house. The catch? Basements have opinions. They’re cool, quiet, and naturally dark
(great for movies), but they also bring moisture, echoes, low ceilings, and the occasional “why is the Wi-Fi
like this down here?” moment.
This guide walks you through building a basement home theater (or basement media room, if you prefer a
“Netflix and chillrespectfully” vibe) with smart planning, real-world layout math, and upgrades that
actually improve picture, sound, and comfort. No fluff. No keyword stuffing. Just the stuff that makes your
room feel like a theater instead of a couch pointed at a screen.
Start With the Basement’s Two Big Boss Fights: Water and Air
Before you buy a projector, a screen, or that popcorn machine you’ll use exactly twice (no judgment), make sure
your basement is healthy to finish. The best surround sound in the world won’t matter if your room smells like a
damp sweatshirt.
Moisture control: your “invisible” upgrade
Basements are prone to humidity because they’re below grade and naturally cooler. Aim to keep indoor humidity in a
comfortable rangeoften around 30% to 50%to discourage mold and musty odors. A properly sized
dehumidifier can be a game-changer, especially in summer or wet climates. Think of it as the bouncer at the club:
it keeps the funky stuff from getting in.
- Start outside: extend downspouts, improve grading, and keep gutters working so water moves away from the foundation.
- Seal obvious leaks: if you see efflorescence (white, chalky residue), peeling paint, or damp corners, address that before finishes.
- Use a dehumidifier strategically: set it near the dampest zone or close to a drain/sump so emptying the bucket doesn’t become your new hobby.
- Choose materials like you expect real life: moisture-tolerant flooring, washable paint, and rugs you can actually clean.
Don’t forget radon and ventilation
If you’re spending hours in a basement theater, it’s worth testing for radon (a naturally occurring gas that can
accumulate in lower levels of a home). Testing is usually inexpensive and fast, and mitigation is very doable if
levels are elevated. Also, movie rooms pack people into a small spaceadd ventilation or ensure your HVAC can
circulate air well, so your epic trilogy marathon doesn’t end with everyone feeling stale.
Define Your “Movie Room Type” Before You Buy Anything
A basement movie room makeover can be anything from “cozy family hangout” to “cinema temple.” Pick your type first,
because it affects everything: screen choice, seating, lighting, soundproofing, and budget.
Three common basement theater styles
-
The Weekend Refresh: big TV, improved lighting, comfy seating, better soundbar or entry surround.
You optimize layout and comfort without tearing open walls. -
The Smart Upgrade: projector or 85–98″ TV, AVR + 5.1/5.1.2 audio, dark paint, acoustic help,
tidy wiring, and a real seating plan. -
The “Why Is This Better Than the Multiplex?” Build: dedicated circuits, sound isolation,
acoustic treatment, riser platform, Atmos, and a screen wall that makes guests whisper “wow” automatically.
Layout That Feels Cinematic: Screen, Seats, and Sightlines
If there’s one design decision that makes or breaks a basement home theater, it’s the relationship between screen
size and seating distance. Too small and it feels like a dentist waiting room. Too large and you’ll be watching
dialogue scenes like a tennis match.
How far should the seats be from the screen?
A practical approach: decide where your main seats must go (because beams, doors, and reality), then choose a screen
size that gives you an immersive field of view without eye strain. Many home theater calculators provide recommended
ranges (often referencing cinema-style guidelines), but you can sanity-check with this simple mindset:
the “best” seat is the one where the screen fills your view comfortably, not aggressively.
- Small basements: consider ultra-short-throw projectors or a large TV if throw distance is tight.
- Low ceilings: mount the screen so eyes land roughly in the lower third of the image, then adjust seating height.
- Multiple rows: plan a riser so the back row can see without “neck-crane mode.” Even a modest riser can improve sightlines.
Projector vs. big TV (the friendly debate)
TVs win for brightness and simplicity. Projectors win for sheer “movie magic” scale and a more theater-like feel,
especially in a light-controlled basement. If your basement gets ambient light (stairs open, bar area, or multi-use),
you can still do projectionjust pay attention to brightness and consider an ambient-light-rejecting screen if needed.
Sound That Makes Movies Feel Real (Without Starting a Household Cold War)
A basement is often a good location for audio because it’s partially insulated by the earth, but it can also become an
echo chamber: concrete + drywall + hard floors = “why does every whisper sound like it’s in a cave?”
Speaker placement basics that actually help
For a classic 5.1 surround setup, place your center speaker aligned with the screen, front left/right
angled toward the main seat, and surrounds to the sides or slightly behind the seating areaoften a bit above ear level
to create enveloping effects rather than a speaker shouting directly into someone’s head.
- Center channel matters: dialogue lives here. If voices sound muffled, you’ll be riding the volume button all night.
- Subwoofer placement is a science experiment: small moves can change bass a lot. Plan for flexibility.
- Atmos (optional but fun): if you add height speakers, make sure your room layout supports themdon’t wedge them into weird corners and hope for cinematic miracles.
Room acoustics: the upgrade you can hear instantly
“Soundproofing” and “acoustic treatment” are not the same thing. Soundproofing aims to keep sound from leaving the room.
Acoustic treatment improves sound inside the room by reducing reflections and smoothing out boomy bass.
Most basements benefit from at least some acoustic help:
- Soft surfaces: carpet, thick rugs, upholstered seats, and curtains reduce harsh reflections.
- Targeted panels: adding absorption at first-reflection points (side walls/ceiling spots where sound bounces to your seat) can sharpen clarity.
- Bass control: corners often amplify bass; corner traps or thoughtful placement can reduce the “one-note thump.”
Soundproofing: How to Reduce “Upstairs Complaints” Without Building a Fortress
If your goal is “great sound” more than “silent house,” you can keep soundproofing simple: seal gaps, add mass where it
makes sense, and treat the biggest leaks (doors and duct paths).
The four principles (in plain English)
- Seal: sound slips through gaps like air. Weatherstripping and door sweeps can help more than you’d expect.
- Add mass: heavier layers (like additional drywall) reduce transmission.
- Decouple: resilient channels or isolation methods reduce vibration transfer through framing.
- Damp: specialized compounds between layers can convert vibration into tiny amounts of heat (yes, really).
If you’re renovating down to studs, resilient channels and double-layer drywall are common strategies. If you’re not
opening walls, focus on sealing and soft materials: a solid-core door, tight seals, rugs, and wall coverings can
meaningfully reduce “sharp” noise escaping the room.
Safety note: for electrical changes, recessed lighting, new circuits, or major wiring, use a qualified pro
and follow local codes. A movie room should be exciting on screennot in your breaker panel.
Lighting: Make It Feel Like a Theater (Not a Big Dark Basement)
Lighting is where most basement movie rooms either look amazing or look like a cave someone forgot to finish.
The best setups use layers: low ambient light for viewing, brighter task lighting for snacks, and
accent lighting for style.
Lighting moves that work
- Dimmers everywhere: a must. You want “movie mode” and “intermission mode” with one slide.
- Wall sconces or indirect lighting: reduces glare and feels more cinematic than a ceiling spotlight.
- Step lights or LED strips: great for safety on risers and stairs, and they look slick.
- Avoid screen glare: place lights so they don’t reflect off the screen or TV.
Paint and finishes: the cheat code for better picture
Darker, matte finishes reduce reflections and help perceived contrastespecially with projectors. You don’t have to paint
everything black like a bat cave, but consider deeper tones on the screen wall and ceiling near the screen. Your picture
will look richer, and your room will feel intentional instead of “finished basement + TV.”
Tech Planning: Hide the Wires, Keep the Options
The easiest way to make a basement movie room look high-end is simple: remove the spaghetti.
Plan wiring so you don’t have extension cords doing parkour across the floor.
Smart infrastructure ideas
- Run conduit where possible: future-you will thank you when you upgrade cables.
- Plan for streaming: hardwired Ethernet (or a good mesh node placed strategically) prevents buffering-induced rage.
- Power protection: use quality surge protection for your AVR, projector, and networking gear.
- Put equipment somewhere logical: a small rack or ventilated cabinet reduces clutter and keeps remotes from mysteriously vanishing.
Comfort Matters More Than Spec Sheets: Seating, Temperature, and Snacks
A basement theater can have a perfect picture and still fail if the room is cold, the seats squeak, or everyone’s fighting
for the one blanket. Comfort is a performance feature.
Seating tips for real households
- Start with the main row: make the best seat dead center (or close to it), not squeezed against a wall.
- Consider a mix: a sofa for lounging plus a couple recliners for “VIP seats” can be more flexible than a full theater row.
- Leave walkways: especially if you have multiple rowsnobody wants to crab-walk past knees in the dark.
Temperature and airflow
Basements can be chilly in winter and humid in summer. Add soft textiles, consider insulating rim joists or weak spots,
and make sure airflow reaches the space. If you’re adding a projector, remember it generates heat. If you’re adding
a crowd, remember humans are basically portable space heaters who also eat chips.
Three Example Makeovers (So You Can Picture the Finish Line)
Example 1: The “Friday Night Fix” (Budget-friendly refresh)
Goal: cozy basement media room with better sound and mood lighting.
Moves: repaint in warmer mid-tone with a darker accent wall, add thick area rug, install dimmable lamps/sconces,
upgrade to a quality soundbar or entry 3.1 setup, organize cables, and add blackout curtain at stairwell if needed.
Result: instantly better immersion, minimal construction, family-friendly.
Example 2: The “Sweet Spot” Basement Movie Room Makeover
Goal: real theater vibe without rebuilding the whole basement.
Moves: 100–120″ screen with projector, 5.1 or 5.1.2 surround sound, darker matte paint on screen wall/ceiling section,
some acoustic panels, dehumidifier dialed in, seating placed intentionally (not against the back wall), and layered lighting.
Result: big-screen magic, clear dialogue, less echo, and a room people choose over the living room.
Example 3: The “Dedicated Cinema” (Construction-heavy)
Goal: reference-style basement home theater with reduced sound leakage.
Moves: sound isolation steps during framing/drywall, dedicated circuits, equipment rack, riser for second row,
acoustic treatment plan, and careful speaker layout including overhead effects if desired.
Result: the kind of room where you “test” one scene and accidentally watch the entire movie.
Common Mistakes (So You Don’t Learn Them the Expensive Way)
- Buying gear before measuring: your room decides screen size and speaker placementnot your wishlist.
- Ignoring humidity: musty air makes the whole room feel unfinished, no matter how good the chairs are.
- Over-lighting the ceiling: bright overhead light ruins projector contrast and kills the theater mood.
- Forgetting storage: remotes, blankets, controllers, discs, and games need a home (or they will form a pile).
- Placing seats against the back wall: it often makes bass uneven and reduces surround effect.
Conclusion: Your Best Basement Movie Room Is Built on the Boring Stuff
The fun part of a basement movie room makeover is the big stuff: the screen, the speakers, the seating. But the rooms
that feel truly “done” win because of the less glamorous decisions: controlling moisture, planning sightlines, layering
lighting, improving acoustics, and keeping the room comfortable for actual humans with snacks.
If you want a simple blueprint: fix the basement environment first, choose screen and seating based on your room’s real
dimensions, then build sound and lighting around that layout. Do it in that order and your basement won’t just be a place
where you watch moviesit’ll be where people ask, “Are we watching it downstairs?”
Real-World Experiences People Have With Basement Movie Room Makeovers (The “Wish I’d Known” Section)
If you read enough basement movie room makeover stories, a pattern shows up: the gear is exciting, but the day-to-day
experience is what determines whether you use the room weekly or once a month. Here are the most common real-life
lessons homeowners and DIYers tend to sharepresented as the things you’ll feel after the initial “new room glow”
wears off.
1) The first movie night teaches you what your plans missed.
On paper, everything fits. In real life, someone needs to walk to the bathroom, a kid wants a blanket, and somebody
inevitably drops a remote between cushions like it’s an Olympic event. People often realize they need a small side table,
a slim console, or built-in storage more than they needed the “perfect” décor item. A couple of drawers for remotes,
chargers, and games can save your room from becoming a clutter magnet.
2) Humidity is the difference between “cozy cinema” and “mysterious basement smell.”
Many basements feel fine most of the yearuntil summer or a rainy spell hits. That’s when a dehumidifier goes from
“optional appliance” to “most valuable player.” People also discover that fabric choices matter: thick curtains and
plush rugs are great for acoustics, but they’re happiest in a basement that stays consistently dry. The best setups
treat moisture control as part of the home theater system, not an afterthought.
3) The sound you love might be the sound your house hates.
A common experience: the first time you turn up an action scene, someone upstairs texts “Is everything okay down there?”
because the bass is traveling. This is where real-world compromises shine. Some households choose to lower subwoofer output
slightly, add a second sub for smoother (less “one-corner booming”) bass, and focus on better dialogue clarity instead of
sheer impact. Others invest in sealing the door, improving ceiling isolation during a remodel, or setting a “late-night”
sound profile that reduces low-frequency rumble when people are sleeping.
4) Seating comfort beats showroom cool.
People love the idea of theater reclinersuntil they realize the “perfect” chair is too bulky for their room or blocks
walkways. A frequent happy ending is mixing seating types: a deep sofa for cuddly viewing, a couple of recliners for
front-row vibes, and a bar-height counter behind for extra guests. That flexibility matters when your room has to host
both movie nights and the occasional game-day crowd.
5) Lighting is the easiest upgrade that feels expensive.
The most satisfying “why didn’t I do this sooner?” moment is usually lighting. Dimmers, wall sconces, and subtle LED accents
make the room feel intentional. People often report that once lighting is layered properly, the room finally feels like a
destinationnot a basement with a screen. And practically speaking, low step lights prevent trips, especially if you add
a riser or have stairs nearby.
6) The best move is building for future upgrades.
Even if you start with a basic setup, homeowners love leaving themselves options: conduit for cables, accessible mounting
points, and space for an equipment shelf or mini rack. A movie room rarely stays “final” because tech evolves, streaming
devices change, and suddenly you’re considering Atmos because you watched one demo clip and your brain went, “Yes, I need
rain sounds from the ceiling.”
In short: the most-loved basement movie rooms aren’t just impressivethey’re easy to use. They stay dry, sound clear,
feel comfortable, and work for how your household actually hangs out. If you prioritize those everyday experiences,
your makeover won’t just look good in photos. It’ll become the default plan on Friday nights.