Table of Contents >> Show >> Hide
- Why Cleaning Holiday Decor Matters (Beyond Just “It Looks Nicer”)
- Before You Start: The 10-Minute Setup That Prevents Regret
- How to Clean Christmas Ornaments (By Type)
- Step Zero for All Ornaments: Gentle dusting
- Glass ornaments (plain, sturdy glass)
- Glass ornaments with paint, glitter, decals, or “vintage vibes”
- Plastic and acrylic ornaments
- Ceramic and porcelain ornaments
- Metal ornaments (brass, stainless, tin, “mystery metal”)
- Wood ornaments and painted ornaments
- Fabric, felt, knit, and ribbon ornaments
- Ornament hooks, caps, and hangers
- How to Clean Christmas Wreaths
- How to Clean Christmas Garlands
- Stubborn Problems: Sap, Sticky Residue, Smoke Film, and Musty Storage Smell
- Pro Storage Moves: Keep Decorations Cleaner Next Year
- FAQ: Quick Answers to Common “Can I Just…” Questions
- of Real-World Experience and Lessons Learned
- Conclusion
Christmas decorations are basically tiny time capsules: they store memories, sparkle, and (if we’re being honest) a shocking amount of dust. If you’ve ever unboxed a wreath and watched a little puff of “attic snow” drift into the air, you already know the vibe. The good news: you don’t need fancy products or a chemistry degree to clean Christmas decorations safely. You just need the right method for the right materialand a little patience for anything involving glitter (glitter follows its own laws of physics).
Below is a practical, step-by-step guide to cleaning ornaments, wreaths, and garlandsboth artificial and freshwithout ruining paint, loosening glue, or turning your holiday heirlooms into “abstract art.” We’ll also cover common problems like sticky sap, musty storage smell, and decorations that come out of the bin looking like they’ve survived three winters and a minor tornado.
Why Cleaning Holiday Decor Matters (Beyond Just “It Looks Nicer”)
Cleaning Christmas decorations isn’t only about making them pretty for photos. Dust can dull reflective surfaces (bye-bye sparkle), trigger allergies, and cling to textured items like flocked wreaths and faux pine. Decorations stored in humid areas can also pick up musty odorsor worse, mildewespecially artificial greenery packed away while slightly damp. A quick clean before display and a thorough clean before storage can help your decor last longer and look better year after year.
Before You Start: The 10-Minute Setup That Prevents Regret
1) Sort by material (this is the whole game)
Don’t clean “a box of ornaments.” Clean glass ornaments, painted ornaments, glitter ornaments, fabric ornaments, etc. One method does not fit all. Water that’s perfectly safe for plain glass can destroy a vintage painted scene faster than a toddler with a marker.
2) Set up a “soft landing zone”
Lay a thick towel on a table or counter. If you’re cleaning fragile items, work low to the ground (seriouslygravity is undefeated). Keep small bowls or trays to corral hooks, caps, and tiny pieces that love to disappear.
3) Gather basic supplies
- Microfiber cloths (dry and slightly damp)
- Soft, clean paintbrush or makeup brush (great for crevices)
- Soft-bristle toothbrush (for sturdy items only)
- Mild dish soap
- Distilled water (optional, but helpful to avoid water spots)
- Cotton gloves (especially for vintage/metal ornaments)
- Handheld vacuum with brush attachment (low suction)
- Compressed air or a hair dryer on cool
- Rubbing alcohol (optional for non-porous, unpainted surfacesspot test)
4) Follow these “golden rules”
- Dust first. Dry cleaning solves most problems with the least risk.
- Spot-test anything wet. Especially paint, glitter, decals, and antique finishes.
- Avoid harsh cleaners. Bleach, ammonia-heavy products, and abrasive powders can discolor or scratch.
- Never soak pre-lit or wired items. Water + wiring = holiday chaos.
- Dry completely before storage. Moisture trapped in bins can lead to odors and mildew.
How to Clean Christmas Ornaments (By Type)
Step Zero for All Ornaments: Gentle dusting
Start with a dry microfiber cloth. For textured ornaments (tiny beads, carved details), use a soft brush. For very delicate pieces, a puff of compressed air or a cool hair dryer can lift dust without pressure. This quick step often makes ornaments look “new” againbecause the main culprit was just dulling dust.
Glass ornaments (plain, sturdy glass)
For plain glass ornaments without paint, glitter, or glued-on embellishments:
- Mix a few drops of mild dish soap in a bowl of lukewarm water.
- Dampen a microfiber cloth (don’t drench it) and wipe gently.
- Rinse by wiping with a second cloth dampened with clean water (or distilled water for fewer spots).
- Dry immediately with a soft towel and let air-dry for 30–60 minutes before rehanging.
Tip: If you’re dealing with smudges on shiny glass, buff with a clean, dry microfiber cloth afterward for that “store display” shine.
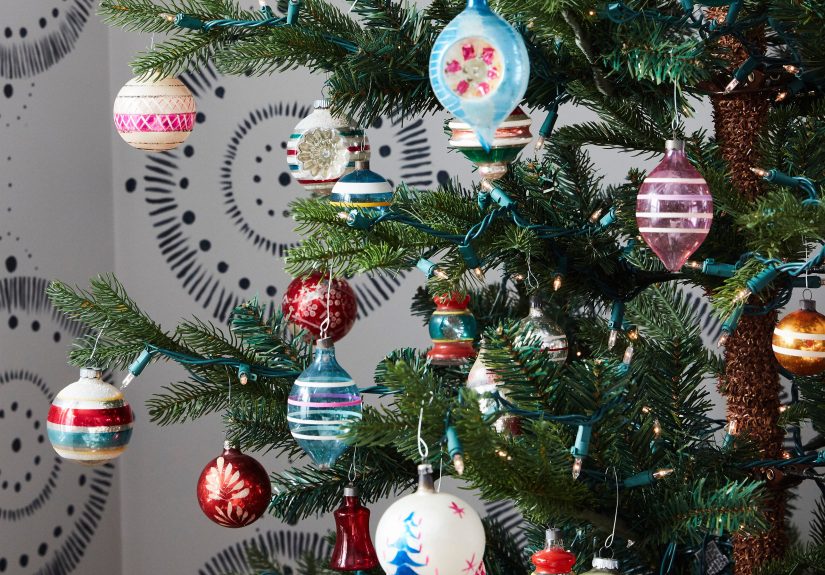
Glass ornaments with paint, glitter, decals, or “vintage vibes”
These should be treated like delicate artwork, not dinnerware. Use dry methods first:
- Soft brush to remove dust (no scrubbing).
- Microfiber cloth for gentle wiping on unpainted areas only.
- If you absolutely must use moisture, spot-test on an inconspicuous area and use the lightest possible touch.
If paint appears fragile or flaking, stop with dry dusting. It’s better to have a slightly imperfect ornament than to “clean” the design right off.
Plastic and acrylic ornaments
Plastic is typically more forgiving:
- Dust first.
- Wipe with a cloth dampened in mild soapy water.
- Rinse wipe with clean water.
- Dry thoroughly.
Skip: Strong solvents and abrasive scrubbers. They can haze clear plastic and scratch glossy finishes.
Ceramic and porcelain ornaments
These can be cleaned similarly to glass as long as the surface is sealed and not hand-painted with fragile finishes:
- Use mild soapy water on a cloth.
- Use a soft brush for grooves.
- Dry thoroughly to protect any metal caps or hangers from rust.
Metal ornaments (brass, stainless, tin, “mystery metal”)
Metal ornaments often just need dusting and a wipe-down:
- Dust with a dry microfiber cloth.
- Wipe with a barely damp cloth and mild soap if needed.
- Dry immediatelydon’t let water sit.
For tarnish: use a metal polish made for that metal type, and test first. Some finishes are plated or coated, and aggressive polishing can remove the top layer. If the ornament is sentimental, “less shiny but intact” beats “shiny but stripped.”
Wood ornaments and painted ornaments
Water can warp wood and lift paint. Keep it dry:
- Dust with a microfiber cloth.
- Use a soft brush to get into carved details.
- If there’s a sticky spot, try a barely damp cloth and dry immediatelyspot-test first.
Fabric, felt, knit, and ribbon ornaments
Fabric decorations love to hold dustespecially if they’ve been stored with pine needles, glitter, or pet hair (which is basically holiday confetti if you squint hard enough).
- Vacuum gently using a brush attachment on low suction.
- Use a lint roller for quick pickup.
- Spot-clean with a tiny amount of mild soap and water, then blot dry.
Avoid soaking. Many fabric ornaments contain cardboard inserts, wire, or glue that won’t forgive a bath.
Ornament hooks, caps, and hangers
Metal hooks and caps can rust if stored with moisture. Wipe them down, let them dry, and consider replacing bent or rusty hooks. If caps are loose, a tiny squeeze can tighten thembut go gently, because some caps are old enough to hold grudges.
How to Clean Christmas Wreaths
Artificial wreaths (unlit)
Artificial wreaths are basically dust magnets with excellent PR. Here’s the safe method:
- Shake it outside. This removes loose dust and debris.
- Vacuum gently. Use a brush attachment on low suction, working with the direction of the foliage.
- Detail dust. Use a microfiber cloth or soft brush to reach deep areas.
- Spot-clean. For grime, wipe with a cloth dampened in mild soapy water.
- Air-dry completely. Hang it in a shaded, well-ventilated spot.
If the wreath is very sturdy and truly unlit (no wires), a light rinse can work, but avoid blasting it with high water pressure. Think “gentle shower,” not “power-wash the holidays into submission.”
Pre-lit artificial wreaths
These should be cleaned dry:
- Unplug and remove batteries first.
- Use a microfiber cloth and soft brush for dust.
- Use compressed air or a cool hair dryer for deep crevices.
- Spot-clean carefully with a barely damp cloth only on non-electrical areas.
Flocked wreaths (the snowy ones)
Flocking looks magical and cleans like a toddler’s art project: fragile, messy, and deeply personal. Avoid wet cleaning whenever possible.
- Use low-suction vacuuming with a brush attachment.
- Use a soft brush for surface dust.
- Do not scrub; you’ll lift the flocking.
If it smells musty or shows visible mold, consider replacing it. Porous flocking can be difficult to fully sanitize without damage.
Fresh (real) wreaths
Fresh wreaths don’t get “washed” so much as “maintained.” Cleaning is mostly debris removal:
- Shake gently outside to dislodge dust and dried needles.
- Use a soft brush to remove cobwebs.
- Wipe decorative add-ons (berries, ornaments) with a dry cloth.
To keep a fresh wreath looking good longer, keep it out of direct sun and away from heat vents. If it’s safe for the materials and decorations, misting the back lightly can help it stay fresh (avoid soaking the front, especially if there are dyed elements that could bleed).
How to Clean Christmas Garlands
Artificial garlands (PVC/PE, unlit)
Treat artificial garland like a long, floppy wreath:
- Take it outside and shake it out (support the length so it doesn’t snag).
- Vacuum gently with a brush attachment on low suction.
- Wipe sections with a microfiber cloth.
- Spot-clean sticky areas with mild soapy water on a cloth, then wipe with clean water.
- Let it air-dry fully before rehanging or storing.
Pre-lit garlands
Keep it mostly dry:
- Unplug first.
- Dust with microfiber and a soft brush.
- Use compressed air to lift dust near wiring.
- Spot-clean only where safe, avoiding electrical parts.
Tinsel garlands and metallic garlands
Tinsel is dramatic. It wants to be admired, not bathed.
- Shake gently outside.
- Use a cool hair dryer to blow off dust.
- Lightly dust with a microfiber cloth.
Avoid watermany metallic garlands can tarnish, rust, or shed sparkle when wet.
Beaded garlands (plastic, glass, or wood beads)
Beads collect grime from hands and holiday handling.
- Wipe beads with a slightly damp cloth and mild soap if needed.
- Dry immediately.
- For wood beads, keep moisture minimal and dry fast to prevent swelling.
Paper garlands and delicate DIY garlands
Paper and moisture are not friends. Use dry methods:
- Soft brush for dust.
- Compressed air (at a distance) for crumbs and glitter.
- Spot-clean tiny marks with a dry cloth or white eraser (test first).
Fresh (real greenery) garlands
Like fresh wreaths, fresh garland is about maintenance:
- Shake out debris outdoors.
- Keep away from fireplaces, vents, and direct sunlight.
- If the garland is plain greenery without delicate add-ons, a light mist can help (don’t soak it).
Stubborn Problems: Sap, Sticky Residue, Smoke Film, and Musty Storage Smell
Sap (the holiday souvenir nobody asked for)
Sap can show up on ornaments, hooks, or decorations placed near real trees. Start gently:
- Let sap harden (or chill the item briefly in a cool area) so it’s less smear-prone.
- Lift what you can with a fingernail or plastic edge (no metal scraping on delicate surfaces).
- For sturdy, non-porous items, dab a cloth with a tiny amount of rubbing alcohol and spot-test before wiping.
- Wipe with mild soapy water, then dry thoroughly.
Smoke or candle soot film
If ornaments look dull despite cleaning, they may have a light film from candles, fireplaces, or cooking. Use mild soap and water on a cloth for sturdy surfaces, and avoid heavy rubbing on paint or gilding. If soot is visible, wipe gently and avoid smearing it deeper into textured details.
Musty smell or suspected mildew
First, air the item out outdoors in shade (fresh air helps more than you’d think). If the item is non-porous (plastic/metal/glass) and has visible mildew, wipe with mild soap and water first. Then, if needed, use either a diluted vinegar solution or a hydrogen peroxide solutionnever mix them. Dry completely in a ventilated area. If a porous item (fabric, flocking, natural materials) has widespread mold, replacing it can be the safer choice.
Pro Storage Moves: Keep Decorations Cleaner Next Year
- Clean before packing. Storing dust “bakes in” grime and makes next year harder.
- Dry everything fully. Even slight dampness can cause odors in sealed bins.
- Use covered bins. Lidded containers reduce dust, pests, and moisture swings.
- Don’t crush greenery. Wreath and garland storage bags or dedicated bins help maintain shape.
- Add moisture control. In humid climates, moisture absorbers can help protect decorations.
- Label by room or category. “Mantel garland” is more helpful than “Christmas Stuff #4.”
FAQ: Quick Answers to Common “Can I Just…” Questions
Can I wash ornaments in the dishwasher?
For most ornaments, no. Dishwashers involve heat, strong detergents, and high water pressurethree things that can damage paint, loosen glue, and cloud plastics. If you have very sturdy, plain plastic ornaments, hand-washing is still safer and takes about the same amount of time.
Can I hose off a wreath or garland?
Only if it’s unlit, sturdy, and made of materials that tolerate water. Even then, use gentle water pressure and allow plenty of drying time. For pre-lit items, stick to dry cleaning.
What’s the fastest way to make old decor look better?
Dustingespecially with microfiber and a soft brushgives the biggest “wow” for the least risk. Most holiday decor doesn’t need deep cleaning; it needs a good de-dusting and a careful spot-clean where hands have touched it.
of Real-World Experience and Lessons Learned
If you’ve ever cleaned holiday decor, you know there are the “official instructions”… and then there’s reality. Reality is a garland that somehow smells like last year’s cinnamon candles, a wreath that’s shedding like a nervous cat, and ornaments that look like they’ve been quietly collecting dust since the early days of the internet.
One common experience is discovering that the biggest mess isn’t dirtit’s mixed materials. That beautiful ornament might be glass, but the detail work is glued-on glitter, plus a ribbon bow, plus a tiny metal cap. The lesson: clean the “base” ornament with the safest method for the most delicate part. People often learn (the hard way) that wiping glitter with a damp cloth can turn “sparkle” into “sparkle runoff,” leaving bald patches where the festive used to be.
Another classic scenario: the attic bin surprise. Decorations stored in garages, basements, or attics can pick up a musty smellespecially artificial wreaths and garlands with dense branches that trap humidity. Many homeowners find that simply airing items outdoors in shade for a few hours makes a noticeable difference. The bigger lesson is storage: even “dry” decor can benefit from being packed only after it’s fully dry, loosely arranged, and kept in bins that reduce moisture swings.
Then there’s the flocked wreath dilemma. Flocked decor looks like a snow globe moment, but it’s fragile. Lots of people try to “wash” it and end up with patchy flocking or a wreath that looks like it survived a blizzard and lost. The best experience-based tip: treat flocking like powdered sugar on a dessertbrush lightly, vacuum gently on low suction, and avoid moisture unless you’re okay with a redesign.
Finally, the most relatable experience is the time crunch clean. You’re decorating, guests are coming, and you just realized the garland is dusty. In real life, you don’t do a spa day for every pine needle. What works: a quick shake outside, a low-suction vacuum pass, and a microfiber wipe on the most visible sections. The lesson is efficiencyfocus on the parts that people see up close: front-facing wreath branches, garland over the mantel, ornaments at eye level. Everything else can be “good enough,” because holiday decorating is supposed to feel joyful, not like you enlisted in a seasonal cleaning boot camp.
Conclusion
Cleaning Christmas decorations doesn’t have to be complicated. The key is matching the method to the material: dry dusting for delicate finishes, gentle wiping for sturdy surfaces, and extra caution for anything pre-lit, flocked, painted, or sentimental. Do a quick clean before display, a smarter clean before storage, and your ornaments, wreaths, and garlands will stay brighter, fresher, and far less “mysteriously sticky” next season.