


Writing a critical essay does not mean criticizing everything like a grumpy movie reviewer with a red...
Physicians are needed far beyond the exam room. As pharma, biotech, medtech, and digital health companies shape...
Want to make your next term smoother and more effective? This in-depth guide explores four smart things...
A stonewashed Belgian linen shower curtain can instantly make a bathroom feel softer, calmer, and more refined....
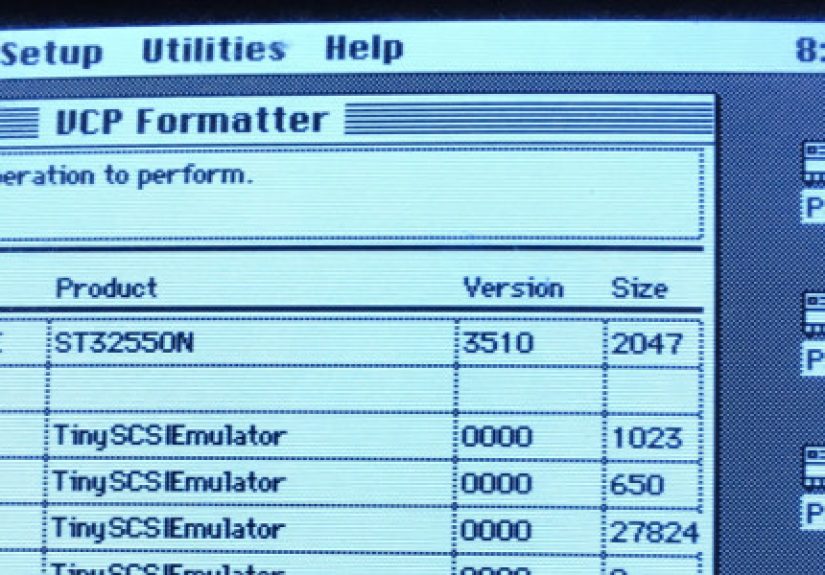
The Tiny SCSI Emulator is more than a cute circuit board with retro-computing charm. It is a...

The FTC’s Rule on Unfair or Deceptive Fees is now in effect, and it changes how live-event...

The G spot is often described as a sensitive area on the front vaginal wall, but it...

What animal truly captures Scorpio energy? This guide explores 10 symbolic spiritual animals for Scorpio, including the...

Why are people ticklish? Tickling may seem silly, but it reveals a fascinating mix of nerves, brain...