Table of Contents >> Show >> Hide
- Before You Start: What “Woodfired” Really Means
- Tip 1: Preheat Like You Mean It (Heat Soak Beats “It Feels Hot”)
- Tip 2: Choose the Right Wood (Your Pizza Can Taste Like a Campfire… in a Bad Way)
- Tip 3: Make Dough That’s Built for High Heat (Simple Wins)
- Tip 4: Keep Toppings Light and Low-Moisture (Steam Is the Enemy of Crisp)
- Tip 5: Master the Launch (Because Pizza Shouldn’t Become a Calzone Against Its Will)
- Tip 6: Learn the 90-Second Dance (Rotate, Lift, and Finish Like a Pro)
- Common Problems (and Fixes That Don’t Involve Swearing at the Oven)
- Bonus: of Real-World Experience (The Backyard Pizza Learning Curve)
- Conclusion
Woodfired pizza is basically dinner and a tiny, delicious science experiment: fire + dough + cheese + 90 seconds of chaos =
that blistered crust and smoky-kissed flavor you can’t quite fake in a standard oven. The catch? Woodfired pizza is fast.
Like “blink and you’ve invented charcoal” fast. The good news is that once you understand a few fundamentalsheat management,
dough that’s built for high temps, and the fine art of launching without panicyou’ll start turning out pies that look (and taste)
like they came from a legit pizzeria.
This guide breaks down six practical tips for making woodfired pizza at home, whether you’re using a backyard wood-fired pizza oven,
a multi-fuel portable oven, or a wood-fired setup that turns your patio into the hottest restaurant on the block (reservation for four,
name: “Me”). You’ll get clear targets, examples, and troubleshootingplus an extra section of real-world experience at the end to help
you skip the most common “why is my pizza doing that?” moments.
Before You Start: What “Woodfired” Really Means
In a true wood-fired pizza environment, you’re cooking with two kinds of heat at once: a screaming-hot surface (stone or refractory floor)
that sets the bottom crust, and intense radiant heat from the flame and dome that browns the top. When everything is dialed in, the crust
puffs quickly, toppings cook without drowning the dough, and you get those signature dark spots (“leoparding”) that make a pizza look like it
just stepped out of a Naples postcard.
The trick is balance. Too much floor heat and the bottom burns before the cheese even thinks about melting. Too much top heat and you’ll get a
gorgeous top with a pale, undercooked base. Your mission: make the floor and the flame work together instead of fighting like two siblings in the back seat.
Tip 1: Preheat Like You Mean It (Heat Soak Beats “It Feels Hot”)
Use targets, not vibes
Woodfired pizza is not the time for guesswork. The most consistent home-pizza makers use surface temperature targets for the stone/floor, because air temp
alone doesn’t tell you what your crust is about to experience. In outdoor pizza ovens, a common “sweet spot” for many styles is around
800–850°F on the cooking surface for balanced top-and-bottom cookinghot enough for fast spring, but forgiving enough to prevent instant
scorch when you’re still getting your rhythm. If you push much hotter, you can absolutely make incredible pizza, but your margin for error shrinks fast.
Give the oven time to store heat
Preheating isn’t just about getting the flame goingit’s about heat soaking the stone so it has enough stored energy to keep cooking evenly after you launch.
Many portable ovens can take longer than the marketing copy suggests to truly stabilize at pizza temps, especially if it’s cold, windy, or the oven has a thicker stone.
Plan for a real preheat window, then confirm with temperature readings instead of a quick peek and a confident shrug.
Quick checklist
- Preheat until the stone is stable, not just “warm.”
- Measure the cooking surface with an infrared-style approach (or the oven’s built-in tools, if accurate).
- Expect longer preheats when it’s cold, windy, or you’re cooking multiple pizzas back-to-back.
- Lower the heat slightly if you’re burning bottoms before the top finishes.
Tip 2: Choose the Right Wood (Your Pizza Can Taste Like a Campfire… in a Bad Way)
Use dry, seasoned hardwoods
If you’re cooking with real wood (not just gas with wood for aroma), fuel quality matters. Dry, seasoned hardwoods burn hotter and cleaner than damp wood,
which creates excessive smoke and struggles to reach stable pizza temps. Hardwoods also tend to give a more controllable burnexactly what you want
when your pizza is cooking in under two minutes.
Good wood options (and what to avoid)
Popular hardwood choices include oak, maple, ash, beech, birch, and similar clean-burning woods. Many pizza makers also like fruitwoods
for aroma, but the real win is consistent heat and low smoke. Avoid soft, resinous, or “mystery” woods that can pop sparks or produce harsh flavors.
And never burn anything treated, painted, or manufacturedyour pizza does not need to taste like a hardware store.
Fire-building for pizza (clean flame = top heat)
For woodfired pizza, the live flame matters because it helps brown the top quickly. You’re aiming for a clean, active flame with minimal smoke output.
If you’re seeing lots of thick smoke, your wood may be damp, your airflow may be off, or you’ve overloaded the fire.
- Use small, split pieces to build and maintain flame.
- Feed the fire gradually rather than stuffing the oven full at once.
- Prioritize clean combustionless smoke, more steady heat.
Tip 3: Make Dough That’s Built for High Heat (Simple Wins)
Skip sugar and oil for high-temperature bakes
When you bake at very high temperatures, ingredients that promote browning in a normal oven can become liabilities. Sugar and oil can accelerate
browning (or burning) before the crust structure finishes setting. For high-temp outdoor pizza ovens, many well-tested doughs keep it simple:
flour, water, salt, and yeastclean flavor, great chew, and fewer “why is it black already?” surprises.
Hydration matters: don’t make your first pie on “expert mode”
Dough hydration (how much water you use relative to flour) affects handling, oven spring, and how quickly the crust cooks through. Higher hydration can yield
a more open, tender crumbbut it can also be trickier to stretch and more likely to tear or stick when you’re still learning.
A practical range for many home pizza makers is roughly 60–70% hydration, adjusting based on flour, style, and how hot you’re baking.
If you’re new to woodfired pizza at home, consider starting closer to the middle of that range so the dough is extensible but not fragile. Once you’re comfortable,
you can nudge hydration upward for a lighter, airier rimjust expect more stickiness and a slightly steeper learning curve.
Fermentation is flavor (and better stretching)
A longer fermentationespecially a cold fermentcan deepen flavor and make dough easier to stretch. Even an overnight rest can improve texture and handling.
If you want a noticeable upgrade without turning pizza into a three-day lifestyle, try this approach:
- Mix the dough and let it start rising at room temp briefly.
- Refrigerate for a longer, slower ferment (overnight or longer).
- Bring dough balls to room temp before stretching so the gluten relaxes.
A simple example dough formula (for learning)
Here’s a beginner-friendly baseline that works well in high heat. Treat it like a starting point, not a sacred scroll:
- Flour: 1000 g
- Water: 650 g (65% hydration)
- Salt: 20 g (2%)
- Yeast: small amount (varies by timeline)
Adjust based on your schedule and environment. If it’s very warm, you need less yeast. If it’s cold, fermentation slows. If you’re using a high-protein flour,
it may absorb more water. Dough is forgivingup until the moment you launch it. Then it becomes a drama critic.
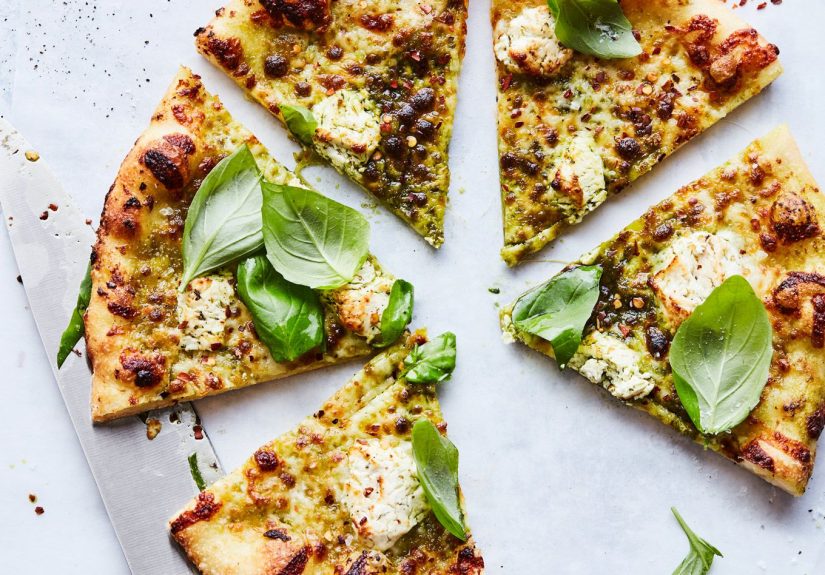
Tip 4: Keep Toppings Light and Low-Moisture (Steam Is the Enemy of Crisp)
Woodfired pizza cooks fast… moisture doesn’t
Your crust is trying to puff, set, and char in under two minutes. Meanwhile, watery sauce, wet mozzarella, and fresh vegetables are releasing moisture and steam.
If the top gets soggy, the center can turn soupy, and your beautiful dough becomes a sad flotation device.
Practical ways to reduce moisture
- Use less sauce than you think you need. Woodfired pizza loves restraint.
- Drain and pat fresh mozzarella (or use low-moisture mozzarella when you want reliability).
- Pre-cook watery vegetables like mushrooms to drive off moisture.
- Save delicate ingredients for after the bake (fresh basil, arugula, prosciutto, finishing oil).
Example: a “beginner-proof” topping combo
If you want a high success rate while you learn heat management, try:
thin layer of sauce + low-moisture mozzarella + pepperoni. It’s classic for a reason. Once you can nail that consistently,
then graduate to fresh mozzarella and water-heavy toppings (which are deliciousbut need more finesse).
Tip 5: Master the Launch (Because Pizza Shouldn’t Become a Calzone Against Its Will)
Use the right peel strategy
Launching is where many home woodfired pizza dreams go to get wrinkled. A common, effective setup is:
one peel for launching (often wood, which dough slides off more easily) and one peel for turning/retrieving
(often metal, thinner, and easier to maneuver near the flame).
Dust smart, not heavy
You need something between dough and peel to prevent stickingbut too much loose flour can burn in the oven and create bitter flavors.
The goal is a light, even “ball-bearing” layer. Many pizza makers like a flour that doesn’t absorb moisture as quickly and stays slippery longer.
If you’ve ever launched a pizza that glued itself to the peel in slow motion, you know exactly why this matters.
The “shake test” saves pizzas
Before you add toppings (and again right before you launch), gently shake the peel. The pizza should move. If it doesn’t, fix it immediately:
lift a stuck edge and add a little more dusting flour underneath that spot. The longer a dressed pizza sits on the peel, the more likely it is to stick,
especially as sauce moisture migrates into the dough.
Launch mechanics (simple and calm)
- Build fast. Topping is not a meditation sessionsave mindfulness for the salad.
- Aim near the center, leaving space from the live flame side.
- Small forward-and-back motions help the pizza slide off cleanly.
- Don’t hesitate mid-launch. Hesitation is how pizza folds into modern art.
Tip 6: Learn the 90-Second Dance (Rotate, Lift, and Finish Like a Pro)
Woodfired pizza is about zones
In most setups, the side closest to the flame is hotter. That means your pizza will brown unevenly unless you rotate it.
Expect a fast first phase where the crust puffs and sets, then a quick rotation cycle to finish the top evenly.
Timing that actually helps
At true Neapolitan-style temperatures (think around the 900°F neighborhood), pizzas can finish in roughly 60–90 seconds.
At slightly lower stone temps (still very hot), you may be closer to 2 minutes. The principle is the same: watch the crust, not the clock.
Three finishing moves to remember
- Rotate early if the flame side is blistering faster than the rest.
- Lift to the dome briefly if the bottom is done but the top needs more color (the dome acts like a broiler).
- Rest the pizza for a short moment before slicing so cheese sets slightly instead of avalanche-sliding off the crust.
How to read doneness
Look for a puffed rim with browned spots, melted cheese with a few toasted edges, and a bottom that’s browned (not pale, not ash).
If you’re getting consistent burn on the bottom, your stone is too hot, your dough may be too thin in the center, or your bake time is too long.
If your bottom is pale while the top looks done, your stone isn’t hot enoughor it hasn’t heat-soaked long enough.
Common Problems (and Fixes That Don’t Involve Swearing at the Oven)
Problem: Bottom burns before the top is done
- Lower the stone temperature target slightly and let the flame handle top browning.
- Reduce sugar/oil in the dough if you’re using them.
- Make sure the pizza isn’t paper-thin in the center.
- Use the “lift to the dome” trick to finish the top without overcooking the bottom.
Problem: Pizza sticks to the peel
- Use the shake test before launching.
- Dust the peel lightly and evenly; don’t let the dressed pizza sit too long.
- Keep toppings lighter (wet toppings accelerate sticking).
- Check for holessauce leaks are basically glue.
Problem: Pale crust, not enough char
- Preheat longer to heat-soak the stone.
- Increase stone temperature gradually.
- Keep a live flame going for stronger top heat.
Bonus: of Real-World Experience (The Backyard Pizza Learning Curve)
The first time you make woodfired pizza at home, it feels like you’re running a tiny restaurant where the chef, the oven manager, and the customer are all
yelling at you at once. You stretch the dough. It looks great. You top it. Confidence rises. You slide it onto the peel… and suddenly your pizza has decided
it lives there now. That moment teaches you a life lesson: the peel is not a plate; it’s a launchpad. The longer your topped dough sits, the more moisture
sneaks underneath, and the more your “effortless launch” turns into a dramatic fold-and-flop.
The second most common lesson is heat humility. Many people assume the oven is ready when they see a big flame. But woodfired pizza isn’t cooked by vibesit’s cooked
by stored heat. If the stone hasn’t heat-soaked, your first pizza might look okay, but the second one will expose the truth: the floor temp drops, the bottom pales,
and you start chasing doneness with longer bakes… which dries the crust and makes toppings overcook. Once you accept that preheating is part of the recipe (not an optional
warm-up), your results jump fast.
Then there’s the “two heats” epiphany: floor and flame. If your stone is too hot, the bottom burns before the cheese bubbles properly. If your flame is weak, the top looks
dull and the crust lacks that signature char. The fix is usually not “more of everything.” It’s balancesometimes you lower the stone temp a touch and keep a livelier flame.
Sometimes you move the pizza a little farther from the fire and rotate sooner. Once you start thinking in zones (hot side near flame, cooler side away from it), you stop
reacting and start controlling.
Toppings teach their own lessons. Early on, it’s tempting to treat pizza like an all-you-can-stack situation. But in a woodfired environment, heavy toppings don’t just
weigh down the dough; they trap moisture. That’s how you get a center that looks cooked until you lift a slice and discover a soft, wet layer underneath. The first time
you blot fresh mozzarella and your pizza suddenly stops turning soupy, you’ll feel like you’ve unlocked a secret level. Same for pre-cooking mushrooms or using a lighter hand
with sauce: the pizza becomes brighter, crisper, and more “pizzeria.”
Finally, the best experience-based tip is to make pizza night a rhythm, not a race. Set up your tools. Portion your toppings. Stretch dough balls only when the oven is ready.
Build one pizza at a time. Launch, rotate, finish, repeat. After a few sessions, you’ll notice you’re calmer, faster, and more consistentand the pizza gets better because
you’re no longer improvising under pressure. Woodfired pizza at home is supposed to be fun. And yes, sometimes the oven will still humble you. But eventually, that chaos turns
into a routineone where the smoke smells great, the crust blisters on cue, and your backyard becomes the place everyone suddenly wants to “just stop by” around dinnertime.