Table of Contents >> Show >> Hide
- Before You Start: What Counts as Edible Glitter?
- 1. Make Quick Colored Sugar Glitter
- 2. Make Coarse Sparkling Sugar Glitter
- 3. Make Gelatin Edible Glitter Flakes
- 4. Make an Edible Glitter Paint with Luster Dust
- How to Choose the Best Method
- Common Mistakes to Avoid
- Smart Ways to Use Edible Glitter
- My Real-Life Experience Making Edible Glitter at Home
- Final Thoughts
- SEO Tags
There are two kinds of people in this world: people who think dessert should sparkle, and people who have not yet seen a cupcake dressed like it has a tiny disco ball tucked into its frosting. If you fall into the first group, welcome. If you fall into the second, pull up a chair. Today we are making edible glitter the fun way, the practical way, and most importantly, the actually-safe-to-eat way.
Homemade edible glitter is one of those small kitchen tricks that makes ordinary sweets look suspiciously expensive. Cookies become party cookies. Cake pops become “Who made these?” cake pops. Even a simple glass rim or chocolate-dipped strawberry suddenly looks like it dressed up for the occasion. The best part is that you do not need one magical method. You have options, and each one gives a different texture, shine, and level of drama.
In this guide, you will learn four smart ways to make edible glitter at home, from easy colored sugar to more dramatic gelatin flakes and shimmer paint. Along the way, we will also cover what edible glitter really is, how to avoid the fake stuff, and which method works best for cookies, cakes, cocktails, candy, and last-minute “I forgot this was a themed party” emergencies.
Before You Start: What Counts as Edible Glitter?
Let’s clear up the sparkly elephant in the room. Not every glitter sold near baking supplies is meant to be eaten. Some products are labeled non-toxic, which sounds comforting until you realize it does not mean edible. In plain English, non-toxic means it probably will not poison you in tiny accidental amounts, but it is still not intended to be consumed. That is a pretty low bar for something you are about to sprinkle on brownies.
Real edible glitter should clearly say edible on the label and include an ingredient list. If you are buying a ready-made shimmer product, look for ingredients commonly used in edible glitter, such as sugar, gum arabic, cornstarch, maltodextrin, or approved food color additives. If the package says “for decorative purposes only,” save it for centerpieces, ornaments, or crafts. Your cake did not ask for a side of confusion.
That safety rule matters because edible glitter sits in an odd little space between decoration and food. It needs to be beautiful, but it also needs to behave like something you would actually want on your dessert. The four methods below all aim for that sweet spot.
1. Make Quick Colored Sugar Glitter
If you want the easiest path to sparkle, colored sugar glitter is the no-fuss champion. It is fast, cheap, kid-friendly, and surprisingly useful. The look is not metallic or mirror-like, but it gives a cheerful crystal sparkle that works beautifully on cookies, donut holes, muffins, cake rims, and candy-coated treats.
What You Need
- 1 cup granulated sugar
- 2 to 6 drops liquid food coloring, depending on the shade you want
- A jar with a tight lid or a resealable plastic bag
How to Make It
- Pour the sugar into a jar or bag.
- Add a few drops of food coloring.
- Seal and shake, rub, or massage until the color is evenly distributed.
- If the color looks too pale, add another drop or two and repeat.
- Spread it out on parchment for a little while if it seems damp or clumpy.
That is it. You just made edible glitter’s easygoing cousin. Colored sugar is ideal when you want sparkle with crunch. It is also great for holiday cookies, birthday cupcakes, or decorating frosted treats before the icing sets. If you have ever looked at bakery cookies and thought, “These seem suspiciously cheerful,” this is one of the tricks behind that look.
Best For
- Sugar cookies
- Muffin tops
- Donut finishes
- Chocolate-dipped marshmallows
- Simple cake decorations
Pro tip: Use white sugar for bright, clean color. If you want deeper jewel tones, increase the color gradually instead of dumping it in all at once and creating what looks like a craft accident.
2. Make Coarse Sparkling Sugar Glitter
If regular colored sugar is cute, coarse sparkling sugar is glamorous. The larger crystals catch light better and create that classic “bakery sparkle” you see on cookies, scones, sweet breads, and even cocktail rims. It is the difference between a twinkle and a full-on wink.
What You Need
- Coarse sugar, sanding sugar, or sparkling sugar
- Gel or liquid food coloring
- A bowl or bag for mixing
How to Make It
- Start with coarse white sugar.
- Add very small amounts of food coloring.
- Toss gently so the crystals keep their shape.
- Let the sugar dry fully if needed before storing.
Why use coarse sugar instead of plain granulated sugar? Because bigger crystals reflect more light and hold their sparkle better, especially on baked goods. They also tend to keep their shape instead of disappearing into the surface. That makes this method especially helpful when you want edible glitter that still looks sparkly after a trip through the oven.
Best For
- Slice-and-bake cookie edges
- Pie crust accents
- Scone tops
- Holiday sugar cookies
- Cocktail rims
This version is not subtle. It crunches. It shines. It announces itself. If your dessert theme is “more is more,” this is your glitter.
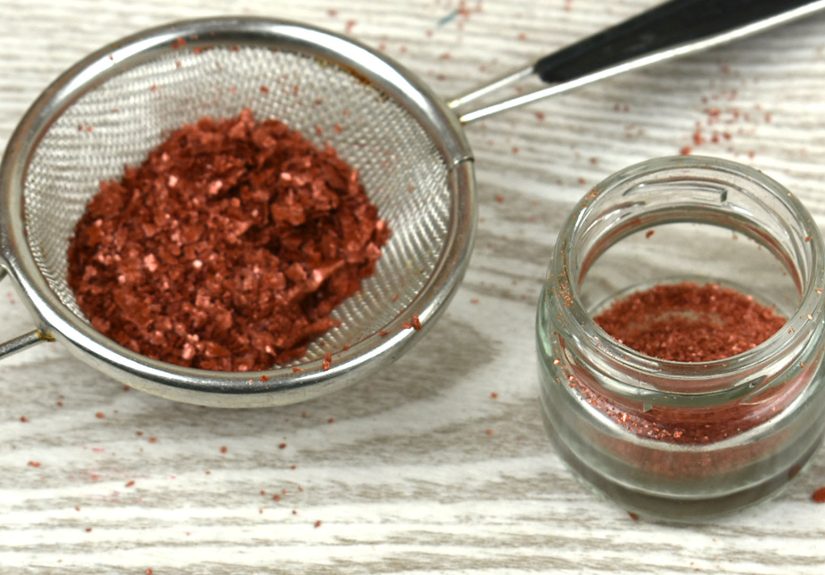
3. Make Gelatin Edible Glitter Flakes
Now we are entering the fancy zone. Gelatin-based edible glitter gives you a shinier, flakier, more dramatic effect. It works particularly well if you want something closer to actual glitter pieces instead of sparkly sugar crystals. The texture is different, the look is bolder, and the results can be wildly pretty on cakes, chocolate bark, molded candies, and celebration desserts.
What You Need
- Unflavored powdered gelatin
- Cold water
- Edible luster dust or approved food coloring
- A microwave-safe bowl
- Plastic wrap, acetate, or a silicone surface
- A spice grinder, clean coffee grinder, or scissors
How to Make It
- Bloom the gelatin in cold water until it thickens.
- Warm it gently until fully melted and smooth.
- Stir in edible luster dust or food coloring.
- Spread the mixture into a very thin layer on plastic wrap or a smooth nonstick surface.
- Let it dry completely until it peels away.
- Break it into flakes or grind it into finer glitter.
This method takes more patience, but it also gives the most dramatic payoff. The flakes can be torn into irregular shards for a modern, jewel-like effect, or ground down for finer shimmer. Because gelatin naturally has a slight yellow cast, lighter or warmer colors usually perform better than icy blue or pure silver unless you use a strong edible dust.
Best For
- Chocolate bark
- Fondant decorations
- Showpiece cakes
- Candy toppers
- Statement desserts for parties
Pro tip: Humidity is the enemy here. If your kitchen feels like a tropical greenhouse, give yourself extra drying time. Gelatin glitter is gorgeous, but it definitely has opinions.
4. Make an Edible Glitter Paint with Luster Dust
This last method is for bakers who want sparkle without crunch. If you have ever admired a dessert with a silky metallic shimmer and wondered how it got that polished look, edible glitter paint is the answer. Instead of making loose glitter, you create a brush-on shimmer finish.
What You Need
- Edible pearl dust or edible luster dust
- Lemon extract or another fast-evaporating edible extract
- A small bowl
- A clean food-safe brush
How to Make It
- Place a small amount of edible dust in a bowl.
- Add enough extract to make a paint-like consistency.
- Brush onto dry fondant, gum paste, royal icing, chocolate, or candy coating.
- Let the extract evaporate so the shimmer sets.
This method does not create free-flowing glitter pieces, but it absolutely creates a glitter effect. Think of it as liquid sparkle. It is fantastic for painting letters on cookies, brushing shine onto molded chocolates, or giving fondant decorations a metallic gleam without burying them under sugar.
Best For
- Fondant toppers
- Royal icing accents
- Cake pops
- Chocolate details
- Elegant holiday and wedding desserts
This is also the best choice when you want a more refined finish. Sugar glitter says party. Luster-dust paint says, “I own at least one tiny artist’s brush and I know how to use it.”
How to Choose the Best Method
If you are standing in your kitchen wondering which route to take, here is the simple breakdown:
- Choose colored sugar glitter for speed, color, and easy decorating.
- Choose coarse sparkling sugar for maximum crunch and bakery-style shine.
- Choose gelatin glitter flakes for dramatic sparkle and true glitter-like pieces.
- Choose luster-dust paint for smooth shimmer and a more polished finish.
In real life, most bakers end up using more than one. A cookie might get sparkling sugar on the edges and luster dust on a fondant topper. A cake might use gelatin flakes for one showy section and edible paint for the details. Glitter does not have to live in a monogamous relationship with one technique.
Common Mistakes to Avoid
- Using craft glitter: This is the big one. If it is not labeled edible, do not put it on food that will be eaten.
- Adding too much liquid food coloring to sugar: That gives you damp sugar clumps instead of sparkle.
- Applying glitter to fully dry surfaces without adhesive: Sugar needs wet icing, glaze, or a tacky layer to stick.
- Using too much extract in luster paint: That causes streaking and puddles instead of shimmer.
- Rushing gelatin glitter: If it is not dry, it will tear, gum up, or act like a sugar-coated mood swing.
Smart Ways to Use Edible Glitter
Edible glitter is not just for birthday cake explosions. It can be elegant, playful, seasonal, or subtle depending on how you use it. Try it on frosted cookies, candy bark, cupcake swirls, truffles, marshmallows, cocktail rims, dipped fruit, cake pops, and molded chocolates. On drinks, use only edible glitter made for food or beverages, and remember that some cocktail glitter is designed to stay suspended longer in liquid for a more dramatic swirling effect.
If you are decorating for the holidays, edible glitter pairs beautifully with snowflake cookies, sugared cranberries, peppermint bark, and metallic cake details. For kids’ parties, bright sugar glitter is the winner. For weddings, showers, and elegant desserts, pearl dust and soft gold shimmer tend to look more sophisticated.
My Real-Life Experience Making Edible Glitter at Home
The first time I tried to make edible glitter, I assumed this would be a five-minute project. You know, the kind of “quick kitchen hack” that social media promises right before it wrecks your counter and your confidence. I started with colored sugar, because it felt safe. Sugar. Food coloring. A jar. What could go wrong? Well, not much, actually. That method was almost annoyingly easy. I shook the jar, looked at the sparkling pink sugar, and immediately got a little too confident. Suddenly everything in sight looked like it needed a glitter coating. Cookies? Yes. Toast? No, but the thought crossed my mind.
The second experiment was coarse sparkling sugar, and that was when I started to understand why texture matters. Regular colored sugar looked pretty, but coarse sugar looked like it had ambition. The crystals caught light in a way that felt more bakery window, less elementary school cupcake table. I rolled the edges of cookie dough in it before baking and got that gorgeous crisp sparkle that makes people assume you bought the cookies somewhere expensive. I did not correct them. I am only human.
Then came the gelatin version, which is where the project turned from “fun little baking task” into “science fair with dessert potential.” The process was not hard, but it did require patience, and patience is not always my strongest ingredient. Watching a glossy gelatin sheet dry felt a bit like waiting for nail polish to set when you really need to use your hands. Still, when I finally peeled it up and broke it into shimmering flakes, I understood the appeal immediately. The look was dramatic, almost jewel-like, especially on dark chocolate. It was the first version that made me think, “Oh, this is not just cute. This is showpiece material.”
Luster-dust paint was my favorite surprise. I expected it to be fussy and high-maintenance, the edible equivalent of trying to hem silk. Instead, it was straightforward and oddly satisfying. A little dust, a little lemon extract, a quick stir, and suddenly I was painting a soft gold sheen onto cookie details like I had my life together. The finish looked polished, grown-up, and far more elegant than dumping on extra sugar. It also taught me that edible glitter does not always have to be loud. Sometimes sparkle works best when it whispers.
What I learned from making all four is that edible glitter is less about one “best” recipe and more about matching the method to the moment. If you need speed, go sugar. If you want shimmer with structure, go coarse crystals. If you want drama, choose gelatin. If you want elegance, reach for edible dust and a brush. Mostly, though, I learned that sparkle changes how people experience dessert. The same cookie that might be ignored on a plate becomes irresistible with a little shine. Apparently, human beings are part crow. We see something glimmering, and we want it immediately.
Final Thoughts
Making edible glitter at home is part baking, part decorating, and part harmless kitchen vanity. It is also one of the easiest ways to make homemade desserts feel festive without changing the entire recipe. Whether you go with simple colored sugar, crunchy sparkling crystals, dramatic gelatin flakes, or a brushed shimmer finish, the best method is the one that fits your dessert and your patience level.
Just remember the golden rule: if it is going on food, it needs to be truly edible. Once you have that part covered, the rest is all sparkle strategy. Your cupcakes can shine, your cookies can twinkle, and your cake can absolutely have main-character energy.