Table of Contents >> Show >> Hide
- Before You Start: Cloud Safety & Hanging Reality Check
- Method 1: The Paper-Lantern Cloud Light (Fast, Fluffy, Budget-Friendly)
- Method 2: The Wire-Frame Storm Cloud (Big, Sculptural, High-Drama)
- Method 3: The Cloud Mobile (Lightweight, Nursery-Friendly, No Electricity Required)
- Troubleshooting: Fix the 5 Most Common “Why Is My Cloud Doing That?” Problems
- Conclusion: Pick Your Cloud, Then Make It Yours
- Experience Notes: What DIYers Usually Learn After Making a Hanging Cloud
If your room has ever felt a little… too “indoors,” a hanging cloud is the fastest way to give it that dreamy, floating-in-the-sky energywithout the inconvenience of actual weather. The good news: you don’t need a woodworking shop, an art degree, or a personal relationship with Zeus. You just need a few basic materials, a little patience, and the willingness to wrestle with static cling like it owes you money.
Below are three tried-and-true DIY approaches (from ultra-budget to “wow, is that from a boutique hotel?”), plus hanging and safety tips so your cloud looks magicalnot like a fire marshal’s villain origin story.
Before You Start: Cloud Safety & Hanging Reality Check
1) Use lights that stay cool
If your hanging cloud includes lighting, choose LED options (fairy lights, LED strip lights, or LED bulbs). Avoid anything that runs hot. Fluffy materials (polyfill, cotton batting, tissue) and heat are not friends. Think “cute ambiance,” not “toasted marshmallow ceiling.”
2) Hang it like you mean it
Lightweight clouds can use removable hooks rated for the load. Bigger clouds should be anchored to a ceiling joist or supported with the right hardware (toggle bolts/swags rated for ceilings). When in doubt, go stronger than you think you needbecause gravity is undefeated.
3) Keep cords, strings, and tiny parts out of kid/pet reach
Hanging decor can create strangulation and chewing hazards. If this is for a nursery or kids’ room, hang it well out of reach, secure loose cords, and consider a no-electric cloud option (see Method 3).
Quick comparison
| Method | Look | Difficulty | Typical Cost | Best For |
|---|---|---|---|---|
| 1) Paper-Lantern Cloud Light | Soft, fluffy glow | Easy | $20–$60 | Bedrooms, dorms, parties |
| 2) Wire-Frame Storm Cloud | Sculptural + dramatic | Medium | $35–$120 | Statement lighting, dining rooms |
| 3) Cloud Mobile (No Electricity) | Airy, nursery-friendly | Easy–Medium | $15–$45 | Nurseries, calm corners, gifts |
Method 1: The Paper-Lantern Cloud Light (Fast, Fluffy, Budget-Friendly)
This is the classic DIY hanging cloud for a reason: paper lanterns give you instant volume, polyfill adds the “cloud,” and LEDs add the “wow.” It’s lightweight enough for many ceilings, but still looks like you paid a designer who owns at least three scarves.
Best for
- Bedrooms, dorm rooms, reading nooks, parties, photo backdrops
- People who want a big visual upgrade without heavy construction
Materials
- Paper lanterns (mix sizes for a natural cloud shape, e.g., 8″, 10″, 12″)
- Polyester fiberfill (polyfill) or cotton batting
- LED fairy lights or LED strip lights (low-heat)
- Hot glue gun + glue sticks
- Fishing line/clear filament (for hanging and “invisible” support)
- Optional: white zip ties, wire, or masking tape (for quick structure)
- Ceiling hook setup (see “Hanging Hardware” tips below)
Step-by-step
- Plan your cloud shape on the floor. Arrange lanterns in a cluster with one “main” lantern and smaller ones branching out. Natural clouds are uneven, so perfection is suspicious.
- Connect the lanterns. Hot-glue lantern edges together where they touch. For extra stability, you can add zip ties or a little wire between frames (hidden under polyfill later).
- Add the LEDs. Place LED strip lights inside the lantern cluster or wrap LED fairy lights around the lantern frames. Keep the controller/power pack accessible so you’re not doing ceiling acrobatics every time you want to turn it on.
- Fluff and glue the cloud layer. Pull polyfill apart into wispy sheets (don’t use dense clumpsthose look like popcorn). Hot-glue in patches over the lanterns until the structure disappears and you get a soft, layered look.
- Create hanging points. Tie 2–4 lines of fishing line to strong spots in the lantern frames (or a hidden support bar/dowel). Bring them together at a single ring or hook so the cloud hangs level.
- Hang and fine-tune. Hang the cloud, step back, and adjust the fishing lines until it floats evenly. Add a little more polyfill where you see harsh edges or “lantern lumps.”
Pro tips (the stuff that saves your sanity)
- Layering beats stuffing. Stretch polyfill into thin sheets. Multiple light layers look cloudlike; one thick layer looks like a sheep exploded.
- Leave breathing room for the lights. Even LEDs should have a bit of airflow. Avoid burying power supplies inside the cloudkeep them outside and accessible.
- Pick a light color on purpose. Warm white feels cozy and dreamy. Cool white feels “bright sky at noon.” Color-changing LEDs can do thunderstorm mode if you want drama.
Hanging hardware: lightweight vs. “real fixture energy”
If your finished cloud is very light, removable hooks may work (only if the hook’s ceiling rating exceeds the total weight). If it’s larger or heavier, mount into a ceiling joist or use a ceiling-rated toggle bolt/swab hook. Always follow the hardware’s instructions and weight limits, and remember: ceilings are less forgiving than walls.
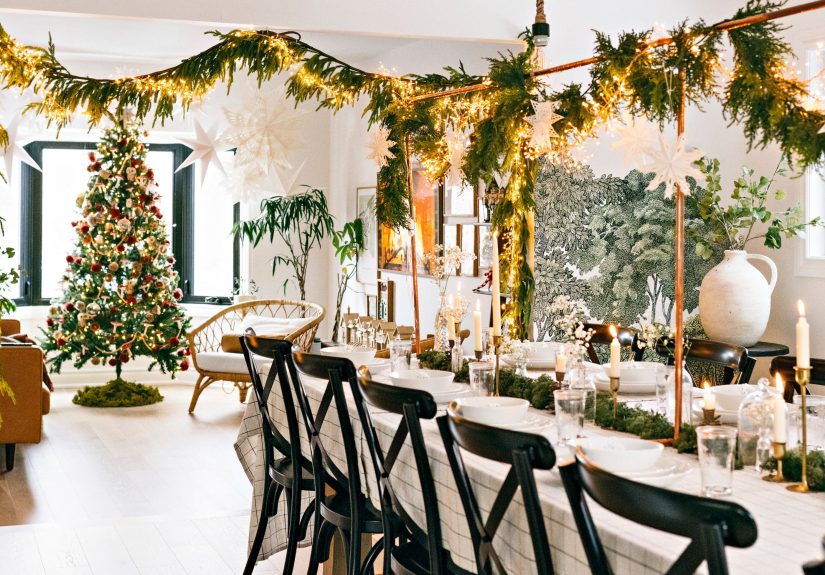
Method 2: The Wire-Frame Storm Cloud (Big, Sculptural, High-Drama)
Want a hanging cloud that looks like it came out of a moody music videosoft outside, electric inside, and maybe one lightning bolt away from a plot twist? Build a wire frame first. This method scales up beautifully and can handle more complex lighting effects.
Best for
- Dining rooms, studios, retail displays, party installations
- People who want a larger cloud with a custom silhouette
Materials
- Chicken wire or hardware cloth (for the cloud “skeleton”)
- Wire cutters + needle-nose pliers
- Work gloves (wire bites back)
- Zip ties or thin wire (to close seams)
- Polyfill or cotton batting
- LED strip lights or LED fairy lights (ideally low-voltage)
- Hot glue (optional) or small dabs of craft glue (use sparingly)
- Ceiling mounting hardware rated for the full load
Build steps
- Sketch the cloud size and pick a “top.” Decide where the cloud will hang and where the power cord will exit. Plan for a “top side” that hides seams.
- Form the wire frame. Cut chicken wire and bend it into a cloud-like oval or lumpy shape. Overlap edges and secure with zip ties or wire. Make a few “anchor points” (reinforced loops) where hanging lines will attach.
- Install lighting inside the frame. Wrap LED strips or string lights around interior ribs so light bounces through the polyfill. Keep power adapters outside the cloud if possible.
- Add the fluffy shell. Stretch polyfill into thin layers and attach it to the frame with tiny dots of hot glue or by weaving fibers through the wire. Build up density graduallythicker in some spots, thinner in others for a natural look.
- Hang with multiple support lines. Larger clouds should use 3–4 hanging lines that meet at a single ceiling hook (or a small crossbar) to prevent tilting. Adjust until it “floats,” not “slumps.”
Make it a storm (optional, but extremely fun)
- Lightning bolt: Cut a zigzag from thin acrylic or foam board, paint it white or metallic, and hang it below with clear filament.
- Thunder glow: Use color-changing LED strips and set quick flashes (short bursts look more realistic than constant strobing).
- Rain: Hang clear beads, paper raindrops, or crystal “icicles” at varied lengths under the cloud.
Safety notes for bigger clouds
- Weight adds up fast. Wire frame + lights + denser polyfill can become heavier than you expect. Use ceiling-rated hardware.
- Avoid sealing heat in. Don’t fully pack polyfill around power supplies or controllers. Keep electrical components ventilated.
- Access matters. Design a discreet “service gap” so you can replace lights without tearing your cloud apart like a raccoon in a pantry.
Method 3: The Cloud Mobile (Lightweight, Nursery-Friendly, No Electricity Required)
If you want something calm, safe, and giftablethis is your move. A cloud mobile hangs lightly, sways gently, and creates that soft “storybook sky” feeling without cords, plugs, or the temptation to leave lights on overnight.
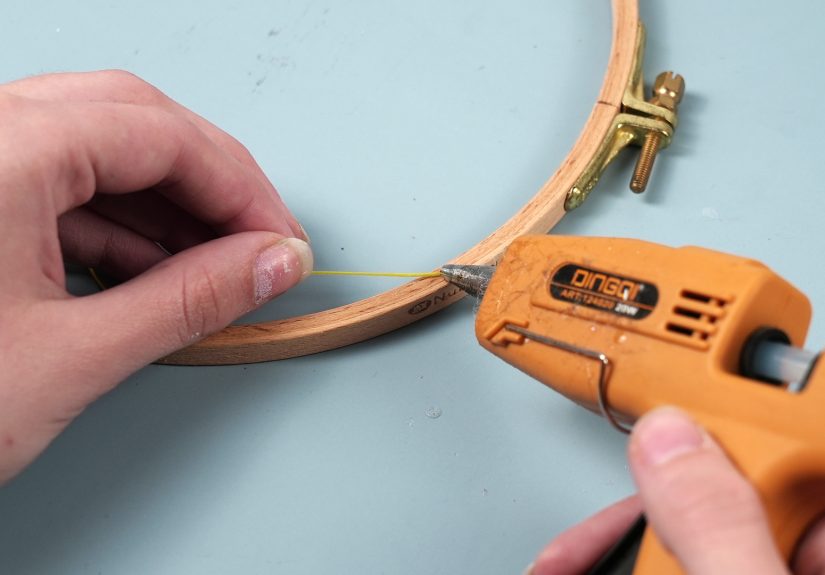
Option A: Felt cloud + raindrops on an embroidery hoop
This version looks polished and modern: a simple hoop, a few stuffed felt clouds, and dangling raindrops. It’s also easy to customize (stars, birds, thunderbolts, a rainbowgo wild, just keep it balanced).
Materials
- 10″ metal hoop or embroidery hoop
- White felt (and optional gray/black felt for storm clouds)
- Cotton balls or batting for stuffing
- Strong thread + needle (or fabric glue for a no-sew shortcut)
- Yarn or embroidery thread (for hanging raindrops)
- Clear fishing line/nylon filament (for the main hanger)
- Paper raindrops, felt raindrops, or beads (your choice)
Steps
- Cut and stitch the clouds. Cut two cloud shapes per cloud, stitch around edges, and lightly stuff before closing.
- Prep the hoop. Wrap the hoop with yarn for a finished look (optional but nice). Tie off neatly.
- Add raindrops. Attach raindrops to yarn at different lengths so the mobile has movement and depth.
- Balance the layout. Tie clouds and raindrop strands to the hoop so weight is evenly distributed.
- Create the hanger. Use 3 lines of clear filament meeting at the top so the hoop hangs level.
Nursery safety checklist
- Hang it well out of reach of cribs and changing tables.
- Keep ends trimmedno long dangling lines within a child’s reach.
- Double-knot everything. If you think it’s secure, tie one more knot anyway.
Option B: Paper cloud mobile (fast craft for parties)
Need a hanging cloud for a baby shower, classroom, or party? Cut layered cloud shapes from cardstock, fold slightly for dimension, and hang them from clear filament beneath a hoop or dowel. It’s lightweight, cheap, and looks great from across the roomaka the “Instagram distance.”
Troubleshooting: Fix the 5 Most Common “Why Is My Cloud Doing That?” Problems
1) My cloud tilts forward
Add a third (or fourth) hanging line and reposition attachment points until the weight is evenly distributed. Also check if the power pack is pulling one side down.
2) You can see the lantern/frame through the fluff
Add thinner layers of polyfill in the transparent spots. Avoid clumping; wispy layers hide structure better than dense wads.
3) The glow looks harsh instead of dreamy
Use warm white LEDs, add a second layer of polyfill to diffuse, and aim lights inward so they bounce instead of shining directly outward.
4) It sheds fibers like a startled cat
You likely used too little glue or tried to attach big chunks. Switch to thinner layers and glue only key touchpoints. A light mist of clear craft spray can help lock loose fibers (test on a scrap first).
5) I’m worried about heat
That’s your good instincts talking. Use LEDs, keep controllers/power supplies outside the fluff, and never trap hot bulbs inside batting. When you first install it, run the lights for 30 minutes and do a cautious “heat check” with your hand near components. If anything feels warm-hot, redesign for airflow or switch lighting.
Conclusion: Pick Your Cloud, Then Make It Yours
The best hanging cloud is the one that matches your space and your patience level. Want quick wins? Go paper lantern + polyfill. Want a showpiece? Build a wire-frame storm cloud with lighting effects. Want calm and kid-friendly? Make a mobile with soft materials and zero electricity. Whatever you choose, prioritize safe lighting, solid hanging hardware, and a little creative chaosbecause real clouds are basically chaos with good PR.
Experience Notes: What DIYers Usually Learn After Making a Hanging Cloud
Here’s the part nobody tells you up front: a hanging cloud is less about “crafting” and more about “negotiating with physics while covered in fluff.” If you build one, you’ll probably have a few universal experiencesconsider this the friendly heads-up your future self will thank you for.
First, polyfill has opinions. It clings to sleeves, floats into places you didn’t invite it, and somehow multiplies when you turn your back. Most makers find it helps to work in stages: pull out a small pile, stretch it into wisps, glue, then repeat. Trying to attach one giant handful almost always creates the “lumpy popcorn” lookand then you’ll spend twice as long “un-lumpifying” it (a highly technical term).
Second, lighting looks different once it’s off the floor. On the ground, your LEDs might feel bright enough to guide airplanes in for landing. Once the cloud is hanging, the glow spreads out and softenssometimes a lot. A common trick is to test at night with the room lights off, then adjust: move lights inward for a gentler bloom, or add a second strand if the cloud looks more “sad gray smudge” than “dreamy sky.”
Third, balance is the secret boss level. The cloud can look perfect until the moment you hang itthen suddenly it leans like it’s listening to gossip. This usually happens because one side has more glue, more lantern overlap, or a power pack tugging downward. DIYers often solve it by adding an extra suspension line (three is easier to level than two), or by shifting the tie points a couple of inches until it floats evenly. The good news: once you find the balance, it tends to stay put.
Fourth, your ceiling matters more than your craft skills. Many frustrations come from underestimating hanging hardware. Lightweight mobiles can be simple, but larger cloud lights need real support. People often report that the “hardest” part is not gluingit’s locating a joist, drilling cleanly, and getting the hook to feel rock-solid. The payoff is huge, though: a cloud that doesn’t wobble every time someone closes a door is the kind of calm you can’t buy in stores.
Fifth, the final 10% is where the magic happens. Once it’s up, you’ll notice tiny spots where the frame peeks through, or one edge looks too sharp. Most makers end up doing a last “beauty pass”: adding a few wispy layers, trimming stray fuzz, and stepping back from different angles (doorway, bed, couch). That’s usually when it stops looking like a craft project and starts looking like decor.
Finally, there’s the emotional part: hanging clouds tend to make people smile. They’re whimsical in a way most adult furniture refuses to be. Whether you build one for a nursery, a party, or your own bedroom, the most common “review” is some version of: “I didn’t expect it to change the whole vibe this much.” Which is basically what clouds do for the sky, toojust with fewer surprise rainstorms.