Table of Contents >> Show >> Hide
- Why Your Leash Grip Matters (Yes, Even If Your Dog Is “Friendly”)
- Before You Grip: Choose a Leash That Won’t Betray You
- Way #1: The Thumb Lock (Everyday “Quick-Adjust” Grip)
- Way #2: The Finger Lock + Two-Hand “Anchor & Slide” (More Control, Less Wrist Pain)
- Way #3: The Body Anchor / Cross-Body Hold (Let Your Core Do the Work)
- Micro-Skills That Make Any Leash Hold Safer
- Troubleshooting: “I’m Holding It Right, But My Dog Still Pulls”
- of Leash-Holding Experiences (Lessons From the Sidewalk)
- Conclusion
Dog leashes look innocent. A strip of nylon. A little clip. A handle loop that whispers, “I’m basically a seatbelt.” And then your dog spots a squirrel and the leash instantly transforms into a physics demo called Momentum vs. Your Rotator Cuff.
The way you hold a dog’s leash isn’t just a “comfort preference.” It’s a safety systemfor your hands, your shoulders, your dog’s neck, and your dignity when you’re trying to act like you totally meant to jog across that wet lawn. Below are three proven leash-handling techniques that keep you in control without turning your walk into an arm-wrestling match.
Why Your Leash Grip Matters (Yes, Even If Your Dog Is “Friendly”)
A good leash grip does three things at once: it prevents the leash from ripping out of your hand, keeps your joints aligned so you’re not absorbing every lunge with your wrist, and lets you adjust quickly when your dog changes speed or direction. In other words: it helps you communicate clearly without getting yanked like a cartoon character.
A bad gripespecially wrapping the leash around your hand or wristcan make it harder to release quickly in an emergency. It can also increase the chance of rope burn, strains, and falls when tension suddenly snaps tight. Your leash should be a connection, not a handcuff.
Before You Grip: Choose a Leash That Won’t Betray You
You can hold a leash perfectly and still struggle if the leash itself is working against you. For everyday walks, most trainers recommend a fixed-length, non-retractable leash (often around 6 feet) that gives your dog room to move while still keeping you in control. Longer lines (15–50 feet) can be great for training and sniffy decompression walksif you know how to manage the slack.
Quick gear notes that make leash handling easier
- Skip retractables for training, busy sidewalks, and unpredictable situations. Sudden “jerk to full tension” is not a hobby.
- Use a harness for pullers if your dog strains on a collar. It can reduce pressure on the neck and give you better steering options.
- Consider a treat pouch so your “leash hand” stays the same and your “treat hand” does treat things (technical term).
Way #1: The Thumb Lock (Everyday “Quick-Adjust” Grip)
If you only learn one leash hold, make it this one. The thumb lock keeps the handle secure without trapping your wrist inside the loop. It’s stable, adjustable, and fastperfect for normal walks, training sessions, and those moments when your dog decides that “sniffing that exact leaf” is a time-sensitive mission.
How to do the thumb lock
- Put your thumb through the leash handle so the loop sits in your palm.
- Close your hand into a fist with your thumb “locked” inside the loop (not your whole wrist).
- Let the working end exit on the pinky side of your fist (this helps keep your wrist aligned and your grip strong).
- Keep a relaxed “U” or “J” shape in the leash when possibleslack is your friend when training a calm walk.
When it works best
- Everyday neighborhood walks
- Loose-leash walking practice (where you want slack most of the time)
- Dogs that occasionally pull but aren’t trying to launch you into orbit
Common mistakes (and the easy fixes)
- Mistake: Looping the handle around your wrist. Fix: Thumb through the loop, wrist free.
- Mistake: Death-gripping constantly. Fix: Use grip when needed, relax when leash is slack.
- Mistake: Letting slack drag into a tangle. Fix: Gather slack in loose folds in your non-leash hand (not wrapped around your fingers).
Way #2: The Finger Lock + Two-Hand “Anchor & Slide” (More Control, Less Wrist Pain)
This method is for the real world: crowded sidewalks, reactive moments, strong pullers, and “my dog is sweet but occasionally turns into a jet ski” situations. You’ll use two hands: one hand anchors the leash close to your body for stability, while the other hand slides and adjusts leash length smoothly.
How to do the finger lock (anchor hand)
- Thread the leash between your index and middle finger, then close your fist.
- Position the leash so it exits on the pinky side of your hand.
- Bring that anchored hand near your center (think belly button / hip area). This turns your core into the shock absorbernot your wrist.
Add the second hand (control hand)
With your anchor hand holding steady, place your other hand farther down the leash. That “control hand” does the fine-tuning: shorten the leash when passing a stroller, lengthen it for a sniff break, or create a quick “traffic handle” effect without yanking or wrapping.
Best use cases
- Passing distractions: dogs, scooters, kids doing kid stuff
- Training moments where you need quick leash-length changes
- Longer leashes and long lines (where leash locks prevent slipping and burns)
- Dogs that surge forward when excited
Why two hands are a cheat code
Two hands spread the force across your arms and shoulders and make your “brake” more controlled. You can shorten the leash without wrapping it around your hand, and you can release length without fumbling. It’s the difference between “I’ve got this” and “I’ve got this… probably… okay no.”
Way #3: The Body Anchor / Cross-Body Hold (Let Your Core Do the Work)
This is the “use your whole body, not just your arm” approach. The idea: position the leash so tension goes into your center of gravity instead of your wrist joint. When a dog pulls, your strongest tools are your legs, hips, and core. This hold is also great for people who want more stability without muscling through every step.
How to do a safe cross-body anchor
- Choose a side (dog on left or right) and keep it consistent for the walk when possible.
- Use a thumb lock or finger lock in the hand farthest from your dog, then bring that hand close to your midline (near your belly button/hip).
- Let the leash run across the front of your body to the dog, keeping it neatnot tangled around you.
- Bend your knees slightly and keep shoulders down. If a lunge happens, you’re braced like you meant it.
Optional: hands-free belt setups (with a big safety asterisk)
Waist-belt systems can reduce the “arm gets pulled forward” effect and may help you brace with your legs. But they’re not for every dog-handler combo. If your dog is large enough to pull you off balance or drag you, hands-free can turn from “convenient” to “unplanned waterskiing.” If you try hands-free, practice in low-distraction areas first and keep a backup plan (like a second handle or an easy way to detach).
Micro-Skills That Make Any Leash Hold Safer
1) Keep your wrist neutral
Your wrist isn’t designed to be a shock absorber. Whether you’re using thumb lock, finger lock, or a body anchor, keep your wrist straight and let your elbow and core handle the load.
2) Manage slack like you’re handling a garden hose
Extra leash length is usefuluntil it’s under your foot or tangled around your dog. Gather slack in loose folds in your free hand (not wrapped around fingers) and feed it out smoothly when you want to give more distance.
3) Treat with your free hand
If you’re training, keep one hand responsible for leash control and the other responsible for rewards. That separation helps your timing and prevents the leash from bouncing around every time your dog earns a snack (which, in your dog’s opinion, should be often).
4) Aim for a “U” or “J” shape, not a tight rope
A constantly tight leash can create constant pressure, and many dogs respond by leaning into it. When you can, keep a little slack. Teach that slack is what makes the walk continue.
Troubleshooting: “I’m Holding It Right, But My Dog Still Pulls”
A strong leash grip is not the same thing as loose-leash walking. It’s possible to hold the leash perfectly while your dog still drags you like a coupon shopper at an outlet mall. Grip is your safety net; training is your long-term solution.
Practical training tweaks that pair well with good leash handling
- Stop when the leash goes tight and move again when slack returns. This teaches your dog that pulling doesn’t get them closer to the good stuff.
- Change direction before your dog reaches full speed toward a distraction. Think of it as “strategic retreat,” not defeat.
- Meet exercise needs first. A dog that’s under-exercised may treat your walk like their one chance to do everything everywhere all at once.
- Use the right gear (like a harness) so training doesn’t rely on discomfort or neck pressure.
of Leash-Holding Experiences (Lessons From the Sidewalk)
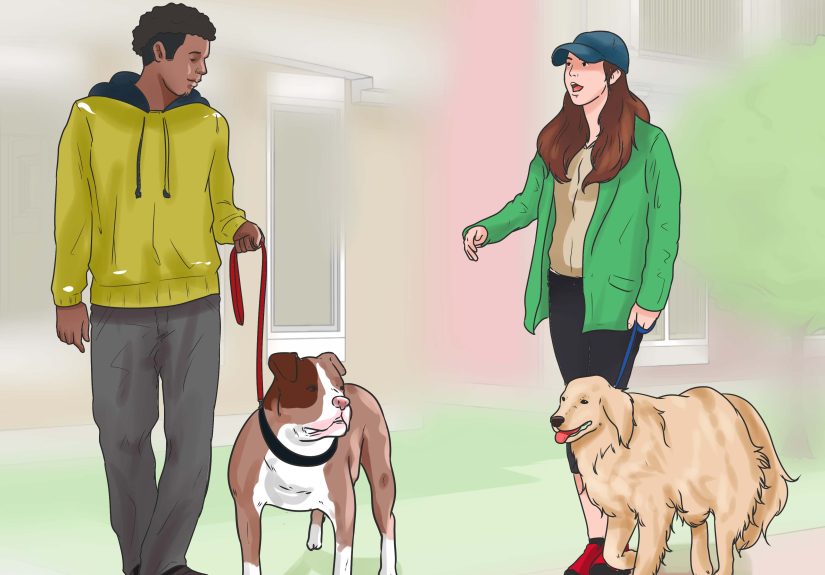
If you want proof that leash handling matters, watch what happens at the exact moment a dog spots something exciting. In group classes, shelter walks, and neighborhood strolls, the “incident” is rarely caused by a bad dogit’s usually a mismatch between surprise, speed, and a leash hold that wasn’t ready for reality.
The Squirrel Slingshot. This one’s classic: the dog is walking politely, the handler is relaxed, and the leash loop is wrapped around the wrist “for security.” Then a squirrel appears and the leash goes tight instantly. Now the handler can’t release, can’t re-grip, and can’t rotate their body to absorb the pullbecause their wrist is trapped. The fix is almost boring: thumb lock instead of wrist loop, plus a slight bend in the knees. Same dog, same squirrel, dramatically less chaos.
The Coffee Cup Betrayal. You’d be amazed how many near-misses begin with “I only had my latte in my other hand for a second.” One-handed walking is fine until it isn’t. The best workaround I’ve seen is teaching your default to be two-handed when you enter “high-distraction zones” (parking lots, corners, busy trails). Anchor hand near your center, control hand down the leash. Your coffee will survive. Your shoulder will send a thank-you note.
The Long-Line Tangle Tango. Long lines are wonderful for sniff walks and training… and also for tying you into decorative knots if you don’t manage slack. People often try to wrap the extra length around their hand to “clean it up,” then get rope burn when the dog accelerates. The smoother approach is to fold slack in loose loops and feed it out intentionally. Some handlers describe it like “handling climbing rope” or “fly-fishing, but the fish is your dog and it’s emotionally invested in that bush.”
The Surprise U-Turn Save. One of the most useful real-world moves is the early U-turn: you notice another dog approaching, your dog’s body stiffens, and you change direction before the leash becomes tight. This pairs beautifully with a thumb lock or finger lock because you can pivot your whole body while keeping the leash secure. Done early, it looks casuallike you simply remembered you left the oven on (even if you definitely did not).
The big takeaway from all these moments is that the “best” way to hold a dog leash isn’t a single perfect gripit’s having a default grip (thumb lock), a stronger control option (two-hand anchor), and a body-based backup plan (cross-body bracing) ready when the world gets interesting. Because it will. The world is extremely interesting to dogs.
Conclusion
Holding a dog’s leash properly is one of those small skills that pays off every single day. Use the thumb lock for comfortable, adjustable everyday walks. Switch to the finger lock with a two-hand anchor when you need extra control and smoother leash-length changes. And when your dog’s excitement threatens to turn your arm into a bungee cord, bring in the body anchor so your corenot your wristdoes the heavy lifting.
Practice these grips at home for a minute or two before your next walk. Your dog will still be your dog (joyfully chaotic at times), but you’ll be the calm, prepared human on the other end of the leash. The squirrels will hate this for you. You will love it.
![Why People Visit YouTube & How to Engage Them [New Data]](https://cashxtop.com/wp-content/uploads/2026/03/why-people-visit-youtube-how-to-engage-them-new-data-k1AnRjaq-thumb.jpg)