Table of Contents >> Show >> Hide
- Before You Start: The “Don’t Make It Worse” Rules
- Way #1: The 10-Minute Daily Reset (Spot Clean + Feed Smart)
- Way #2: The Weekly Water Change (Partial Change + Siphon Clean)
- Way #3: The Deep Clean (Tank “Spa Day” for Algae, Sludge, and Buildup)
- How to Keep a Turtle Tank Cleaner Longer (Less Work, More Turtle Vibes)
- Quick FAQ
- of Real-World Turtle Tank Cleaning Experiences (The Honest Part)
- Conclusion
Turtle tanks are basically a tiny, watery universe where your turtle eats, swims, naps, andlet’s be honestdoes
“turtle business.” That’s why even the cutest turtle can turn a tank into a swampy crime scene in record time.
The good news: you don’t need fancy gadgets or harsh chemicals to keep things clear, safe, and (mostly) not
stinky. You just need the right routine.
In this guide, you’ll get three practical cleaning methods that cover every level of mess:
(1) a quick daily reset, (2) a weekly partial water change that keeps the tank stable,
and (3) an occasional deep clean for when algae and sludge start acting like they pay rent.
Along the way, you’ll learn what to clean, what not to “over-clean,” and how to keep the tank cleaner longer.
Before You Start: The “Don’t Make It Worse” Rules
Turtle tanks are different from fish tanks because turtles are heavier eaters, messier poopers, and professional
water-splashers. So the cleaning strategy is less “sparkling showroom aquarium” and more “healthy habitat that
doesn’t smell like a forgotten gym bag.”
- Skip soap and household cleaners. Residue can irritate turtles and mess with water quality.
- Use dedicated buckets and tools. Don’t clean turtle gear in the same sink area used for food.
- Wash your hands after handling the turtle or tank items. Reptiles can carry germs even when they look healthy.
- Unplug equipment before water work. Filters, heaters, and lights should be off while you drain/refill.
- Don’t “sterilize everything” at once. A tank stays stable because beneficial bacteria help break down waste. Over-cleaning can cause water problems.
One more practical note: water is heavy. If you’re lifting buckets, ask an adult for helpyour back will thank you,
and your turtle will continue believing you’re a competent caretaker.
Way #1: The 10-Minute Daily Reset (Spot Clean + Feed Smart)
This method is your tank’s daily “wipe down the counters” routine. It won’t replace water changes,
but it dramatically slows down stink, cloudiness, and algae.
What you’ll need
- A small net or aquarium scoop
- A turkey baster (yes, the kitchen toolbuy a tank-only one)
- Paper towels or a microfiber cloth (tank-only)
- A small container for trash (leftover food, shed skin, plant bits)
Step-by-step
-
Remove leftover food within 10–15 minutes.
Uneaten pellets and protein treats break down fast and spike the “why does my tank smell?” factor.
If your turtle is a slow eater, feed smaller amounts more often. -
Spot-suck debris with the baster.
Aim for corners, under the basking dock, and anywhere poop likes to hide. Think of it as a tiny vacuum
that runs on your patience. -
Wipe the splash zone.
The rim and lid area collects dried mineral spots and gunk. A quick wipe keeps buildup from turning into
crusty tank décor you did not request. -
Check the basking dock and ramp.
If it’s slimy, rinse it with hot water (no soap) and scrub with a dedicated brush. Let it cool before returning it. -
Top off evaporation the right way.
Evaporation removes water, not waste. So topping off helps water level, but it doesn’t “remove dirty.”
If you top off, use conditioned water and try to match the tank temperature so you don’t chill your turtle.
Make your life easier: “cleaner feeding” tricks
- Use a feeding dish or station. It keeps food in one area and makes cleanup faster.
-
Try “feed in a separate tub” for super messy meals.
For example, if you give shrimp, worms, or chopped veggies that explode into crumbs, feeding in a separate container can reduce tank gunk.
Keep the water warm and shallow enough for safety, and never leave your turtle unattended. -
Don’t overfeed. Overfeeding = more waste + more ammonia + more cleaning. Your turtle will still act hungry afterward.
That’s not a medical symptom; that’s just turtle confidence.
Way #2: The Weekly Water Change (Partial Change + Siphon Clean)
If Way #1 is brushing your teeth, Way #2 is the dentist appointment you actually keep. A partial water change
removes dissolved waste, refreshes water chemistry, and helps keep ammonia/nitrite levels from creeping up.
It also lets you clean without fully “resetting” the tank.
What you’ll need
- Gravel vacuum/siphon (or a hose system designed for aquariums)
- Bucket(s) used only for the turtle tank
- Water conditioner/dechlorinator (follow label directions)
- Thermometer (to match refill temperature)
- A soft brush or algae pad for quick scrubs
- Optional: water test kit (ammonia, nitrite, nitrate)
How much water should you change?
Many setups do well with 25–50% weekly, but the “right” amount depends on tank size, filtration,
how messy your turtle is, and how often you remove leftovers. A big tank with a strong filter stays stable longer.
A smaller tank gets gross faster. (Turtles do not care about your schedule.)
Step-by-step
-
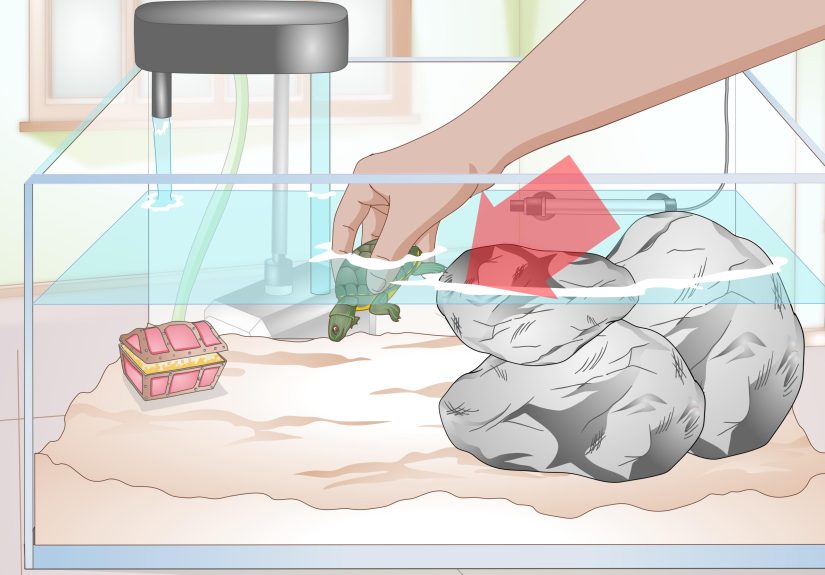
Make a safe temporary spot for your turtle.
Use a large plastic bin or tub with a secure lid (air holes), a little room-temperature water,
and a dry spot to rest. Keep the turtle warm and out of drafts. This is the “turtle hotel.” -
Unplug equipment.
Turn off the filter and heater before draining. If you have a glass heater, let it cool for 10–15 minutes
so it doesn’t crack when the water level drops. -
Siphon out 25–50% of the water.
As you siphon, hover the gravel vacuum just above the bottom to pull up settled debris.
Focus on corners and under the basking area where waste collects. -
Quick-clean the “hot spots.”
Use an algae pad to wipe the glass where you see film. If the ramp/dock is slimy, scrub it with hot water and a brush. -
Rinse filter sponges/media gently (only if needed).
If the filter flow slowed down, swish sponges in a bucket of the old tank water you removed.
This helps remove gunk while being kinder to beneficial bacteria than straight tap water.
Don’t make it spotlessjust unclogged. -
Refill with conditioned, temperature-matched water.
Treat tap water with a conditioner that removes chlorine/chloramine. Match the temperature to the tank
so you don’t stress your turtle with a surprise cold plunge. -
Restart everything and observe.
Plug the heater and filter back in. Check that the filter is running normally and the water is circulating.
Return your turtle once temperatures and water level are stable.
A realistic example schedule
Let’s say you have one medium red-eared slider in a 75-gallon tank with an oversized canister filter.
A common routine might look like:
- Daily: remove leftovers, baster-suck debris, wipe splash zone
- Weekly: 30–40% water change + quick siphon + rinse pre-filter sponge
- Monthly-ish: deeper siphon into corners + scrub dock/ramp thoroughly
If the water smells strong, looks cloudy quickly, or tests show rising ammonia/nitrite,
increase the water change amount or frequencyand double-check your filter capacity.
Way #3: The Deep Clean (Tank “Spa Day” for Algae, Sludge, and Buildup)
Deep cleans are for the moments when your tank develops a stubborn biofilm, algae is hosting a takeover,
or the substrate is holding onto so much gunk that siphoning feels like a joke. The goal is not to “sterilize
the universe.” The goal is to remove built-up grime while keeping the habitat safe and stable afterward.
When to deep clean
- You can’t control odor with weekly water changes
- Algae film returns within a day or two
- Substrate is trapping waste and stays dirty-looking
- You’re upgrading tanks or rearranging the habitat
- Your filter is constantly clogging despite regular rinsing
What you’ll need
- Extra buckets/tubs (tank-only)
- Algae scraper or pad
- Dedicated scrub brush
- White vinegar (for mineral deposits) and/or baking soda paste (for stubborn spots)
- Water conditioner + thermometer
- Optional: replacement mechanical media (like filter floss), if yours is falling apart
Step-by-step deep clean (without panic-cleaning the entire ecosystem)
-
Move your turtle to the turtle hotel.
Keep it warm and secure. -
Save some tank water.
Set aside 25–50% of the old tank water in clean buckets. This can help keep the transition smoother
when you refill (especially if your tank is established). -
Drain the tank and remove décor.
Take out the dock, rocks, driftwood, plants, and any tank furniture. -
Scrub décor with hot water.
Use a dedicated brush. For stubborn mineral crust (white, chalky buildup), soak items in a vinegar-and-water mix,
then rinse extremely well. Let items air-dry fully if you can. -
Clean the glass (no soap).
Use an algae pad or scraper for film. If you see mineral streaks, vinegar can help dissolve them.
Rinse the tank well afterward. -
Deal with the substrate.
If you use gravel or stones: rinse in buckets until the water runs much clearer.
If it never truly cleans up, consider replacing itor switching to a bare-bottom tank for easier maintenance.
(Bare-bottom is not “lazy.” It’s “strategically efficient.”) -
Filter cleaning: do the “staged” approach.
Rinse sponges/media in old tank water. Replace only what’s truly worn out.
If you have biological media (like ceramic rings), don’t replace it all at once unless the manufacturer instructs it
and you’re prepared to re-stabilize the system. -
Refill smart.
Add your saved water back in, then top off with conditioned, temperature-matched water.
Restart the filter and heater. Let things circulate and warm up before returning the turtle. -
Monitor for the next 24–72 hours.
Watch clarity and smell. If you use a water test kit, keep an eye on ammonia and nitrite.
If anything spikes, do an additional partial water change.
Deep-clean mistakes to avoid
- Don’t use scented cleaners or “antibacterial” sprays. The residue can harm your turtle.
- Don’t clean everything to squeaky perfection at once. A completely “reset” tank can get unstable fast.
- Don’t blast filter media under hot tap water. Heat and chlorine can reduce the helpful bacteria that keeps waste under control.
- Don’t pour dirty tank water into places used for food prep. Dispose carefully, and sanitize afterward.
How to Keep a Turtle Tank Cleaner Longer (Less Work, More Turtle Vibes)
1) Oversize your filtration
Turtles produce more waste than fish of the same size, so many keepers choose a filter rated for
more than the tank’s actual gallons. Strong filtration won’t replace water changes,
but it can seriously reduce how fast things get gross.
2) Add a pre-filter sponge
A pre-filter sponge on the intake can catch big debris before it clogs the main filter. It’s easy to rinse weekly,
which keeps the filter flowing longer and turns “filter maintenance” into a quick task instead of an afternoon.
3) Control the mess at the source: leftovers
The fastest way to dirty water is food rotting on the bottom. Remove leftovers promptly, especially protein treats.
If your turtle is a confetti-eater, use a feeding dish or a separate feeding tub for the messiest meals.
4) Test your water occasionally
Clear water can still be “chemically dirty.” Testing ammonia, nitrite, and nitrate gives you a reality check.
In many healthy setups, ammonia and nitrite should stay at or near zero, while nitrate rises slowly and gets
reduced through water changes.
5) Keep temperatures steady during cleanings
Sudden temperature swings are stressful. Matching refill water temperature and keeping the turtle warm in its
temporary bin helps your cleaning day stay boringin the best way.
Quick FAQ
How often should I clean a turtle tank?
Most tanks benefit from daily spot cleaning, weekly partial water changes, and occasional deep cleans.
The exact schedule depends on turtle size, tank size, and filtration. If it smells strong or clouds quickly,
increase water change frequency.
Do I really need to dechlorinate the water?
Many households treat tap water with chlorine or chloramine, which can irritate animals and disrupt the tank’s
helpful bacteria. Using a conditioner made for reptile/aquatic setups is a simple safety step.
Always follow the product label.
Why is my tank cloudy after cleaning?
Cloudiness can come from stirred-up substrate, a filter that needs rinsing, or a tank that’s still stabilizing.
Give the filter time to catch particles, avoid overfeeding, and do smaller, consistent water changes rather than
huge, infrequent ones.
What’s the safest “cleaner” for tank buildup?
For mineral deposits and some grime on hard surfaces, diluted white vinegar and a dedicated scrub brush can work well,
followed by thorough rinsing. Avoid soap and scented household cleaners.
of Real-World Turtle Tank Cleaning Experiences (The Honest Part)
If you’ve never cleaned a turtle tank before, here’s the part nobody puts on the “cute turtle” poster: turtles are
tiny dinosaurs with excellent vibes and zero concern for your interior design. The first time many people do a water
change, they expect something gentlelike a spa day. What they get is a workout, a chemistry lesson, and a new respect
for how fast a tank can smell “earthy.”
One classic experience is the “bucket realization.” You start siphoning, feeling proud, and then you lift the bucket
and discover it weighs approximately the same as a small planet. Suddenly, you understand why long hoses and sink
attachments were invented. Another universal moment: the mysterious sludge zone. You thought your tank bottom was
just “a little dirty,” but the siphon reveals a hidden layer of gunk that looks like it’s been saving up for months.
That’s when you learn the magic of targeting corners and the area under the basking dockbecause turtles treat those
spots like the unofficial landfill.
Then there’s filter maintenancethe oddly satisfying, mildly horrifying part. You open the filter and find the sponge
doing its job a little too well. The rinse water turns a dramatic color that can only be described as “regret latte.”
It’s also the moment you learn the difference between “clean enough to flow” and “so clean you accidentally reset your
tank.” A gentle swish in old tank water often feels like the sweet spot: you clear the clog without turning your filter
media into a sterile museum exhibit.
Algae brings its own storyline. Some days you wipe the glass and it looks greatuntil the next afternoon when the film
returns like a sequel nobody asked for. That’s usually the point people start adjusting lighting duration, scrubbing
the basking ramp more often, and getting serious about leftover food. It’s also where expectations get healthier:
you’re not trying to create a tank that never grows algae. You’re trying to keep algae from winning.
And finally, there’s the turtle itselfoften watching the whole process like a manager observing a project it didn’t fund.
Many turtles react to a cleaner tank by swimming laps like they just got upgraded to first class. Others act suspicious,
like you moved their furniture two inches to the left and now nothing feels right. Either way, once you settle into a rhythm
(daily spot clean, weekly water change, occasional deep clean), the whole system becomes easier. The water stays clearer longer,
the tank smells less, and cleaning day stops feeling like a surprise event and starts feeling like basic maintenancelike taking
out the trash, except the trash occasionally tries to climb your arm.
Conclusion
Cleaning a turtle tank isn’t about making it look perfectit’s about keeping the habitat healthy, stable, and comfortable
for your turtle (and your nose). Use the daily reset to stay ahead of leftovers and debris, rely on weekly partial water
changes to control waste and water chemistry, and save deep cleans for when buildup becomes stubborn. Do it consistently,
keep temperatures steady, and avoid harsh cleaners, and you’ll spend less time scrubbing and more time enjoying your tiny
aquatic roommate living its best life.